Aaron is always telling me I need to rank my favorite hikes by difficulty level and then a few weeks ago Jessica over at HungryGems asked me to do the same thing. I have been thinking about it a lot these past weeks and decided they are both right.
Here is my top 5 easy hikes that I have done so far:
5. Fountain Valley Trail: It is the shortest trail in Roxborough State Park and takes you around the feet of the beautiful red rocks in this park. It has almost no elevation gain but striking views.
4. Waterton Canyon: This trail is a road used by Denver water but open to the public for hiking and biking because the Canyon is lovely. You can also challenge yourself by determining how far you want to hike from 1 to 12.6 miles. Plus there is always a good chance you can catch some long horn sheep in the Canyon.
3. South Rim Trail: This trail is a short 3 mile hike with a nice initial climb and then the views of Roxborough State Park take over everything. It shows off the beauty of the park in a way none of the other trails do. Plus you get the whole Front Range and Denver to ooohhhh and ahhh at.
2. Rawhide Trail – White Ranch Park: This trail has it all, beautiful views of Denver & Golden, a great forest trek and then on the West side the cascading mountains of Golden.
1. Spruce Mountain: This is my favorite Easy hike we have done so far. It is easy to get to, it has expansive views of the entire front range from Pikes peak to Longs Peak. There is an initial short climb and then the trail weaves along ridge beautifully set up like an outdoor museum where you step off the trail to viewing like areas. I like to use it as a good way to get visitors who will be hiking during their visit to give them a taste of Colorado’s beauty. Plus it helps to get them active at altitude so going higher will be easier.
Highest Elevation: 10,708Ft is the highest we made it but the highest part of the hike is supposed to be 10,740 ft
Trail Length: The full length of the trail round trip is a 13 miles to Hall Valley Trailhead we made it just under 8 miles round trip almost to the ridge top which was supposed to be 7.4 miles round trip, we didn’t make it to the Ridge line. It took us 5 hours.
Bathrooms: Not near this trailhead but we passed a few outhouses on the Road up….they looked scary going outside would be better.
Pets: Yes on leash
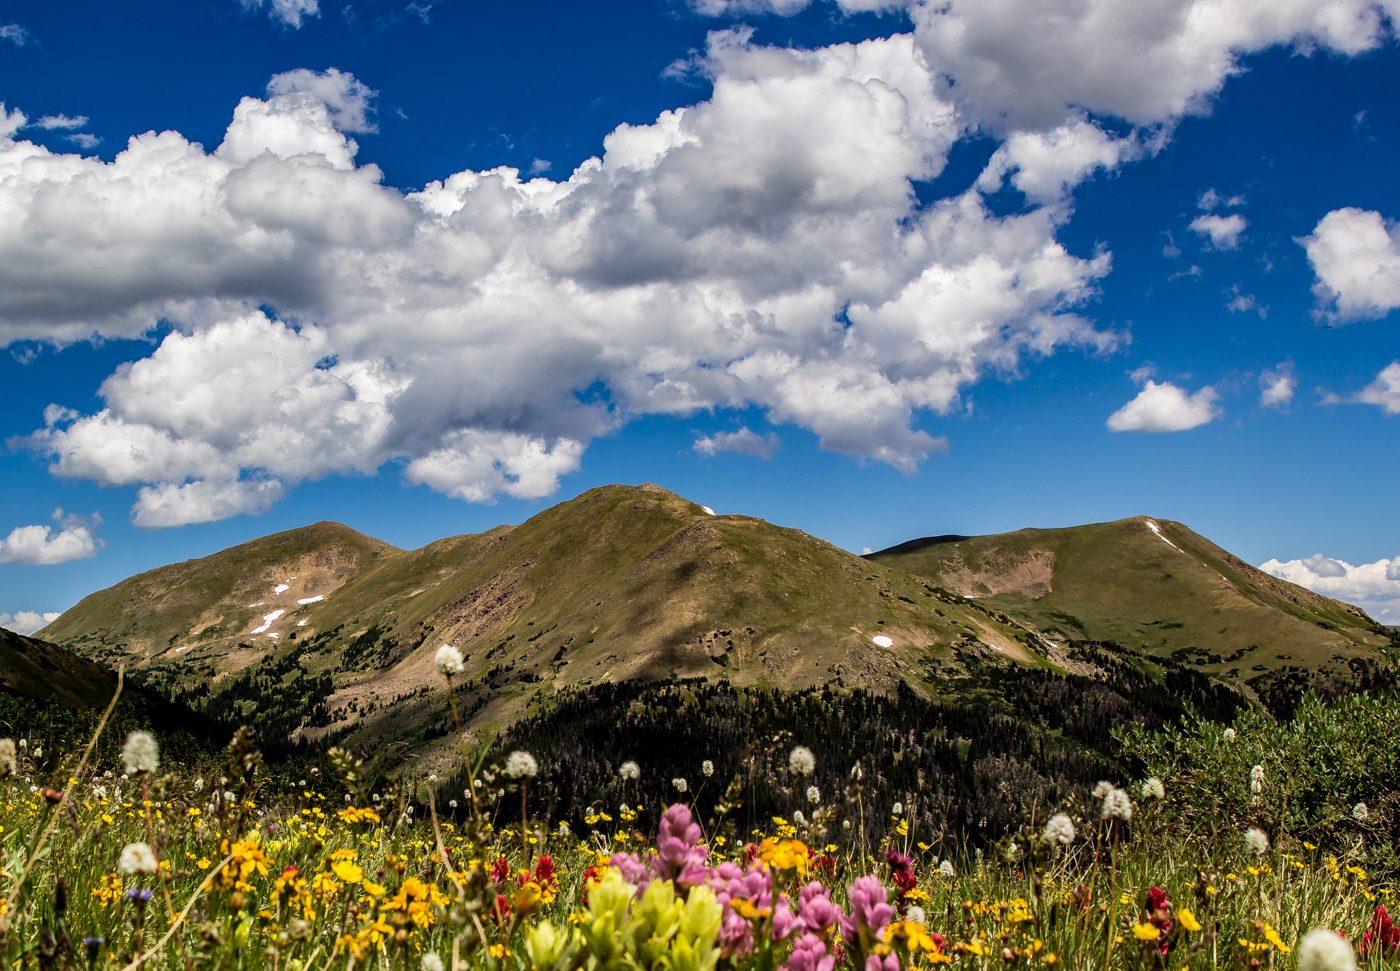
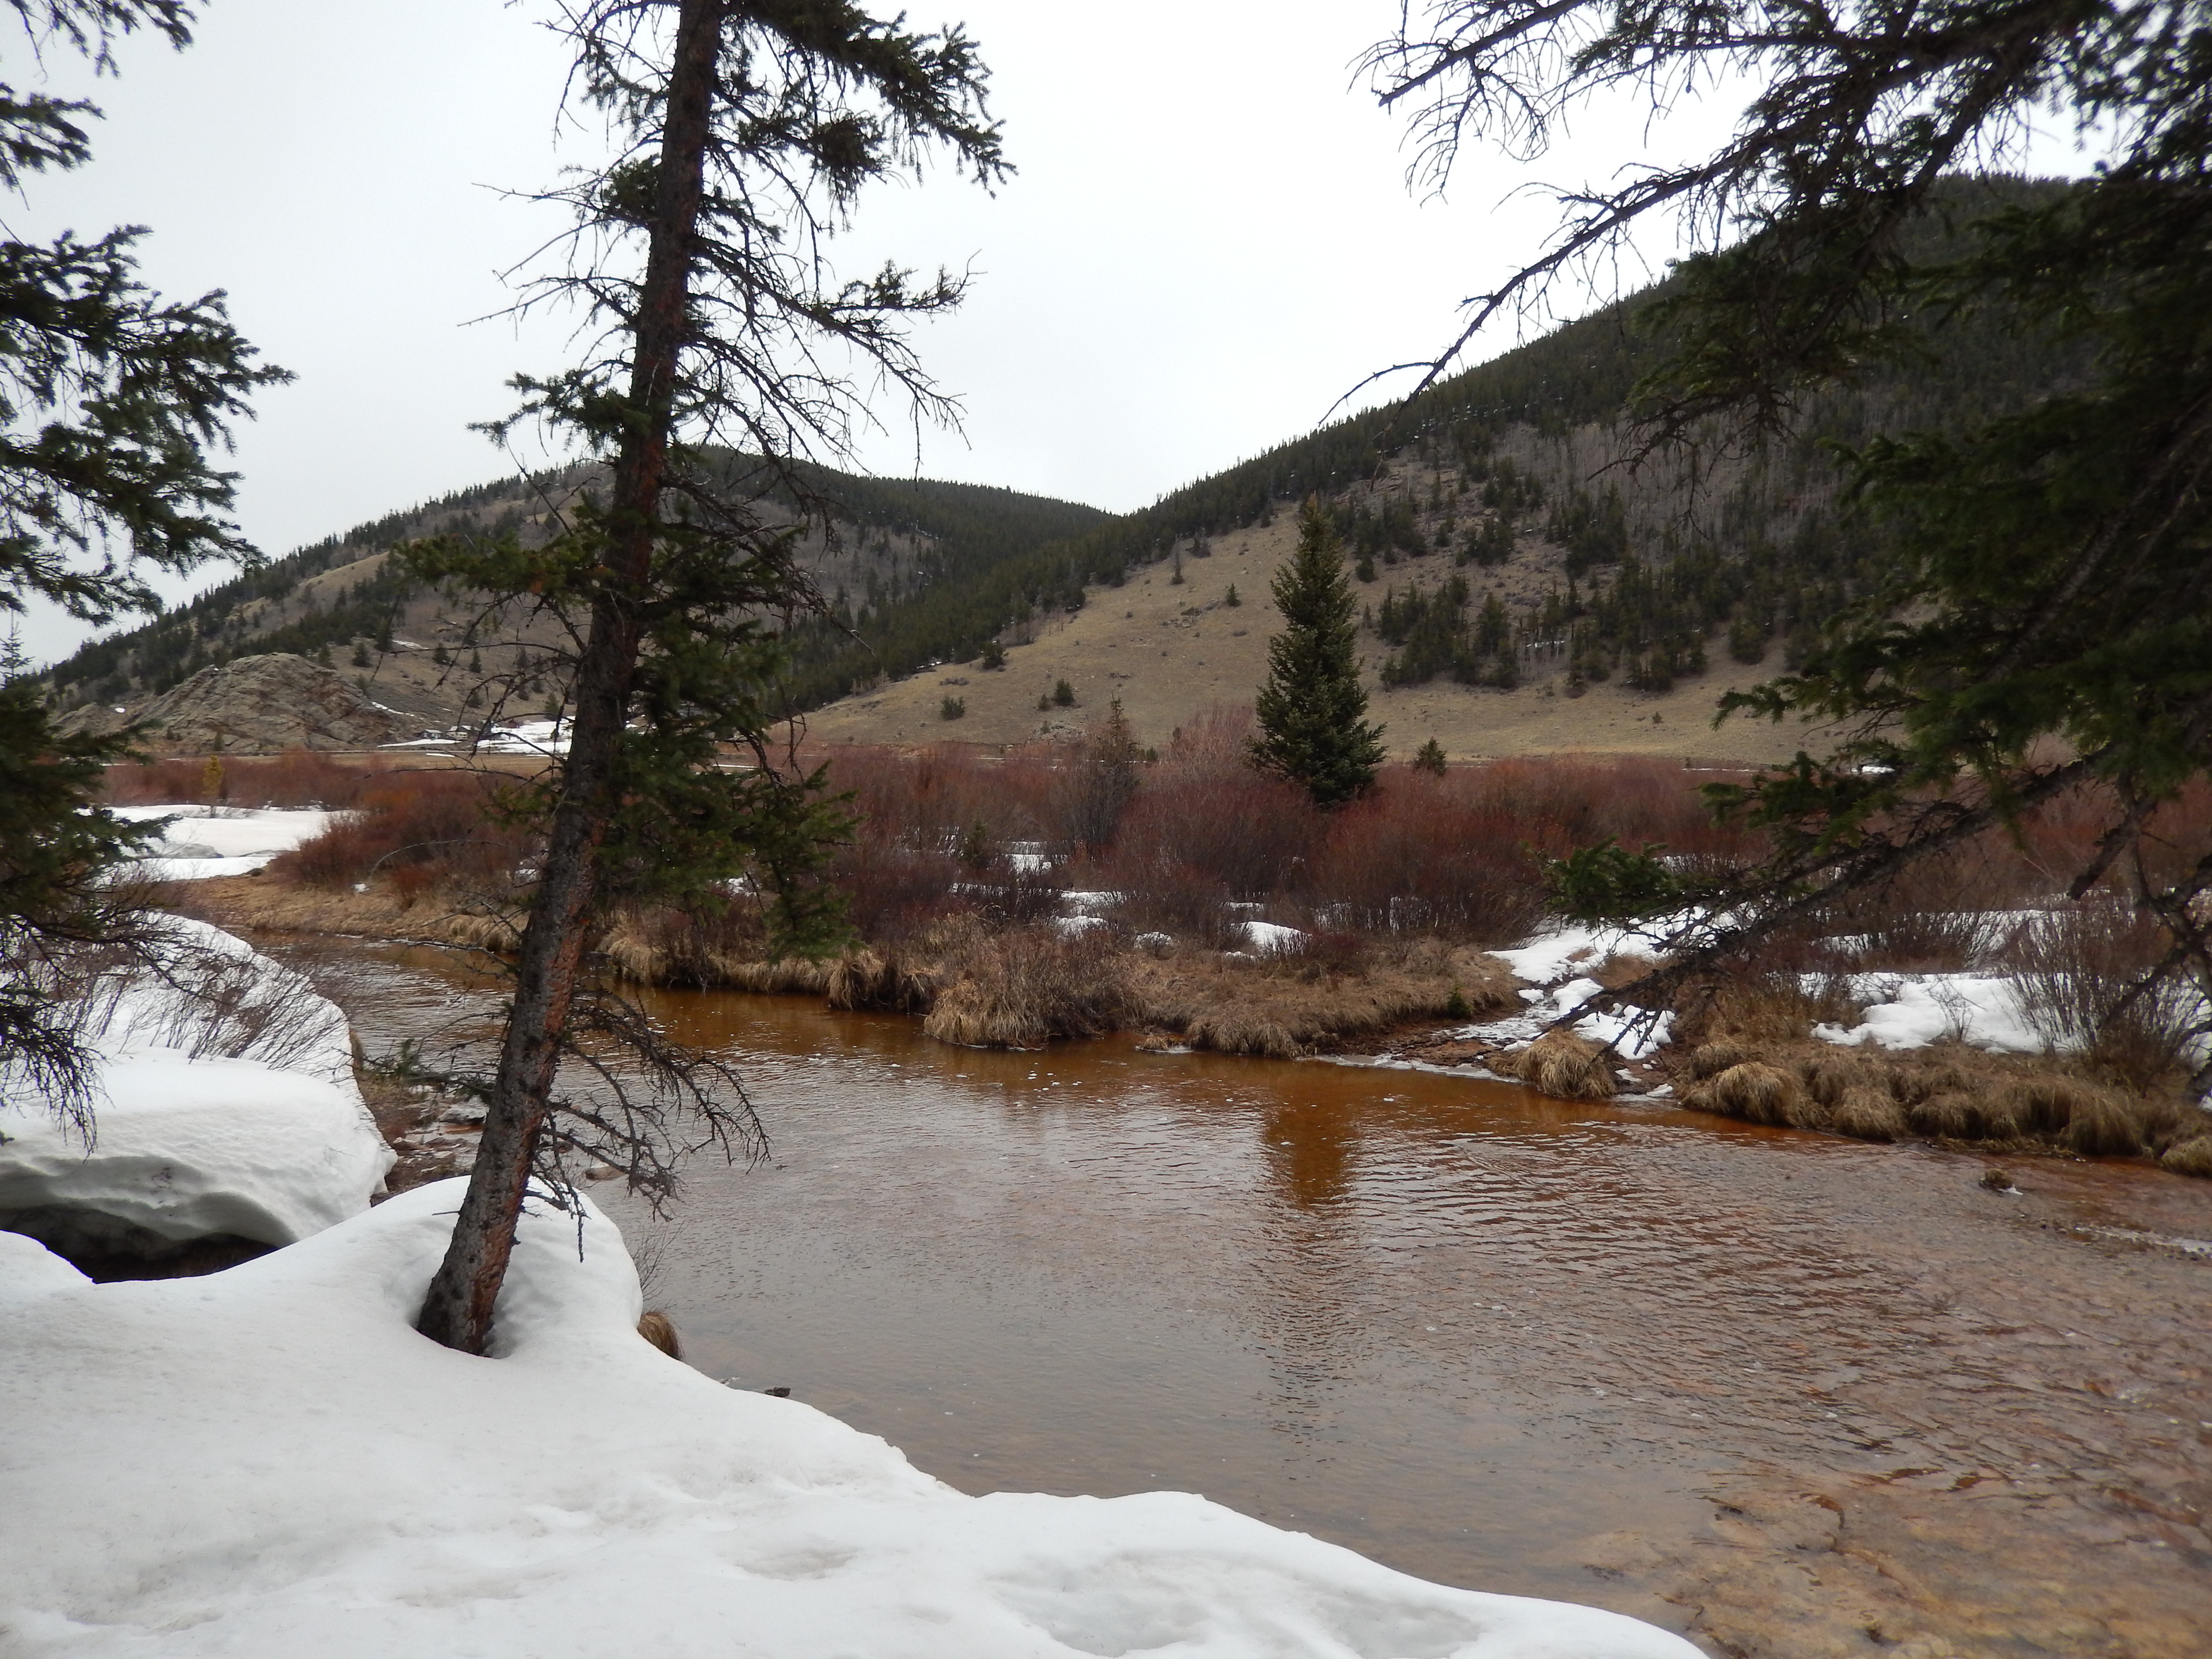
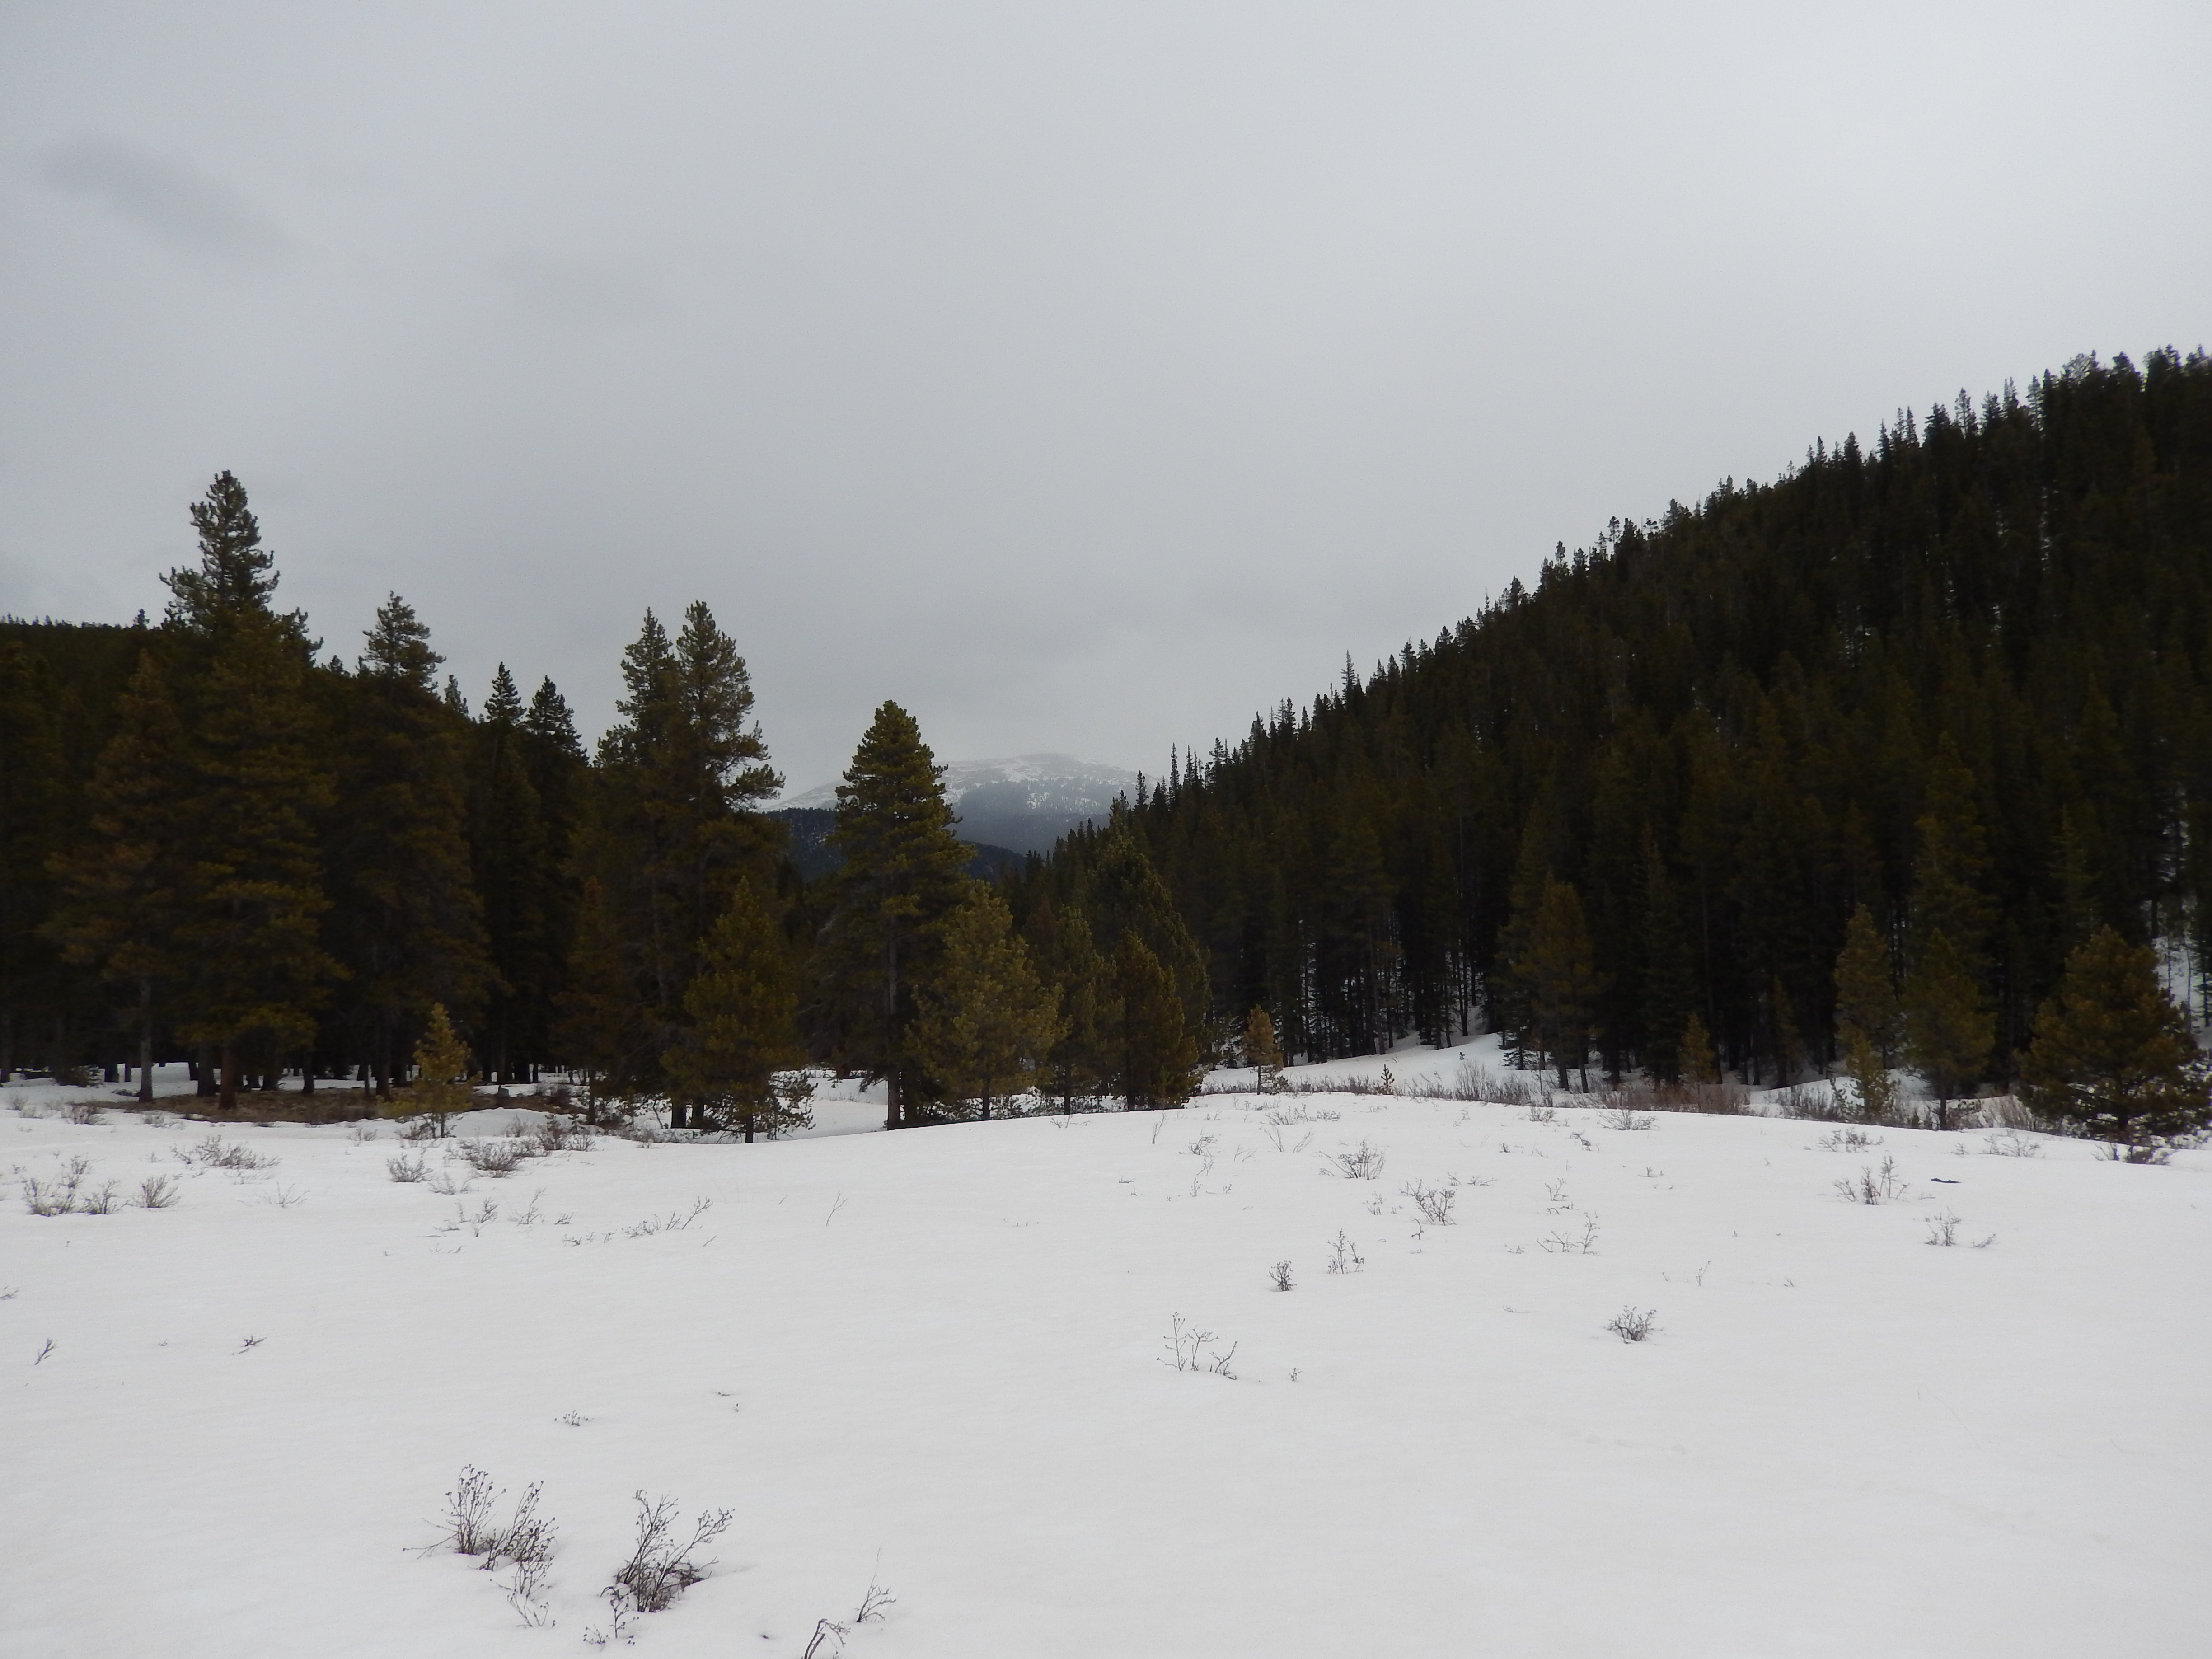
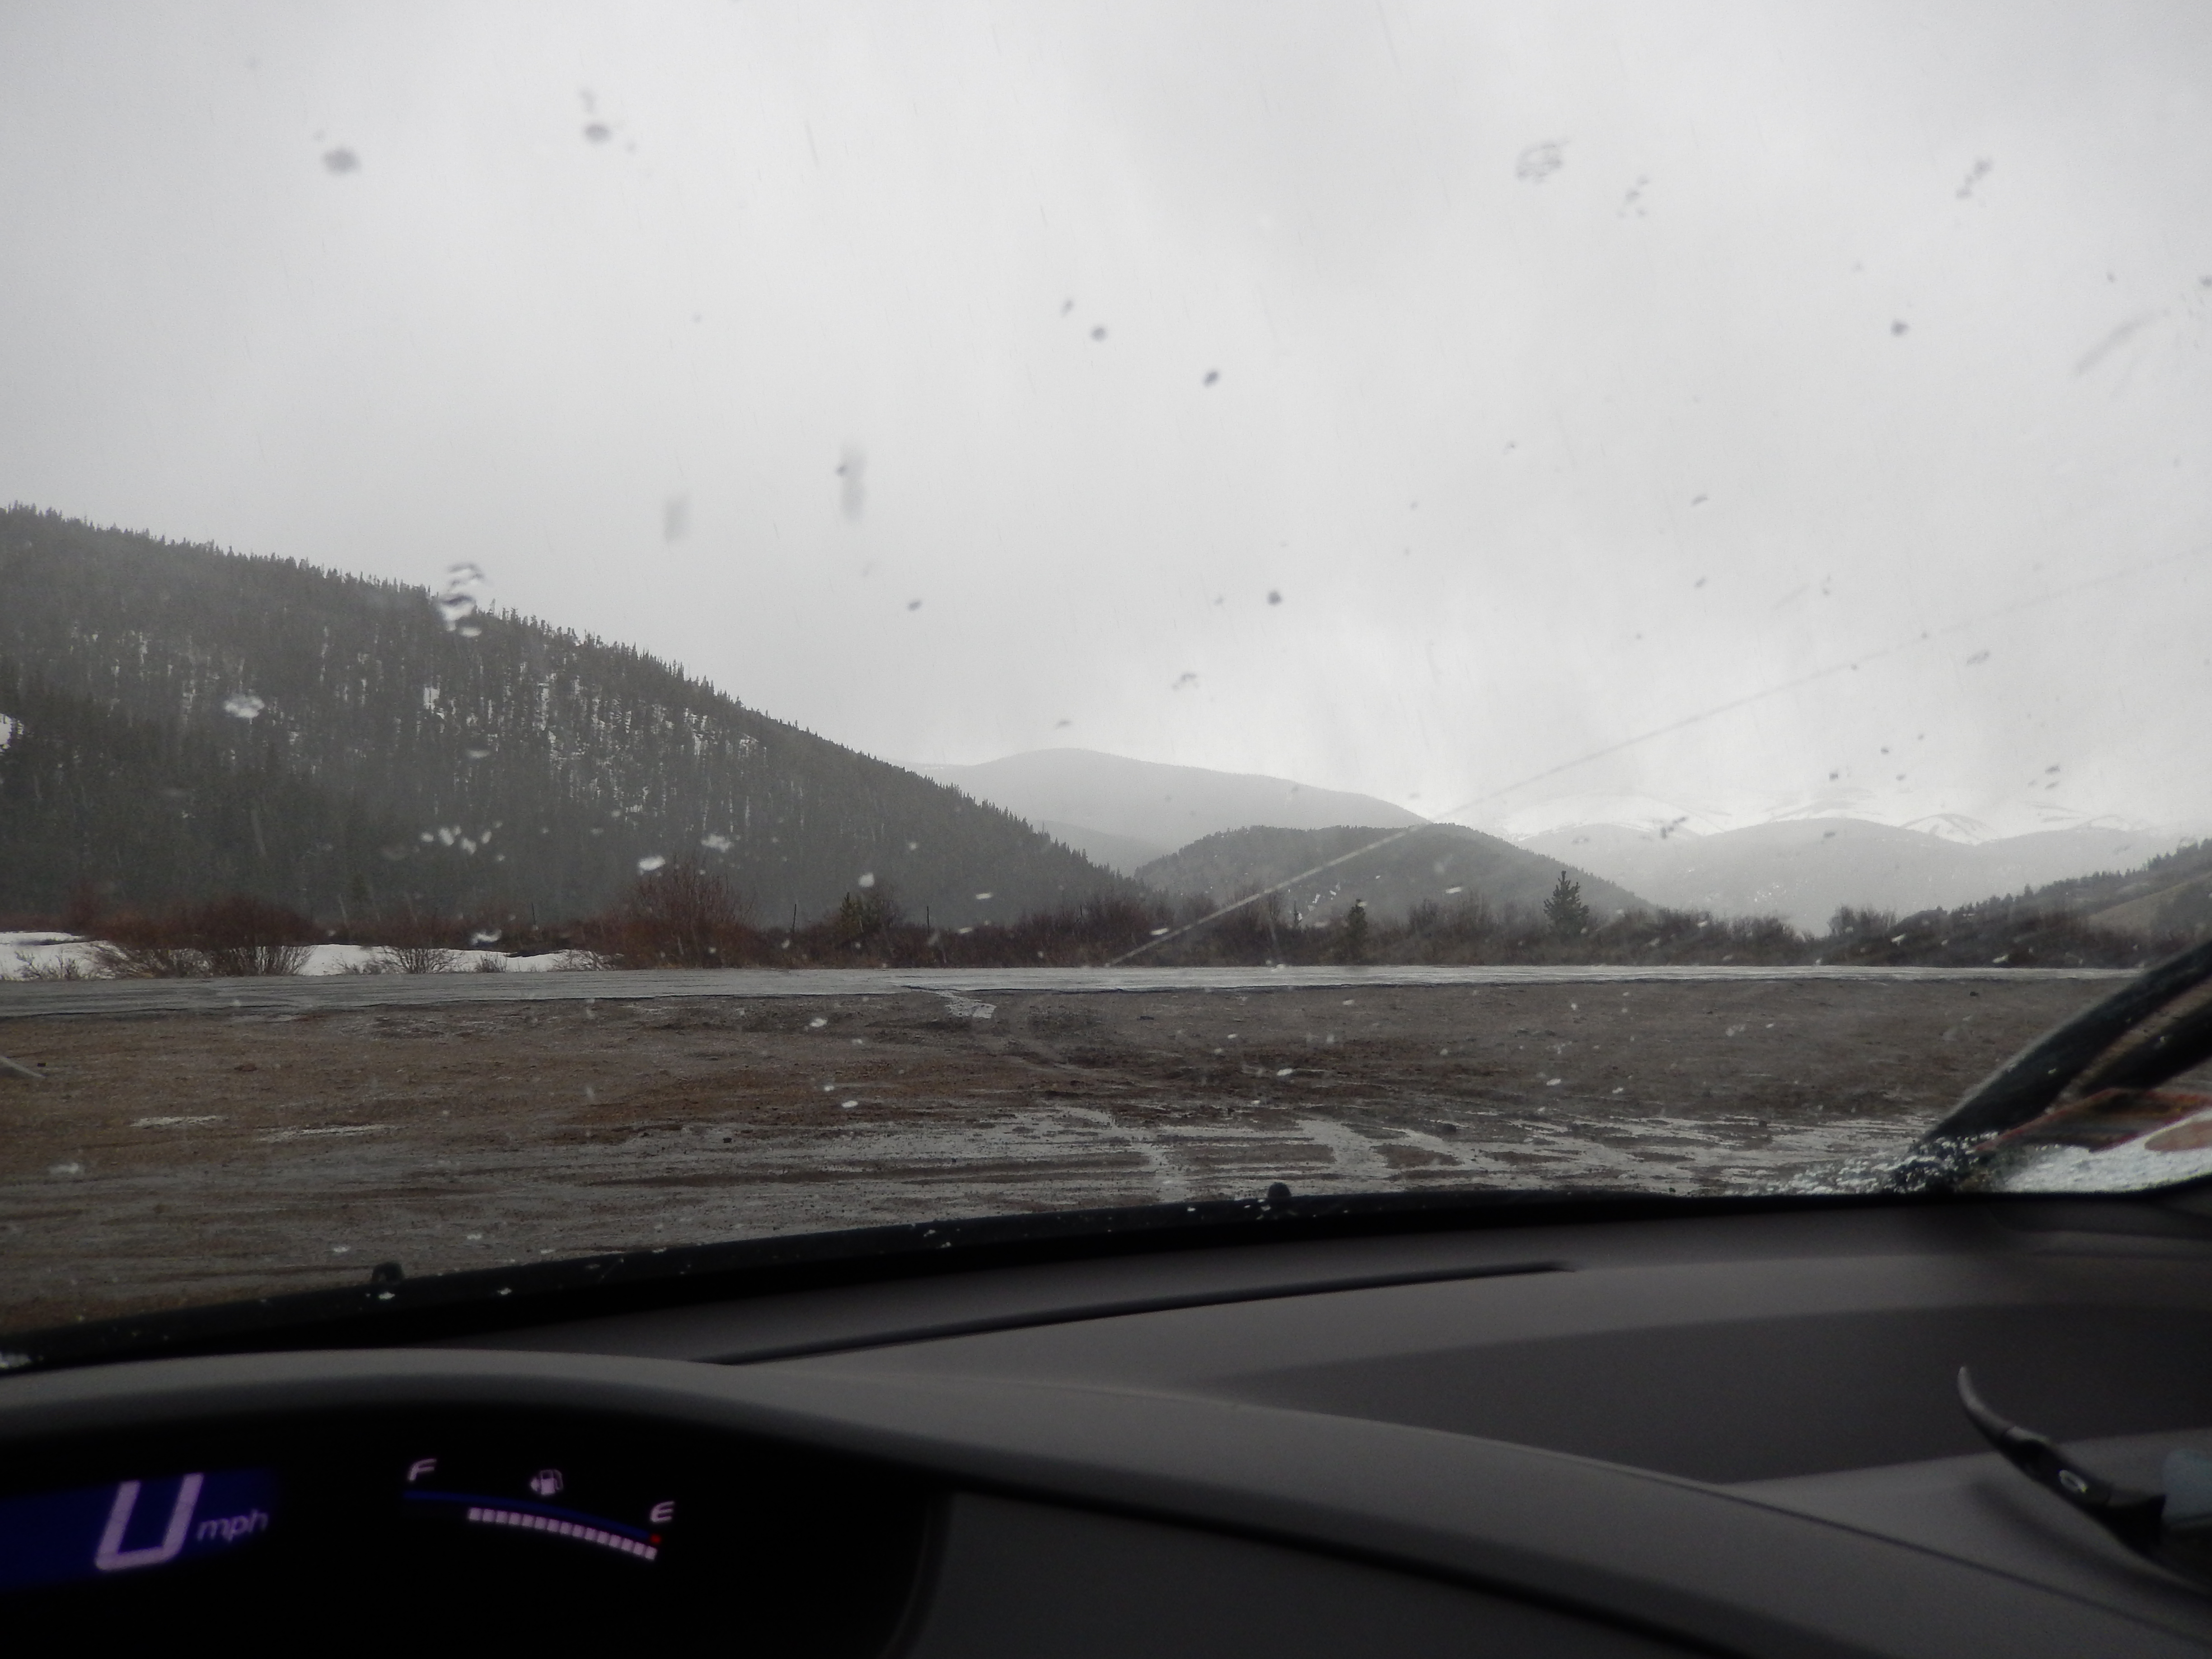
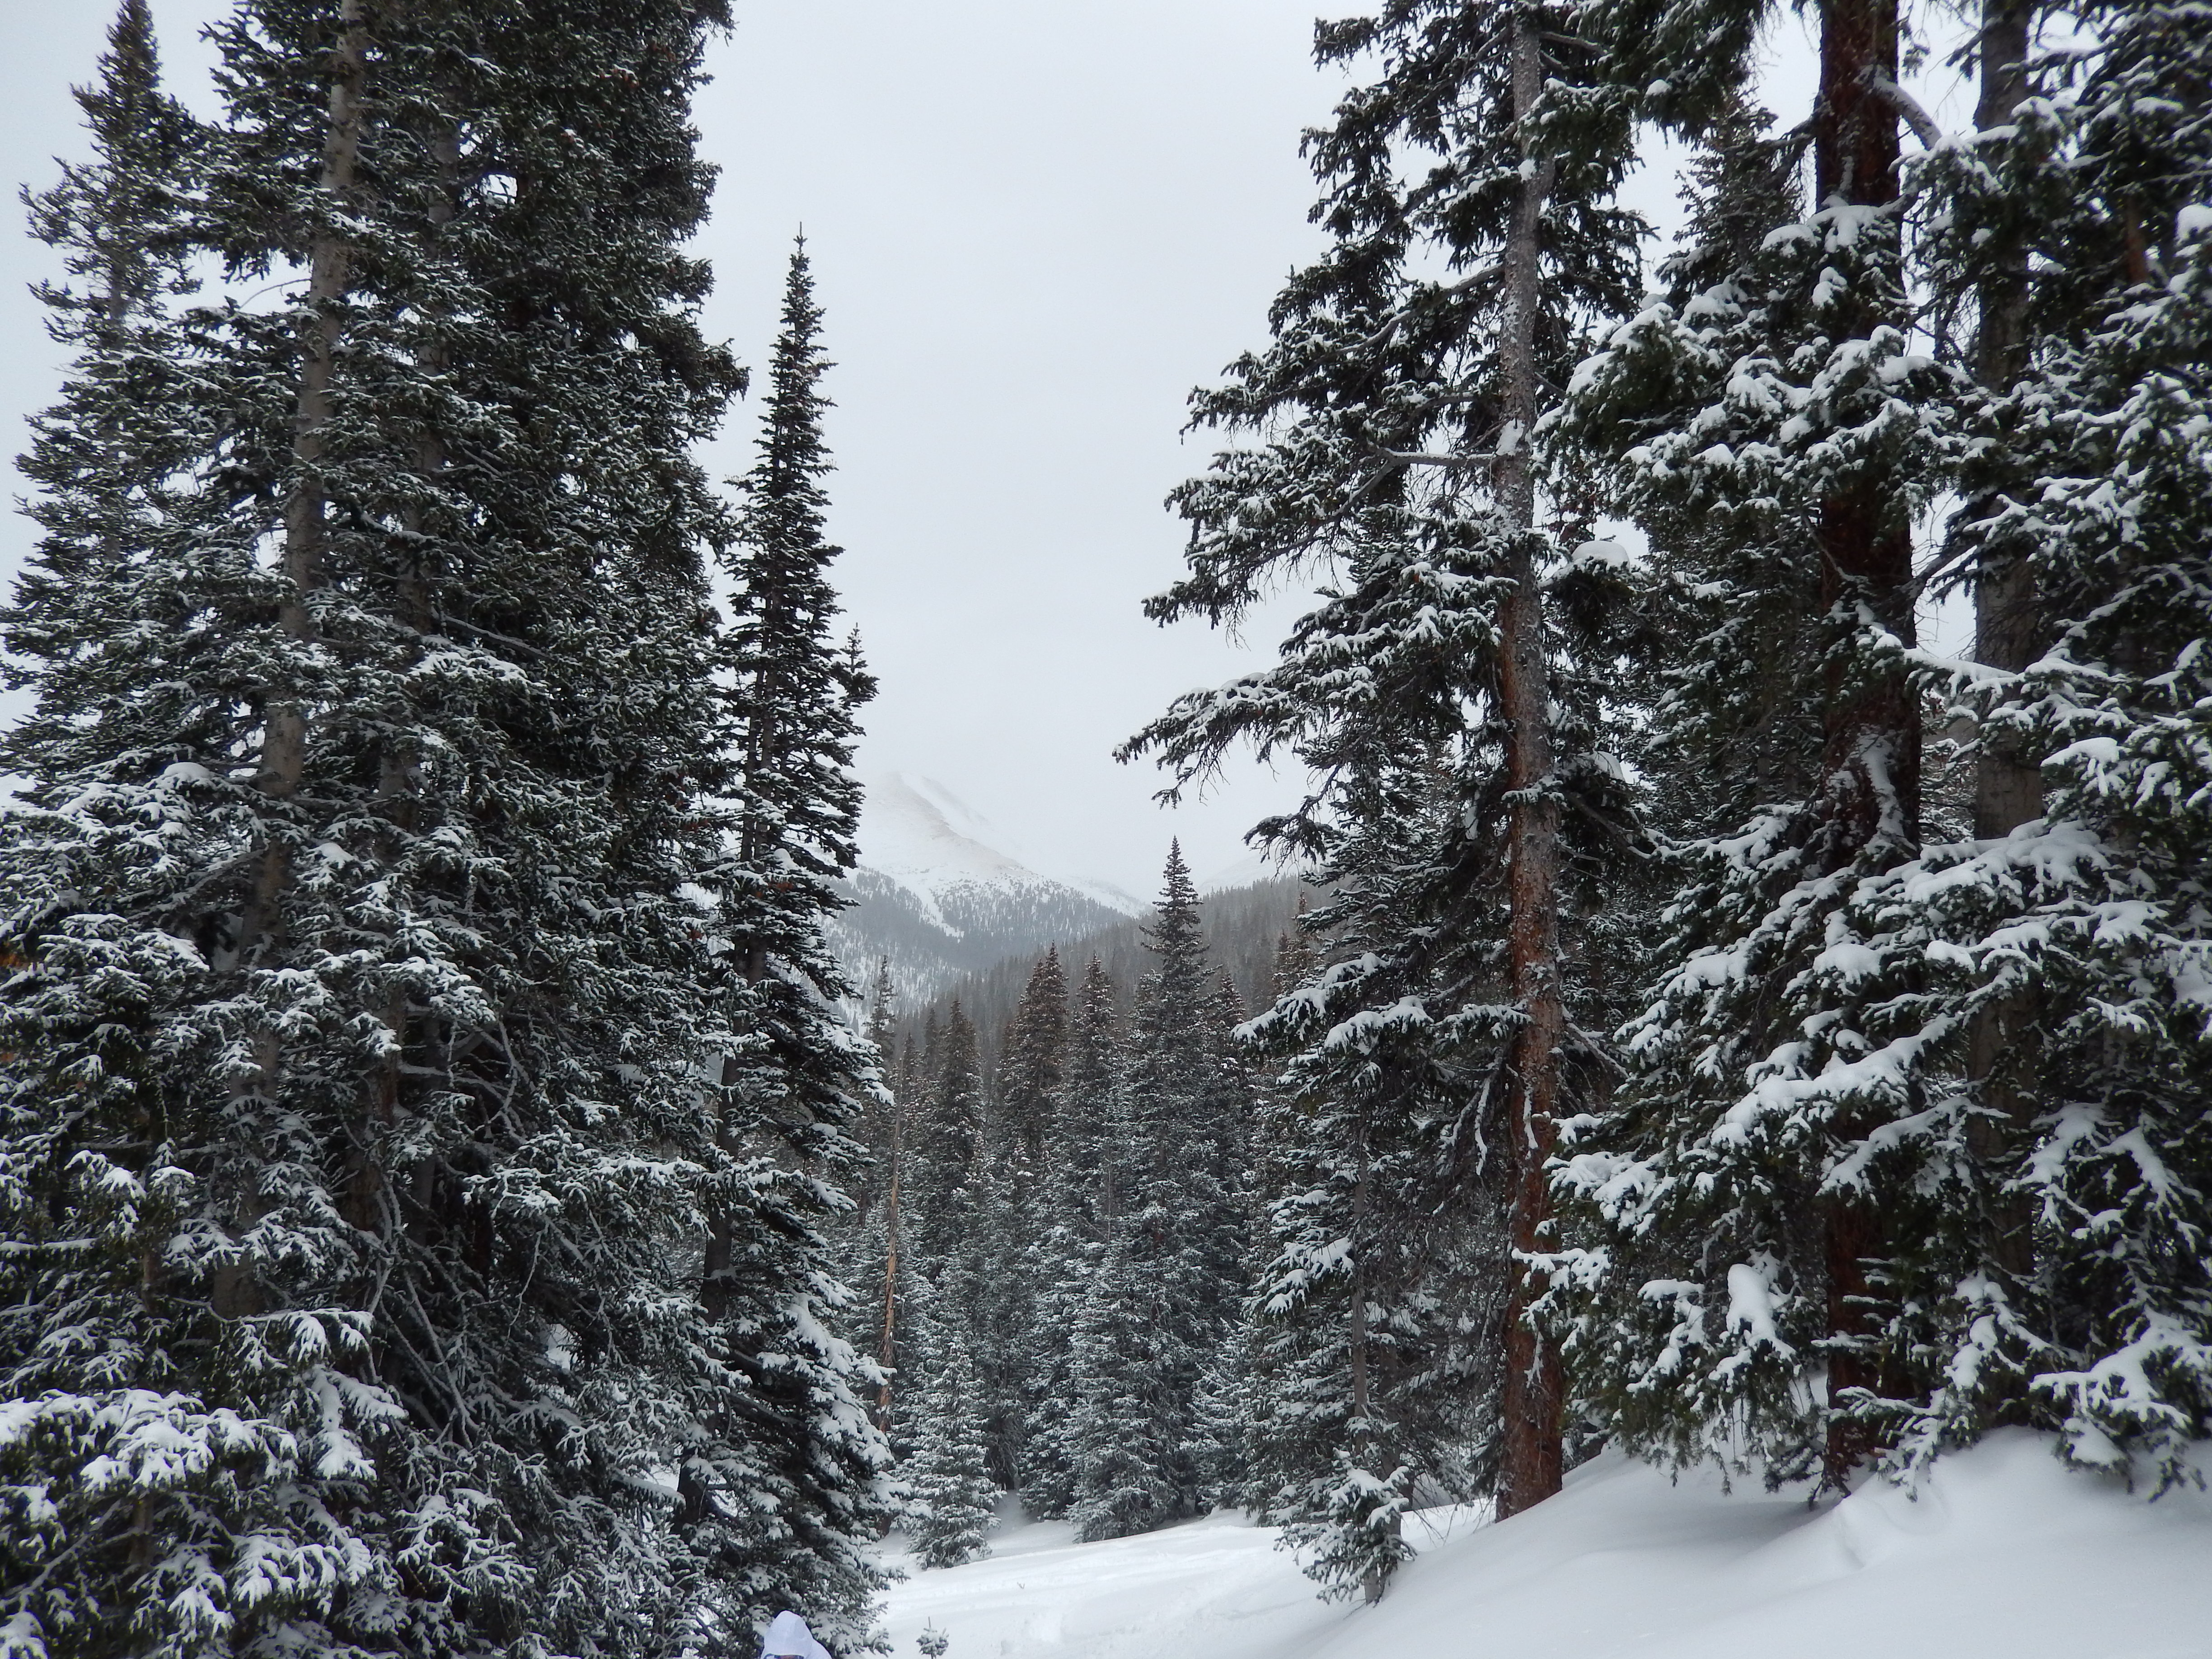
Beginning views
Last Fall I found this random website that gave a whole bunch of trail names with no information on where, length, difficulty or elevation. I wrote down a couple of pages of them, found a few details and last week was the first time I actually studied them. I wanted something that got us over 10,000Ft and in studying them I found this particular trail. It looked perfect for our goals, lots of mileage, possible 2000-ish feet total elevation gain, getting above 10k and possible awesome views. The other great thing about the trail is every report I found, and there weren’t many of them, said there was low to no traffic. The only thing I wasn’t sure of was if we would need snowshoes or not… the week had been really warm and sunny so I figured if we needed them, it would only be to get over the ridge to get to that last 1.5 miles to the turnaround point. When the news was reporting from Vail on Friday, there was no snow at the lower elevations which was about where we would be starting so I figured if we carried the snowshoes it would at least help me with my strength building for backpacking.
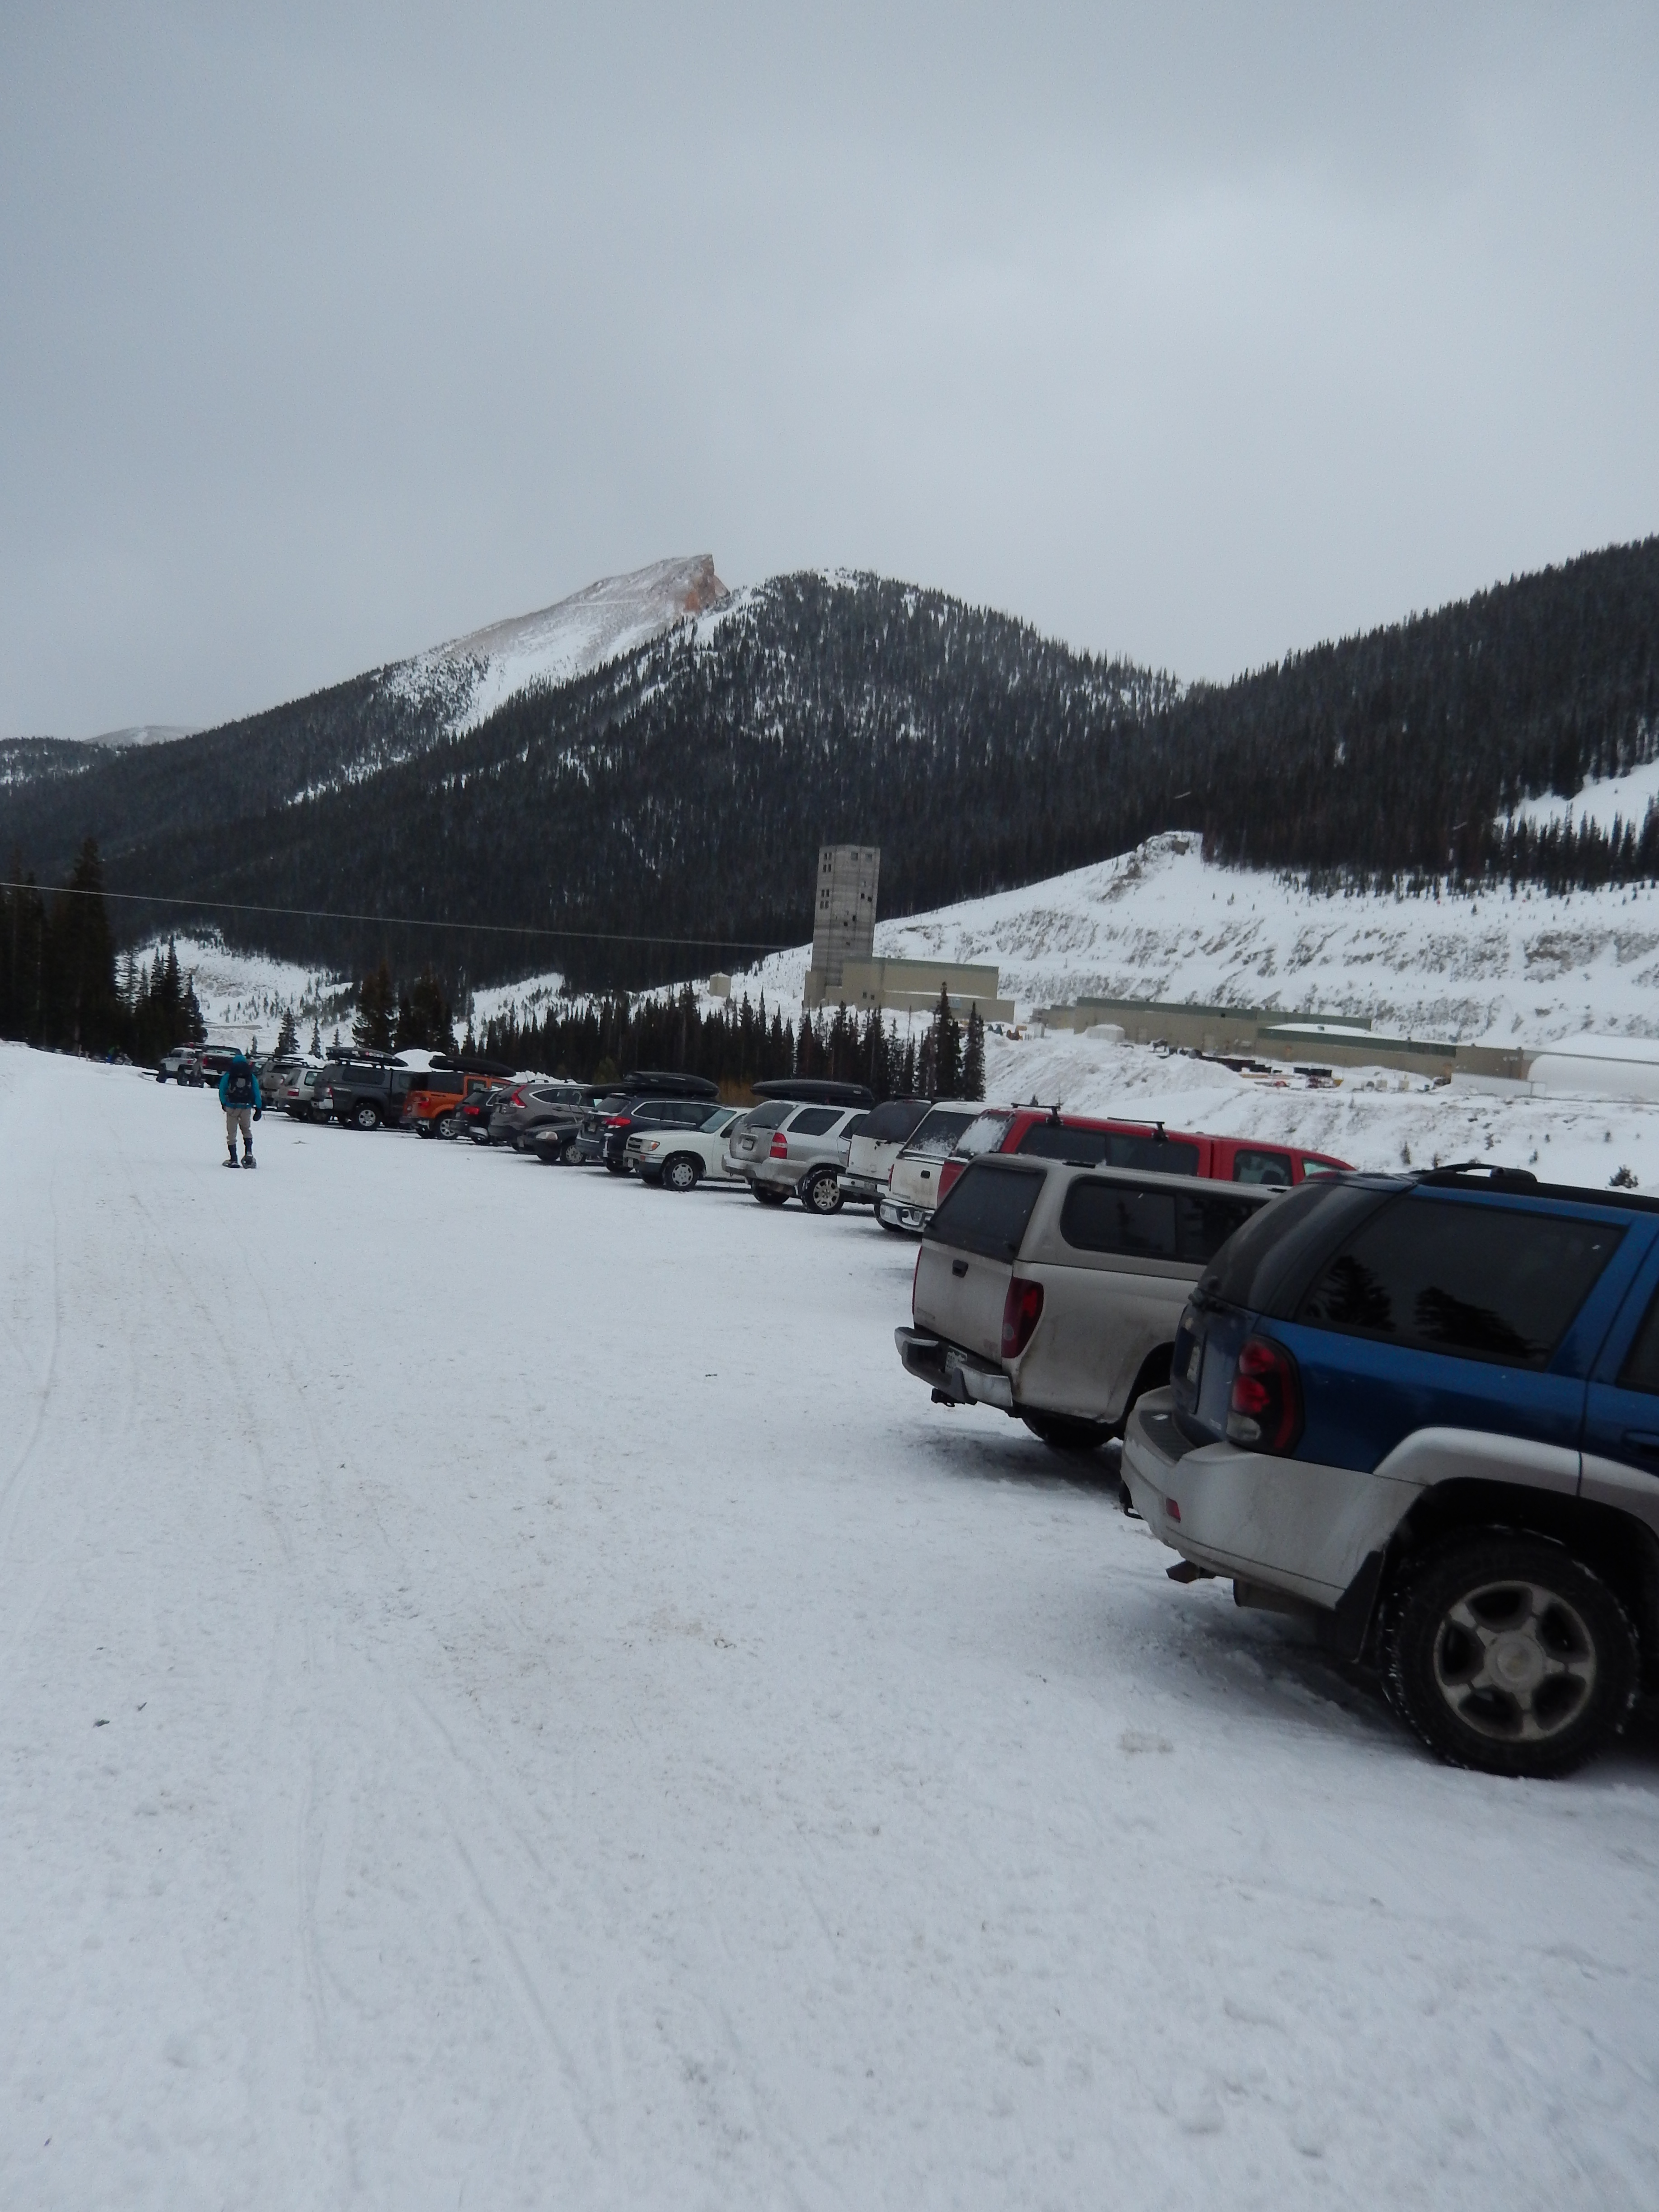
Saturday we got up early and started our almost 2 hour drive to the trailhead, the weather called for possible light rain in the AM, with thunderstorms starting around 2PM so I wanted to make sure we had enough time to finish before those possible thunderstorms started. You have to park .2 miles past the trailhead.
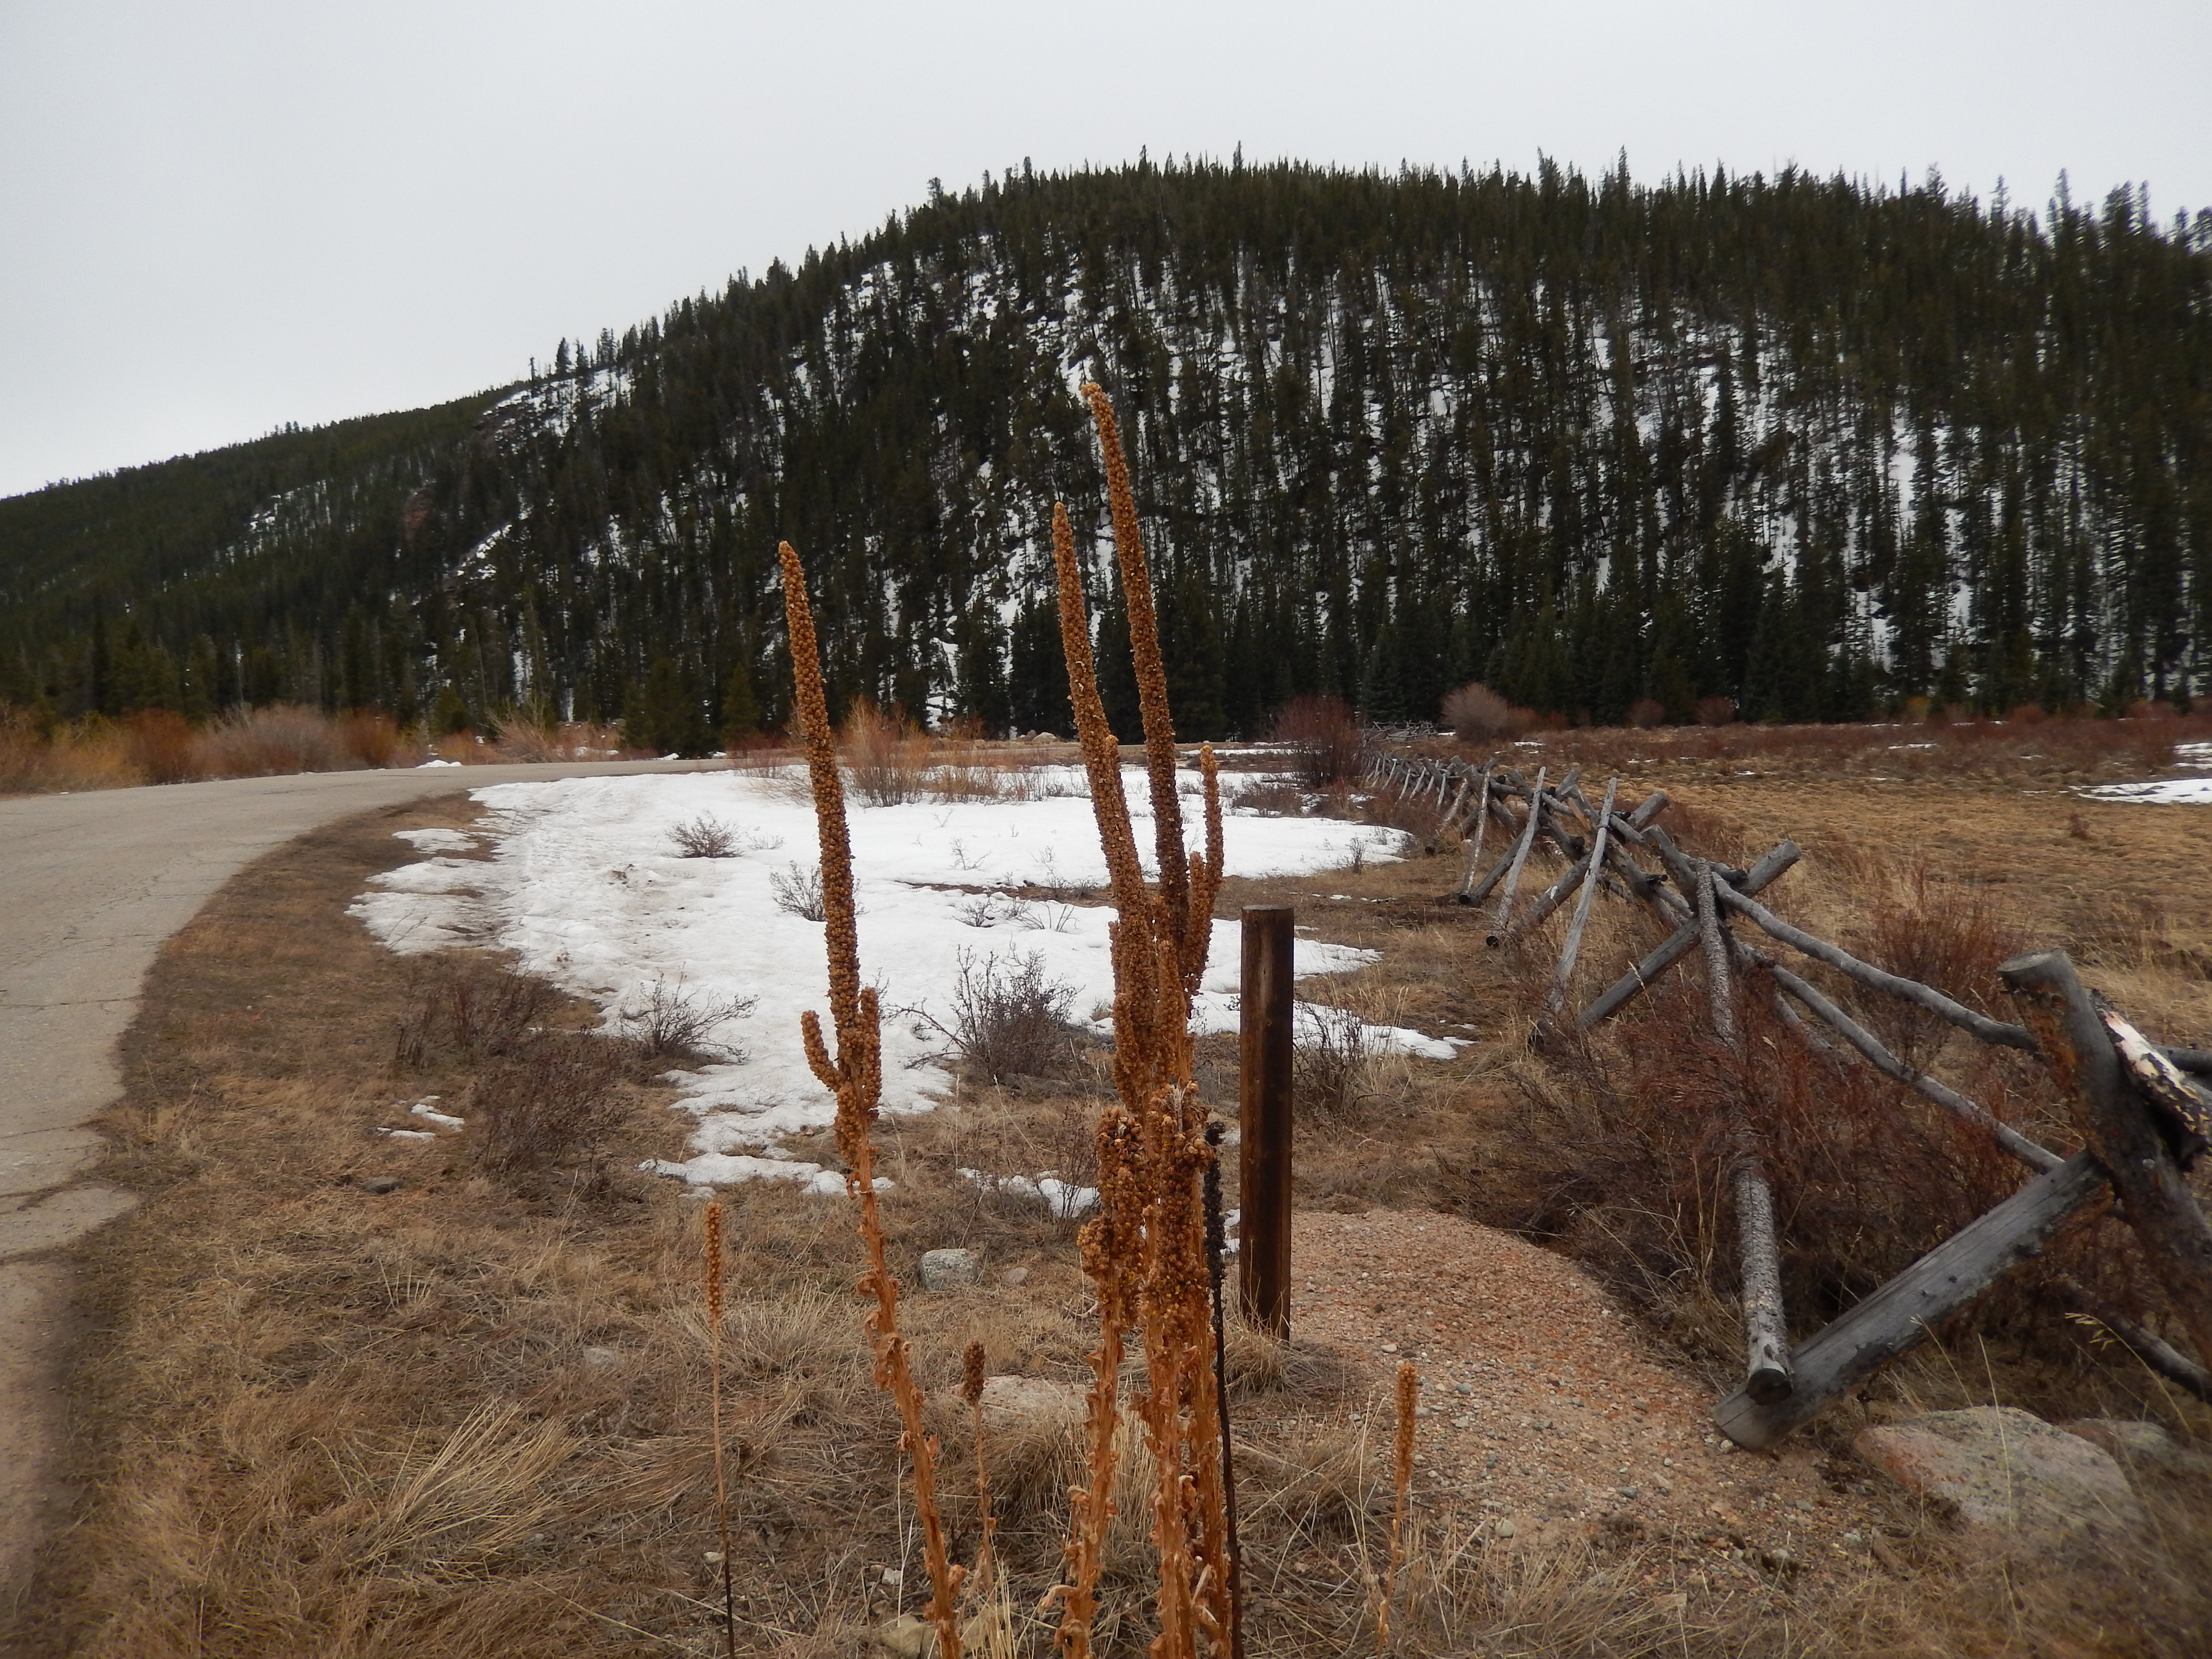
Parking lotWalking back to the trailhead
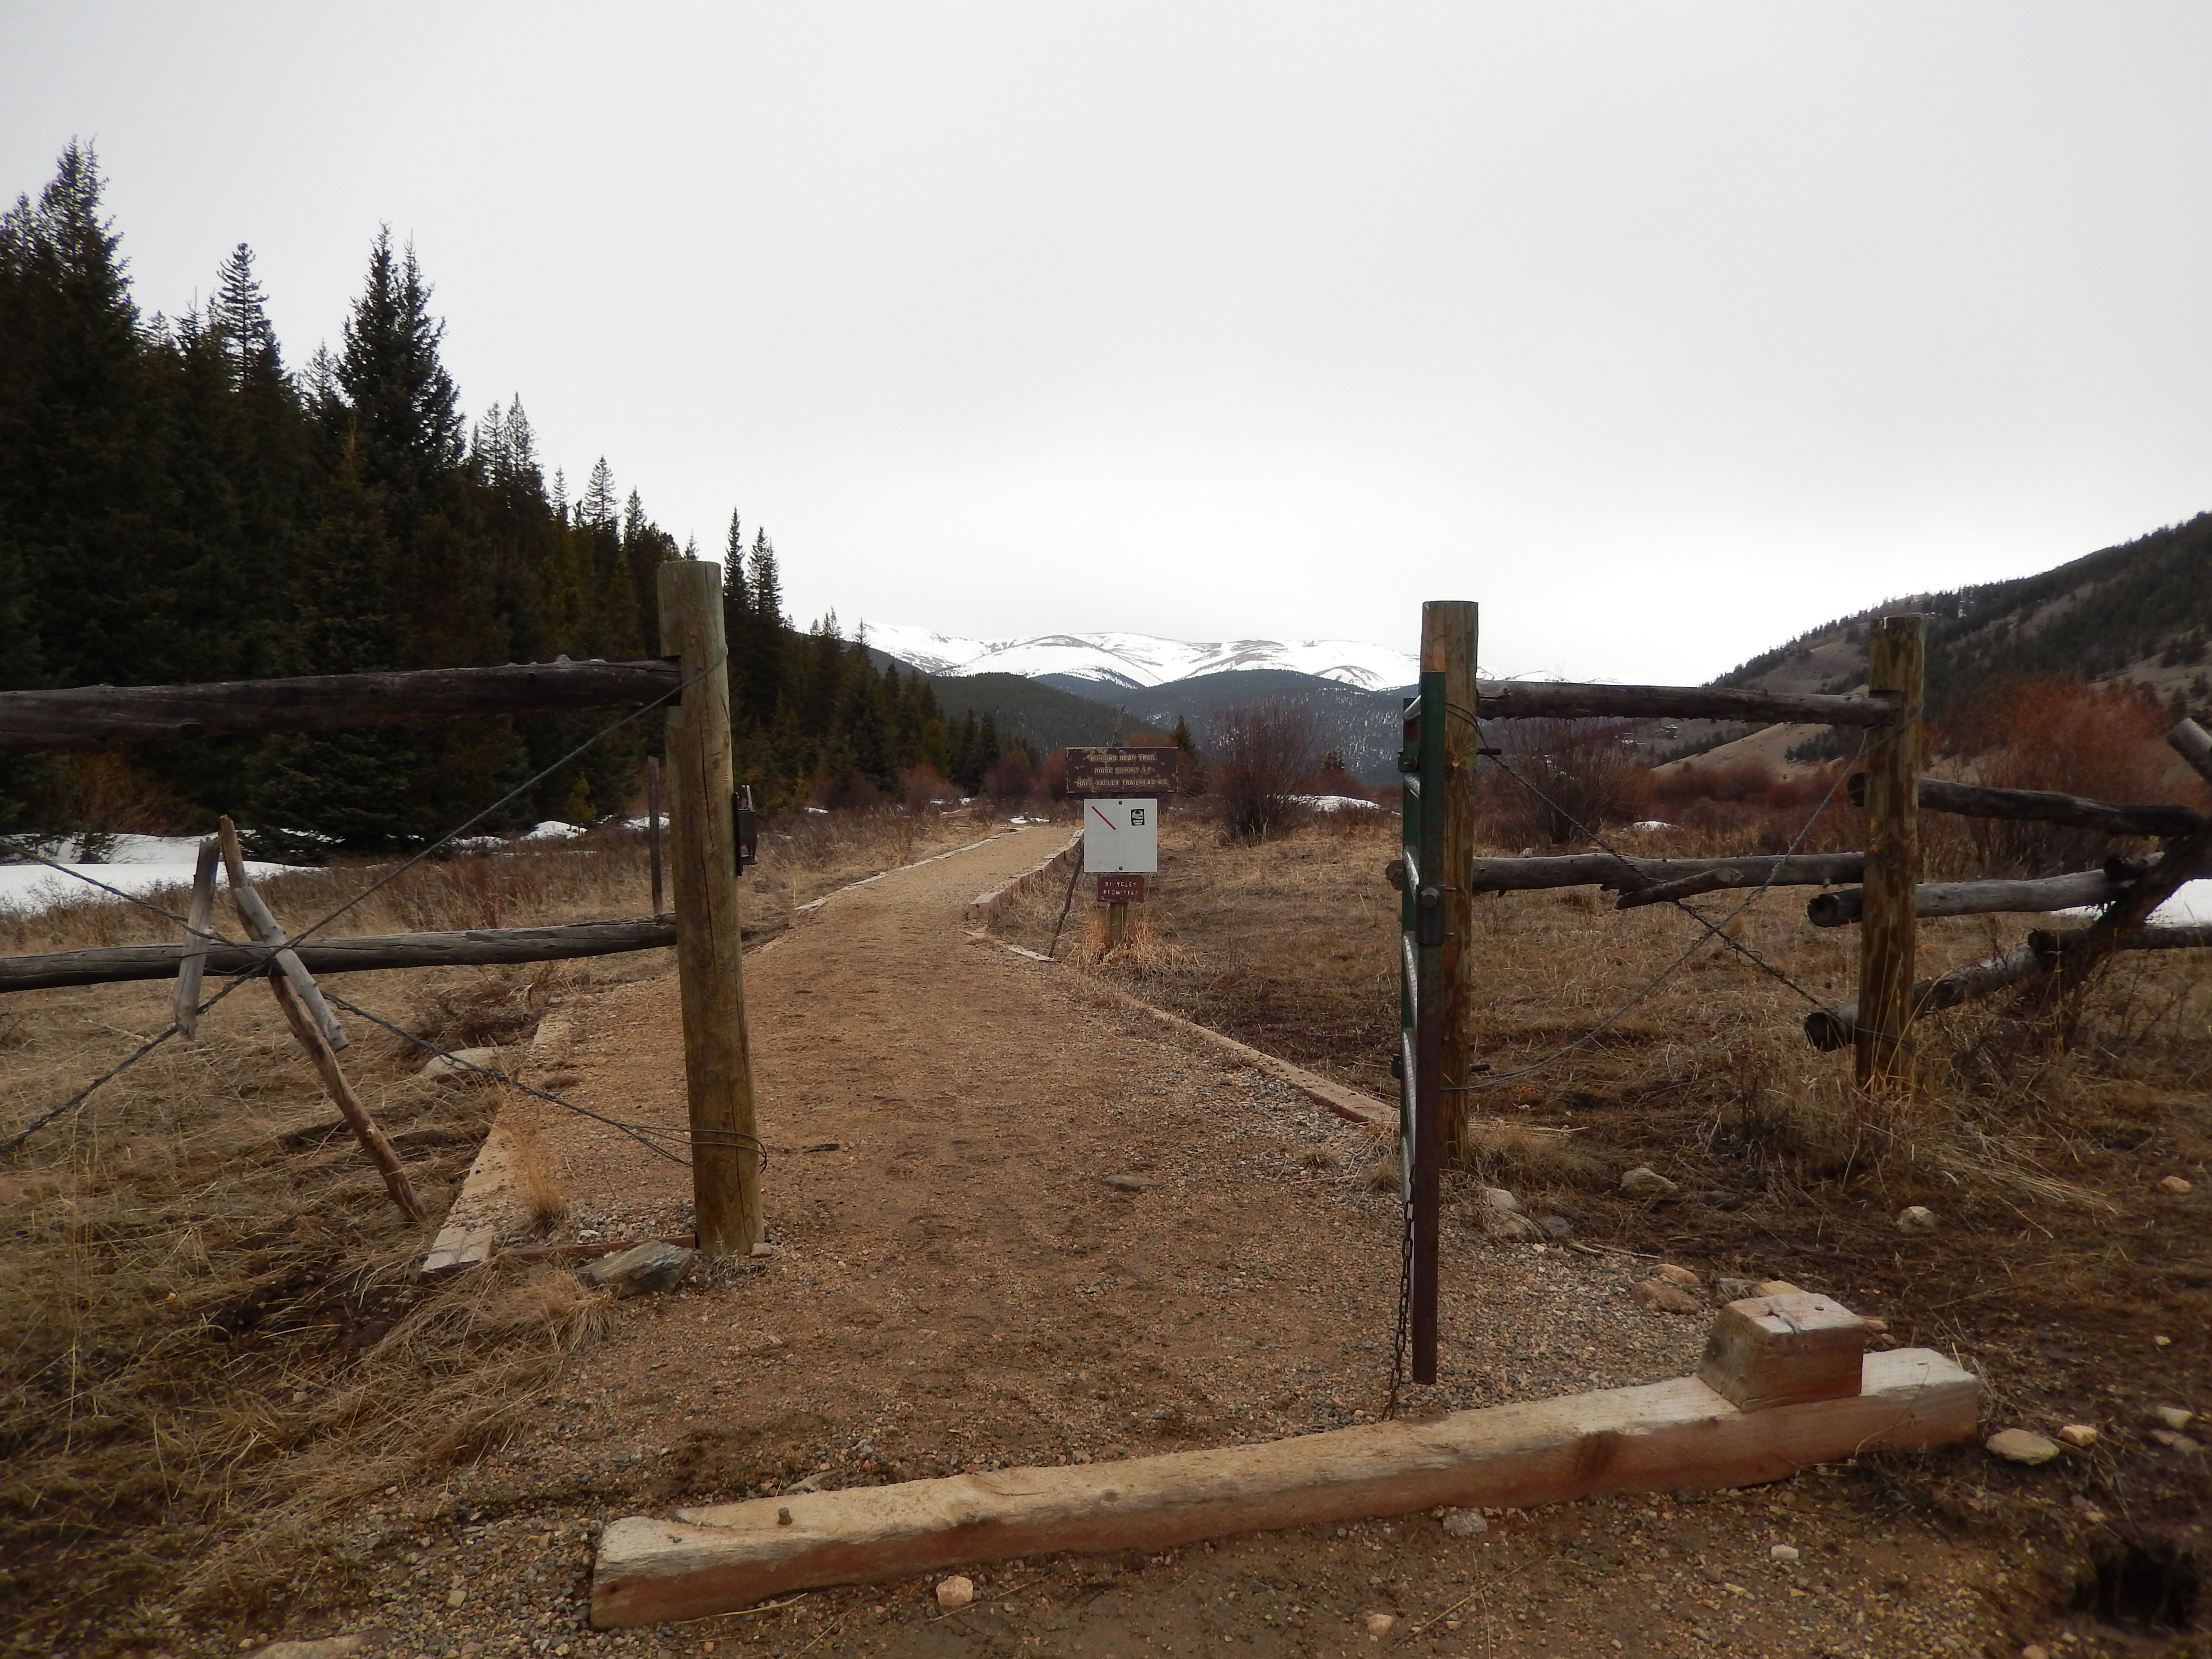
The trail is immediately off of Park County Road 62 :
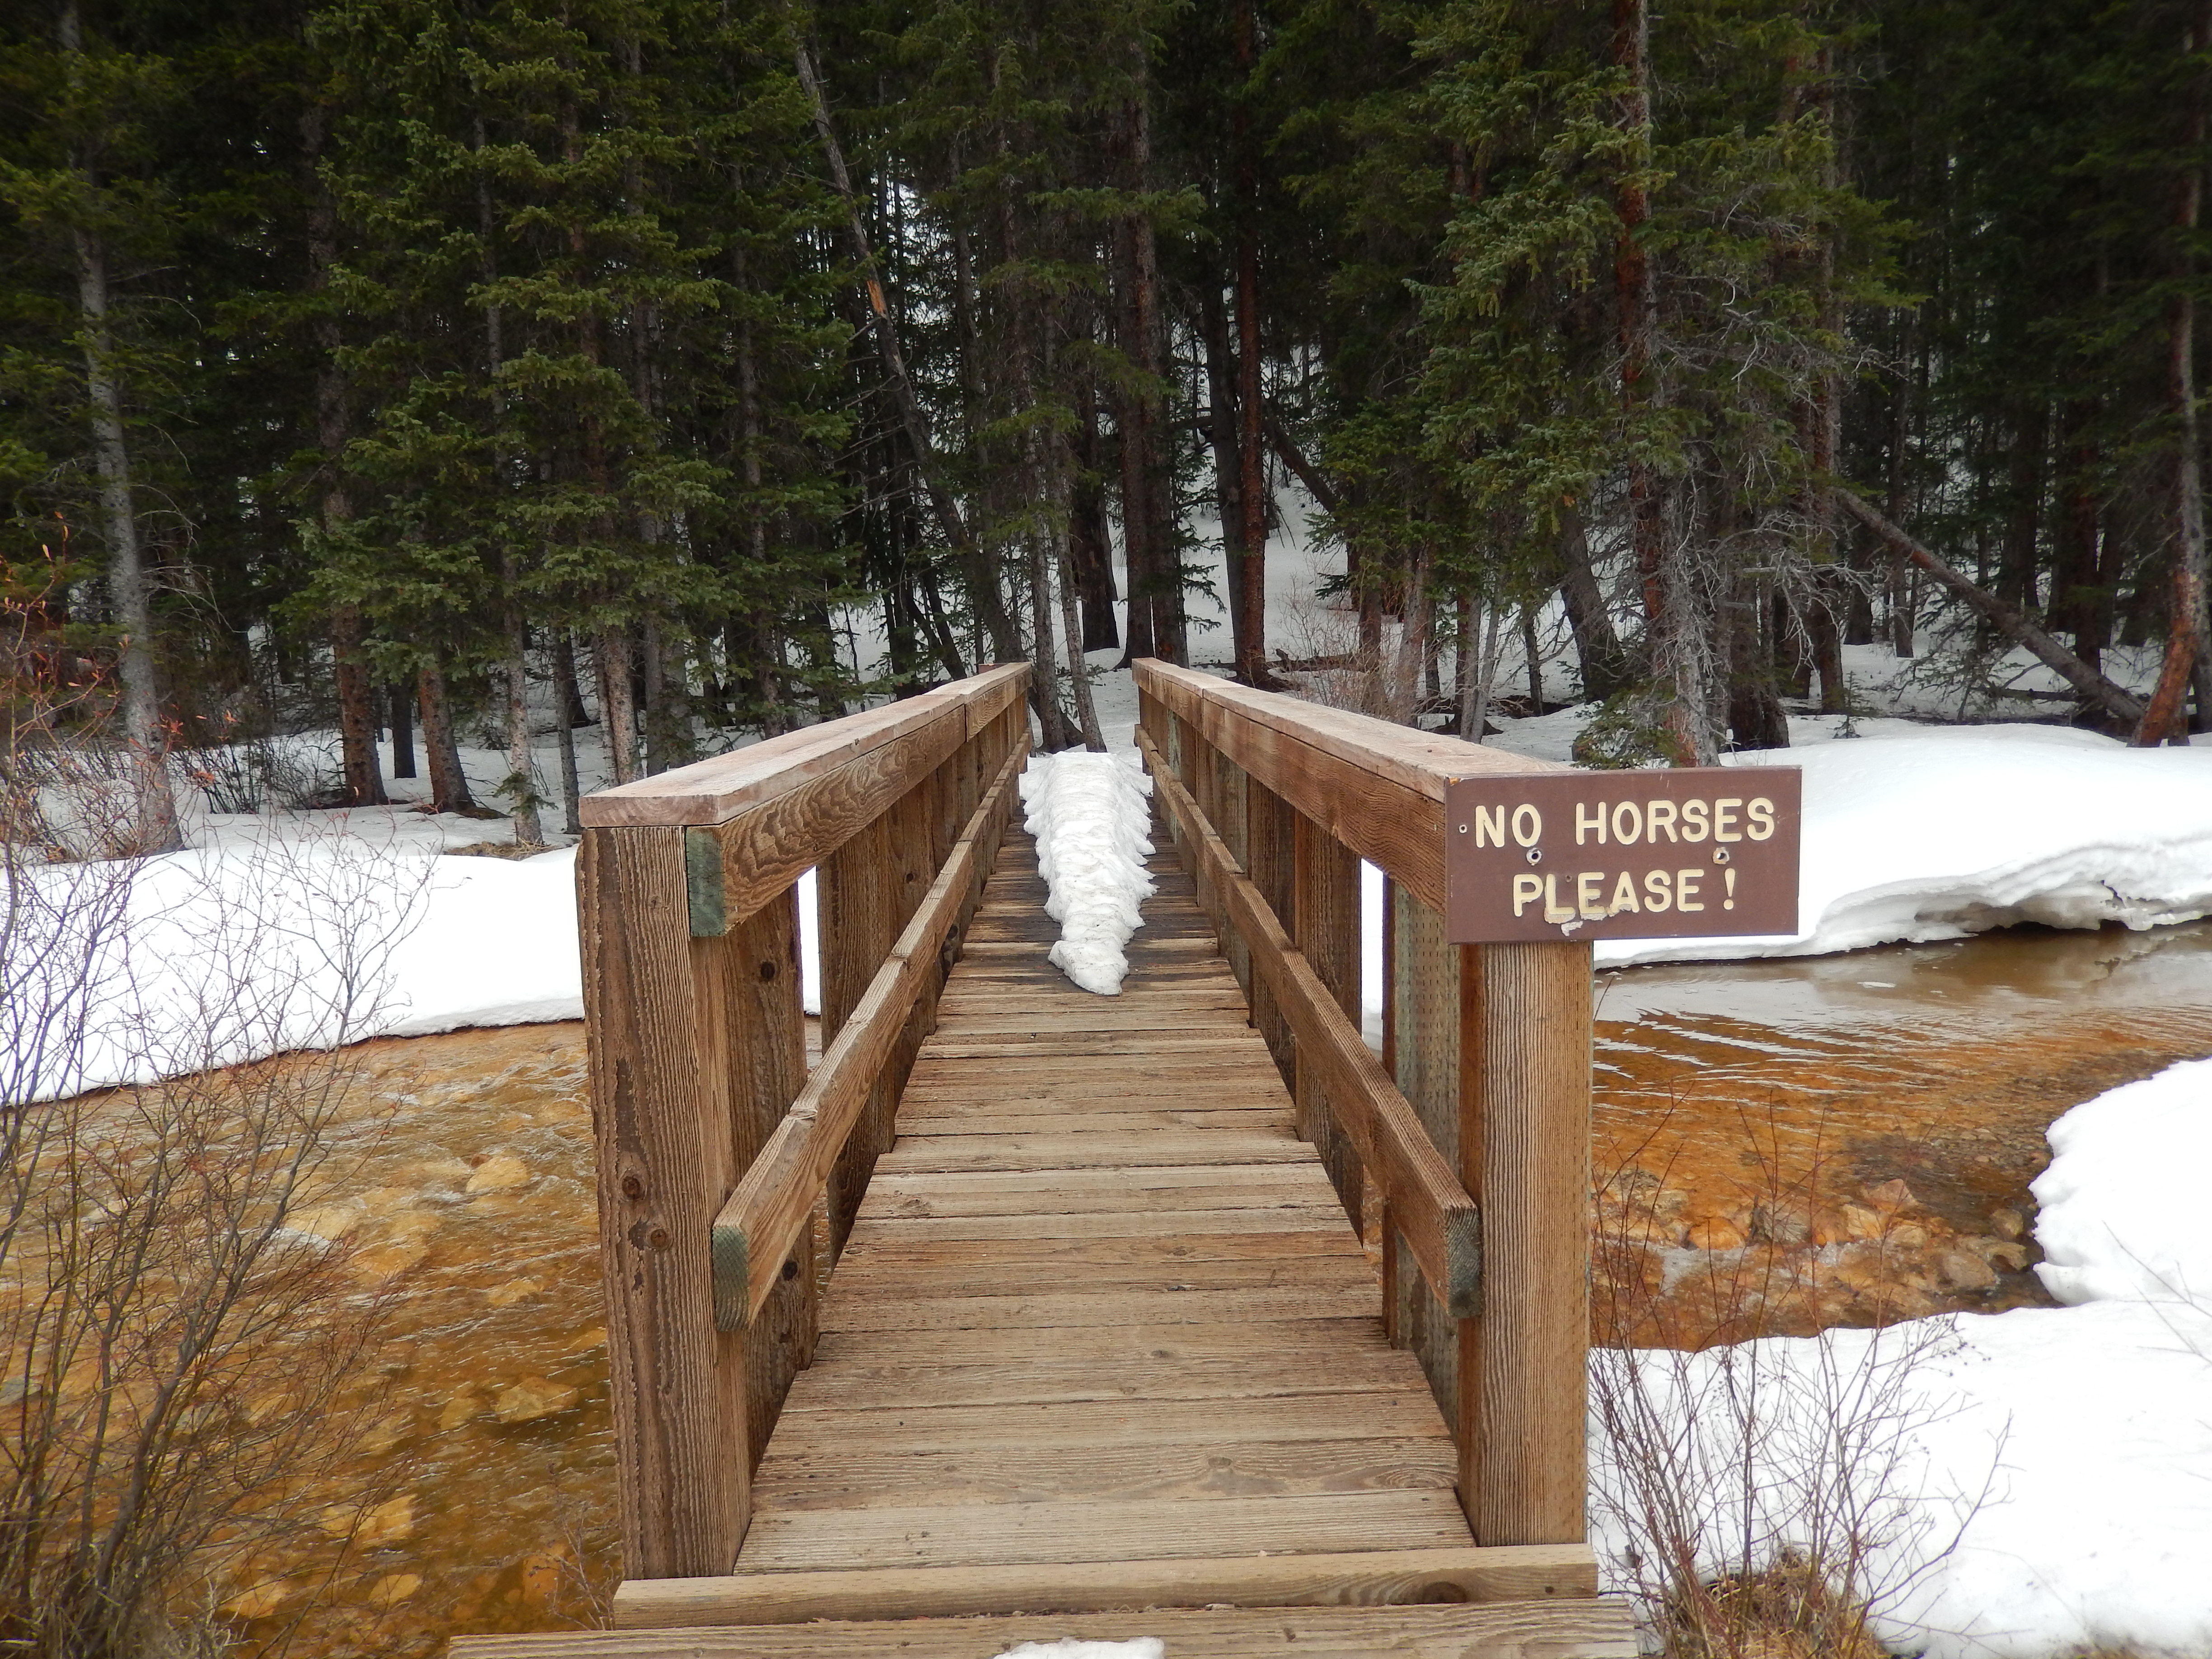
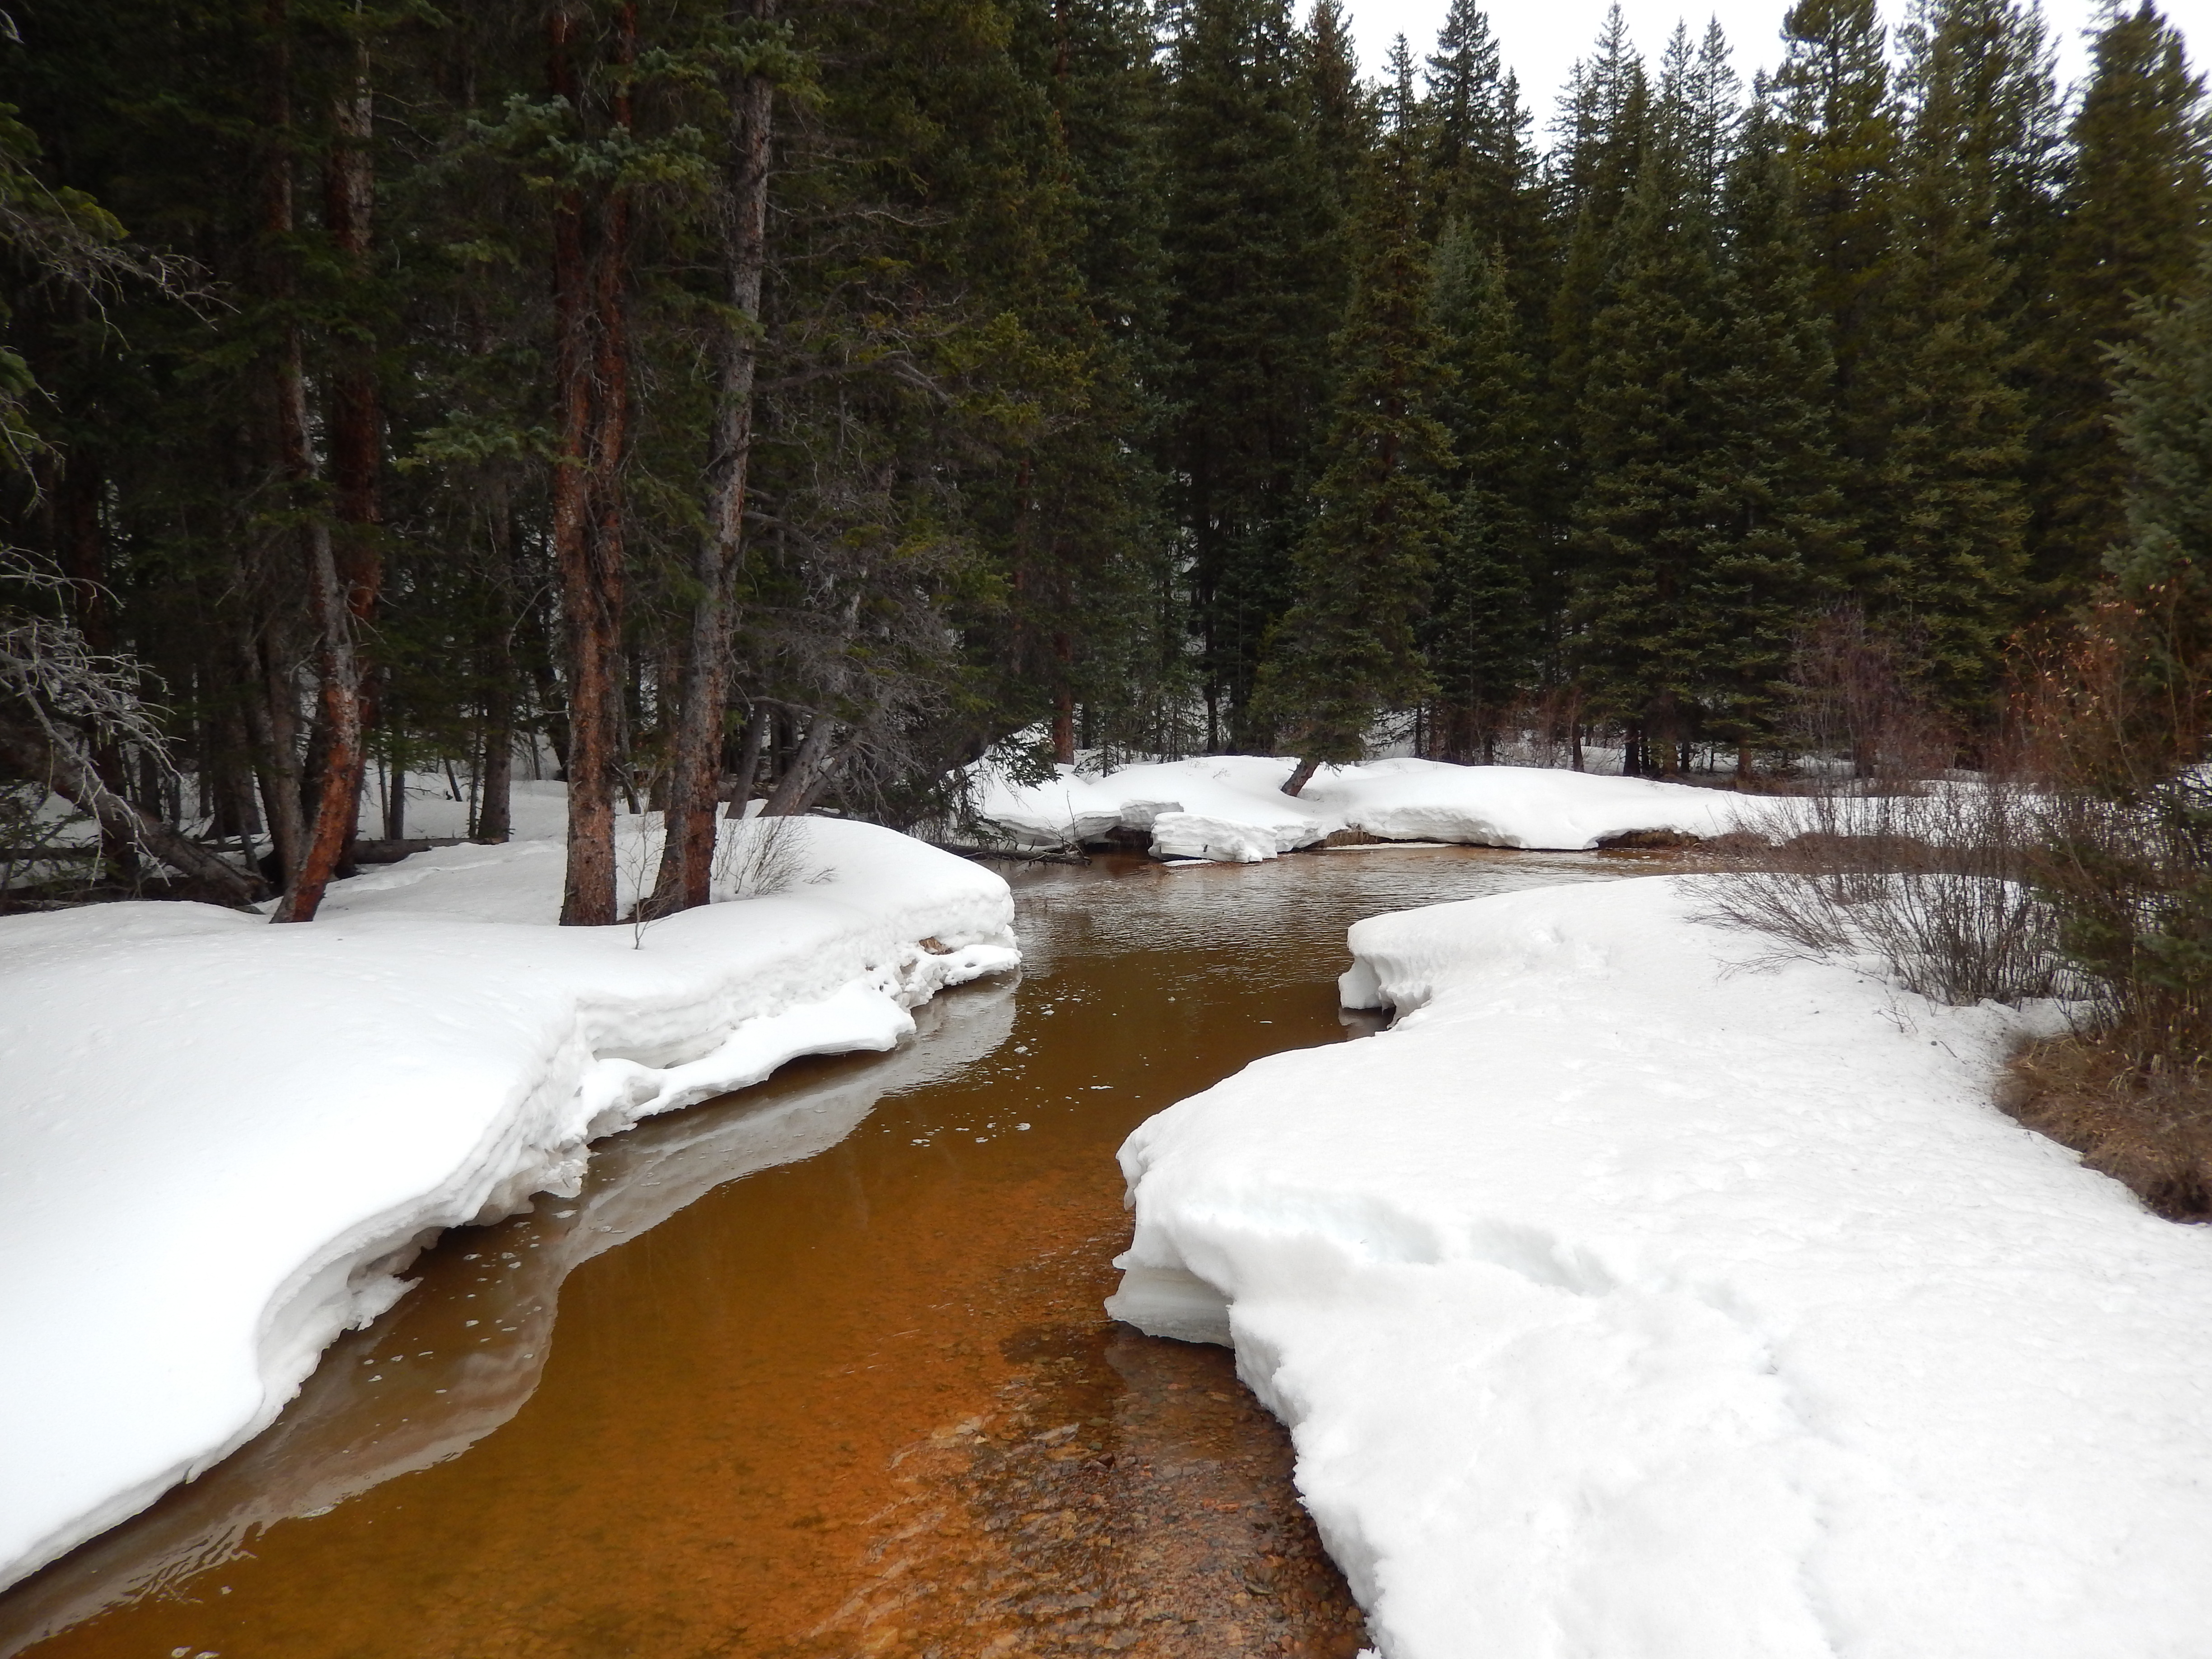
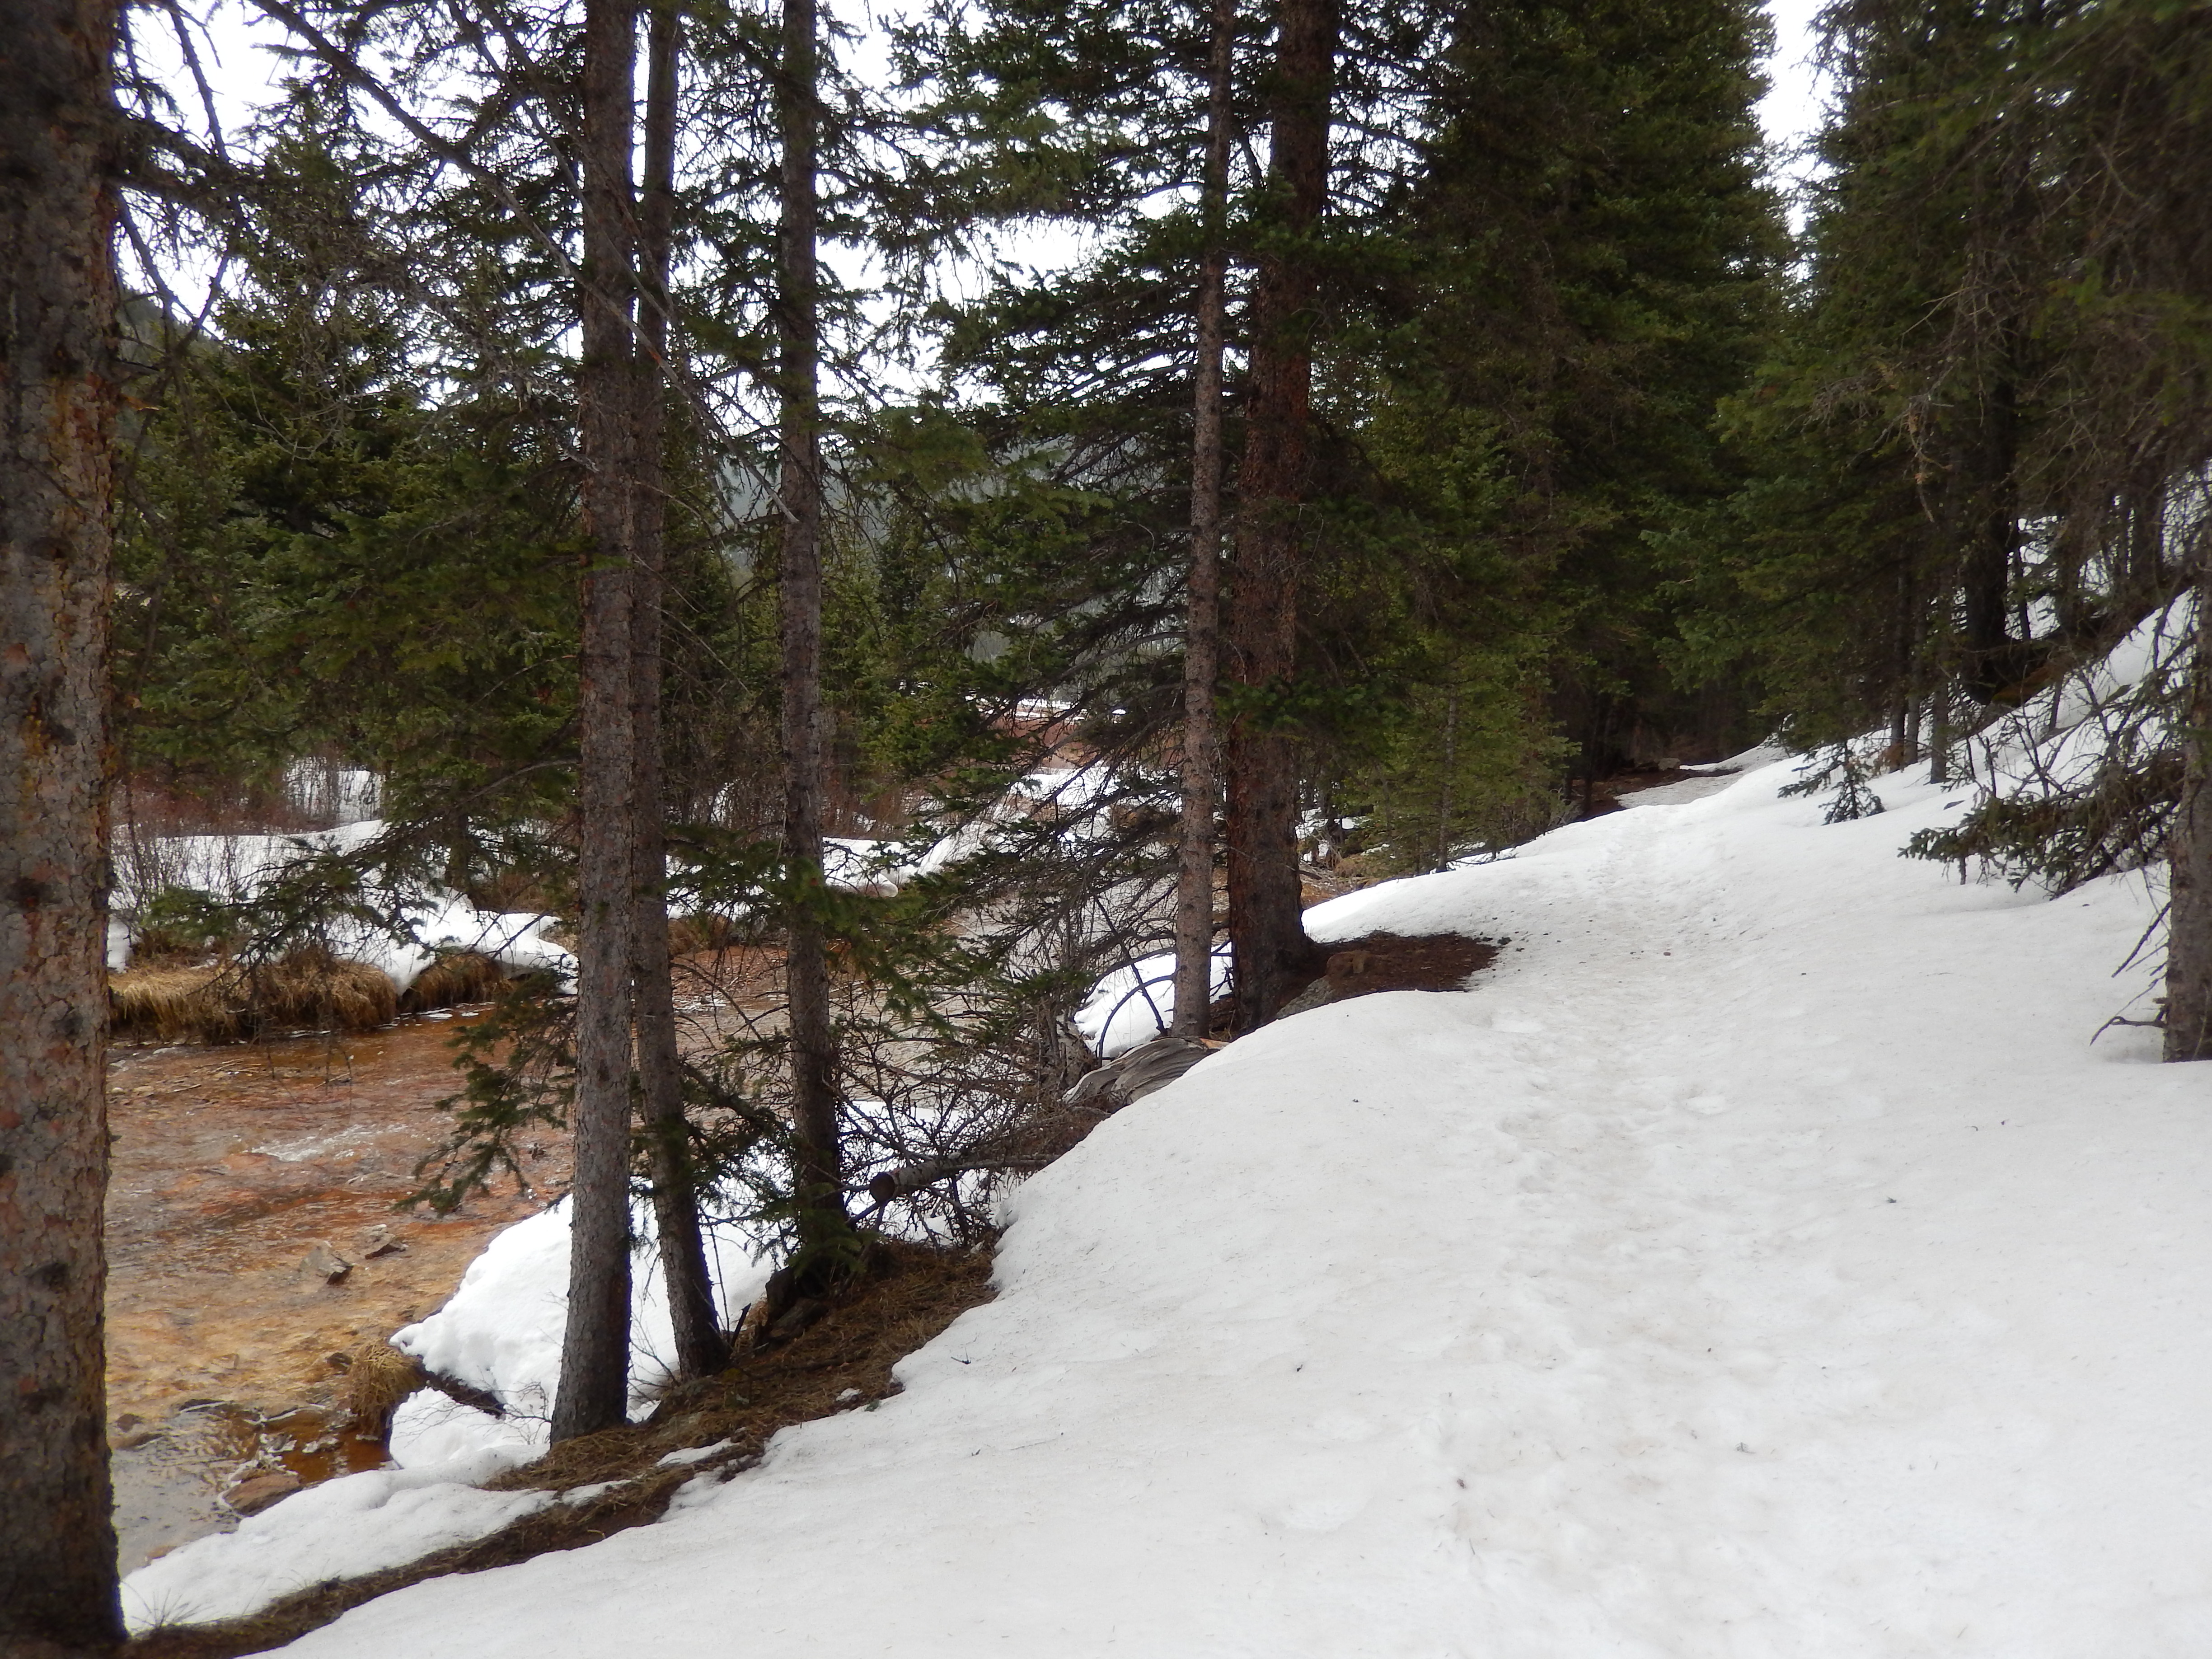
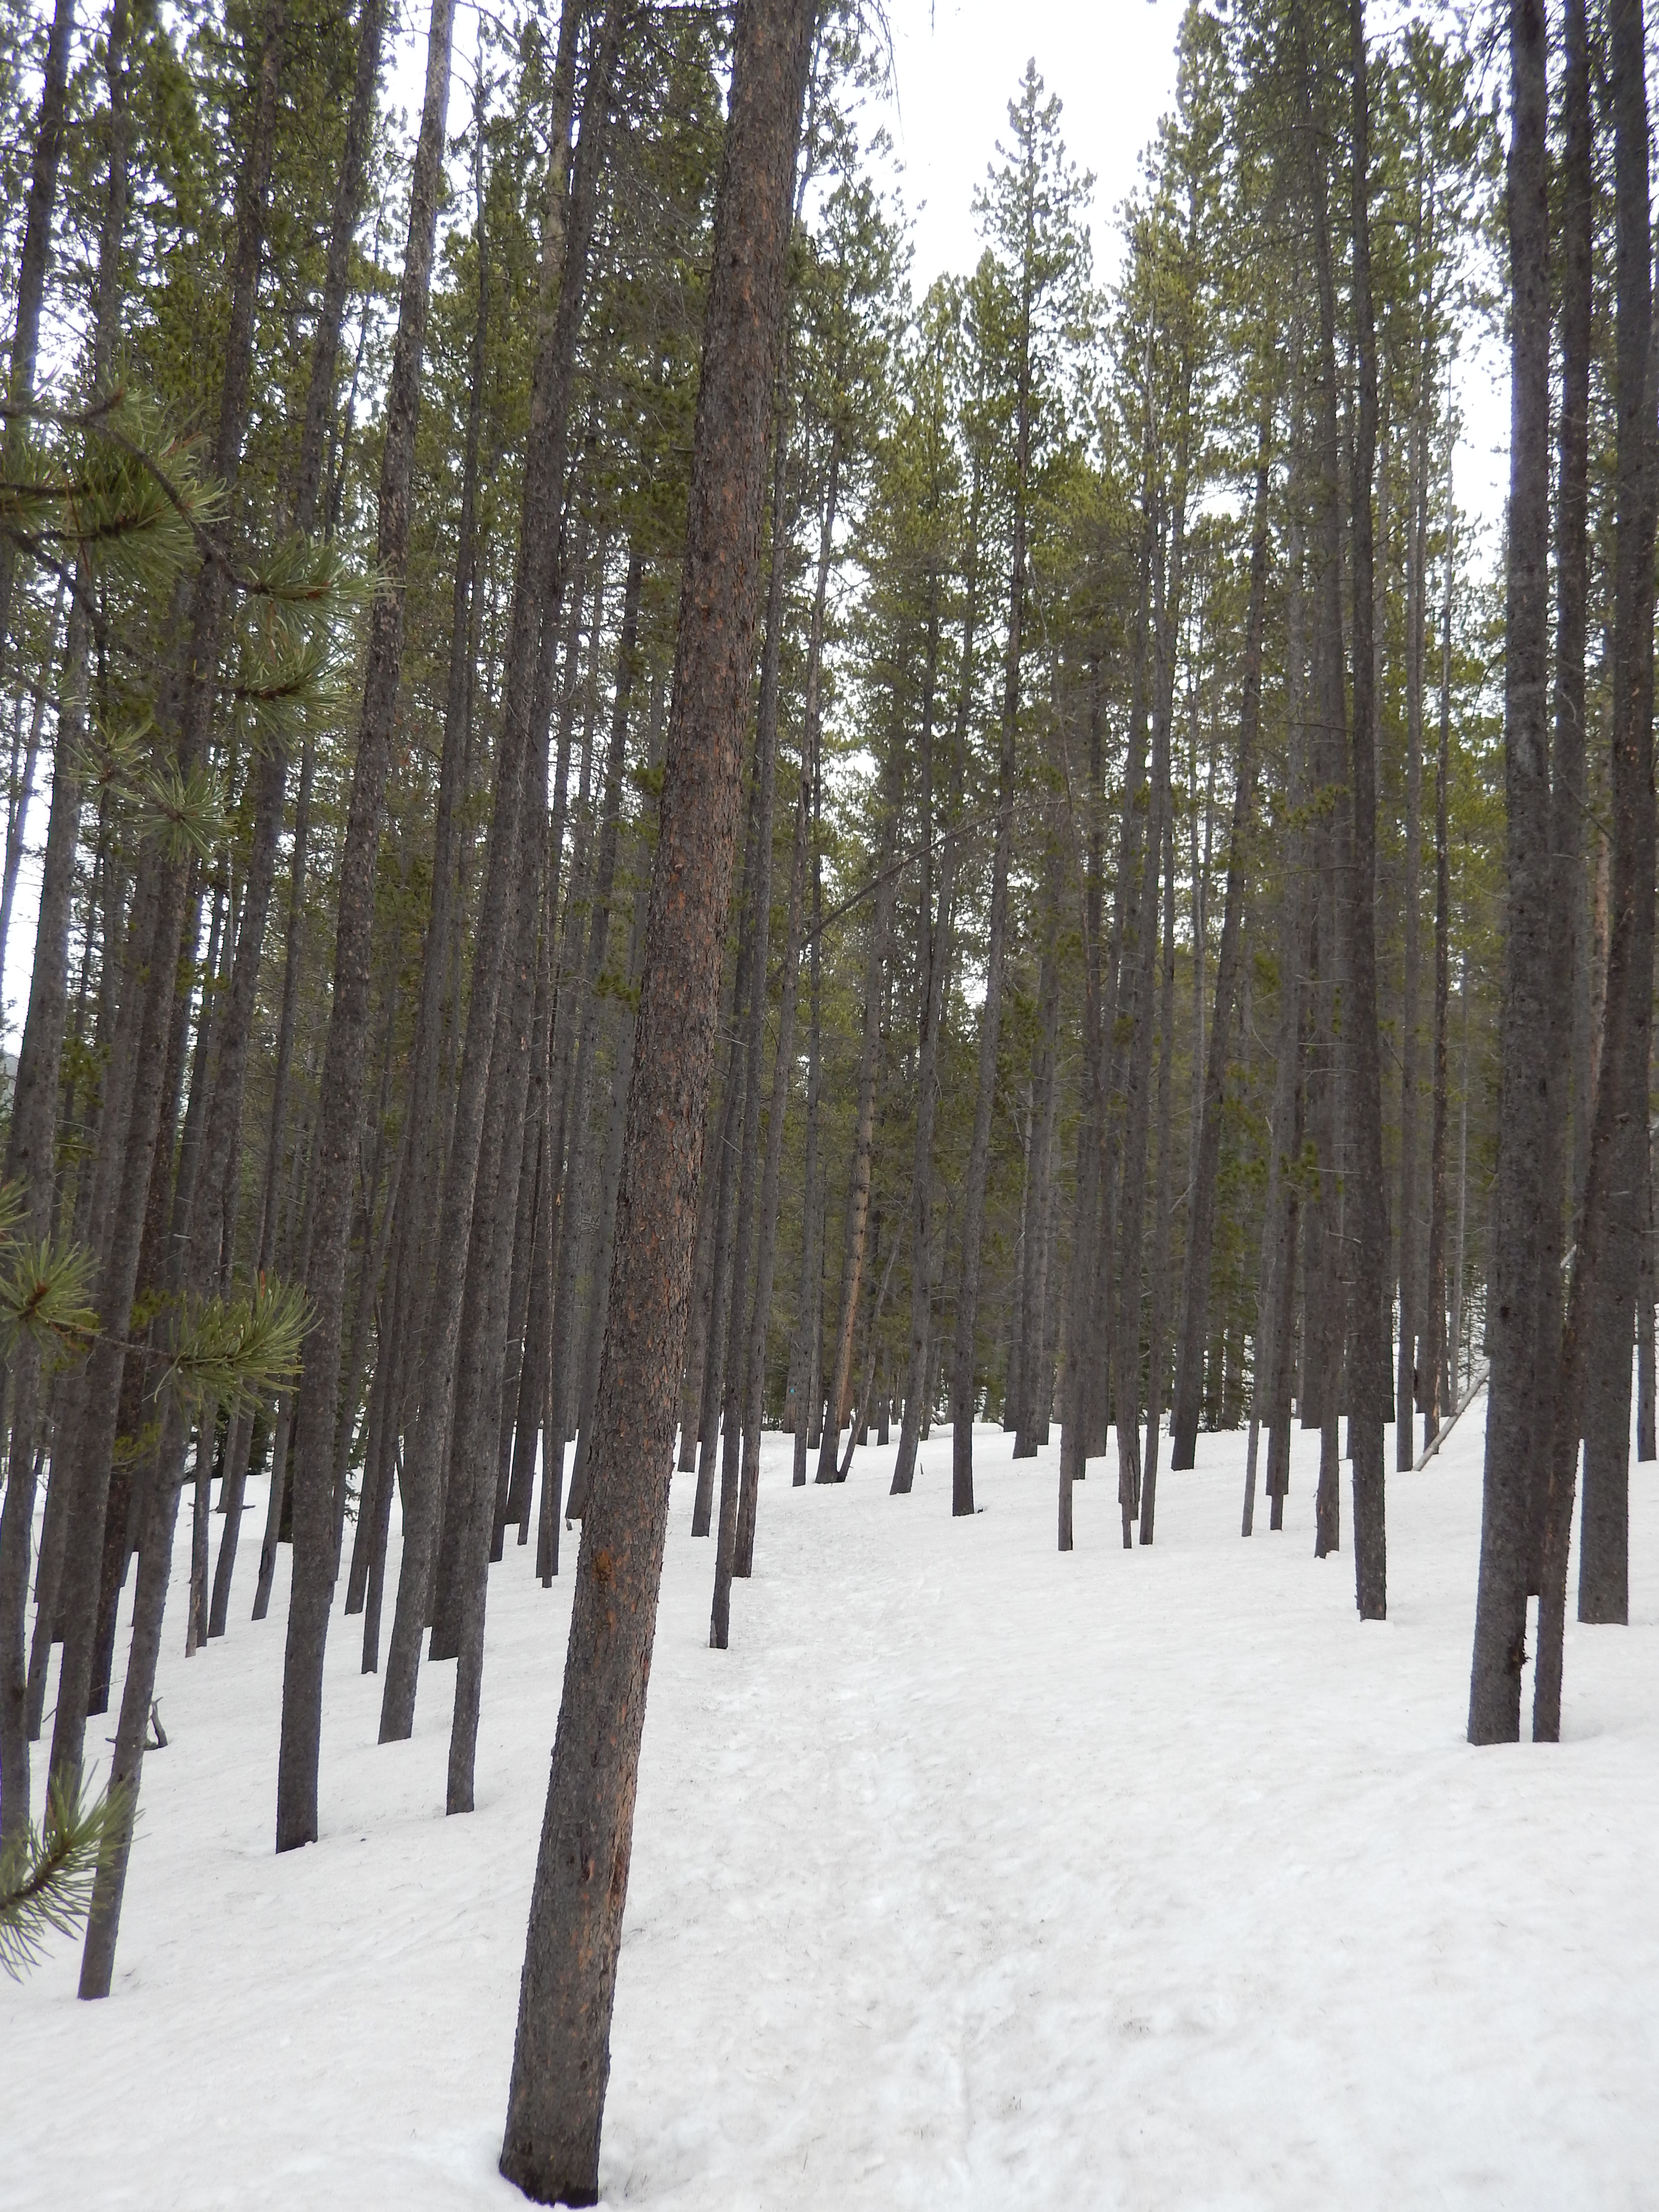
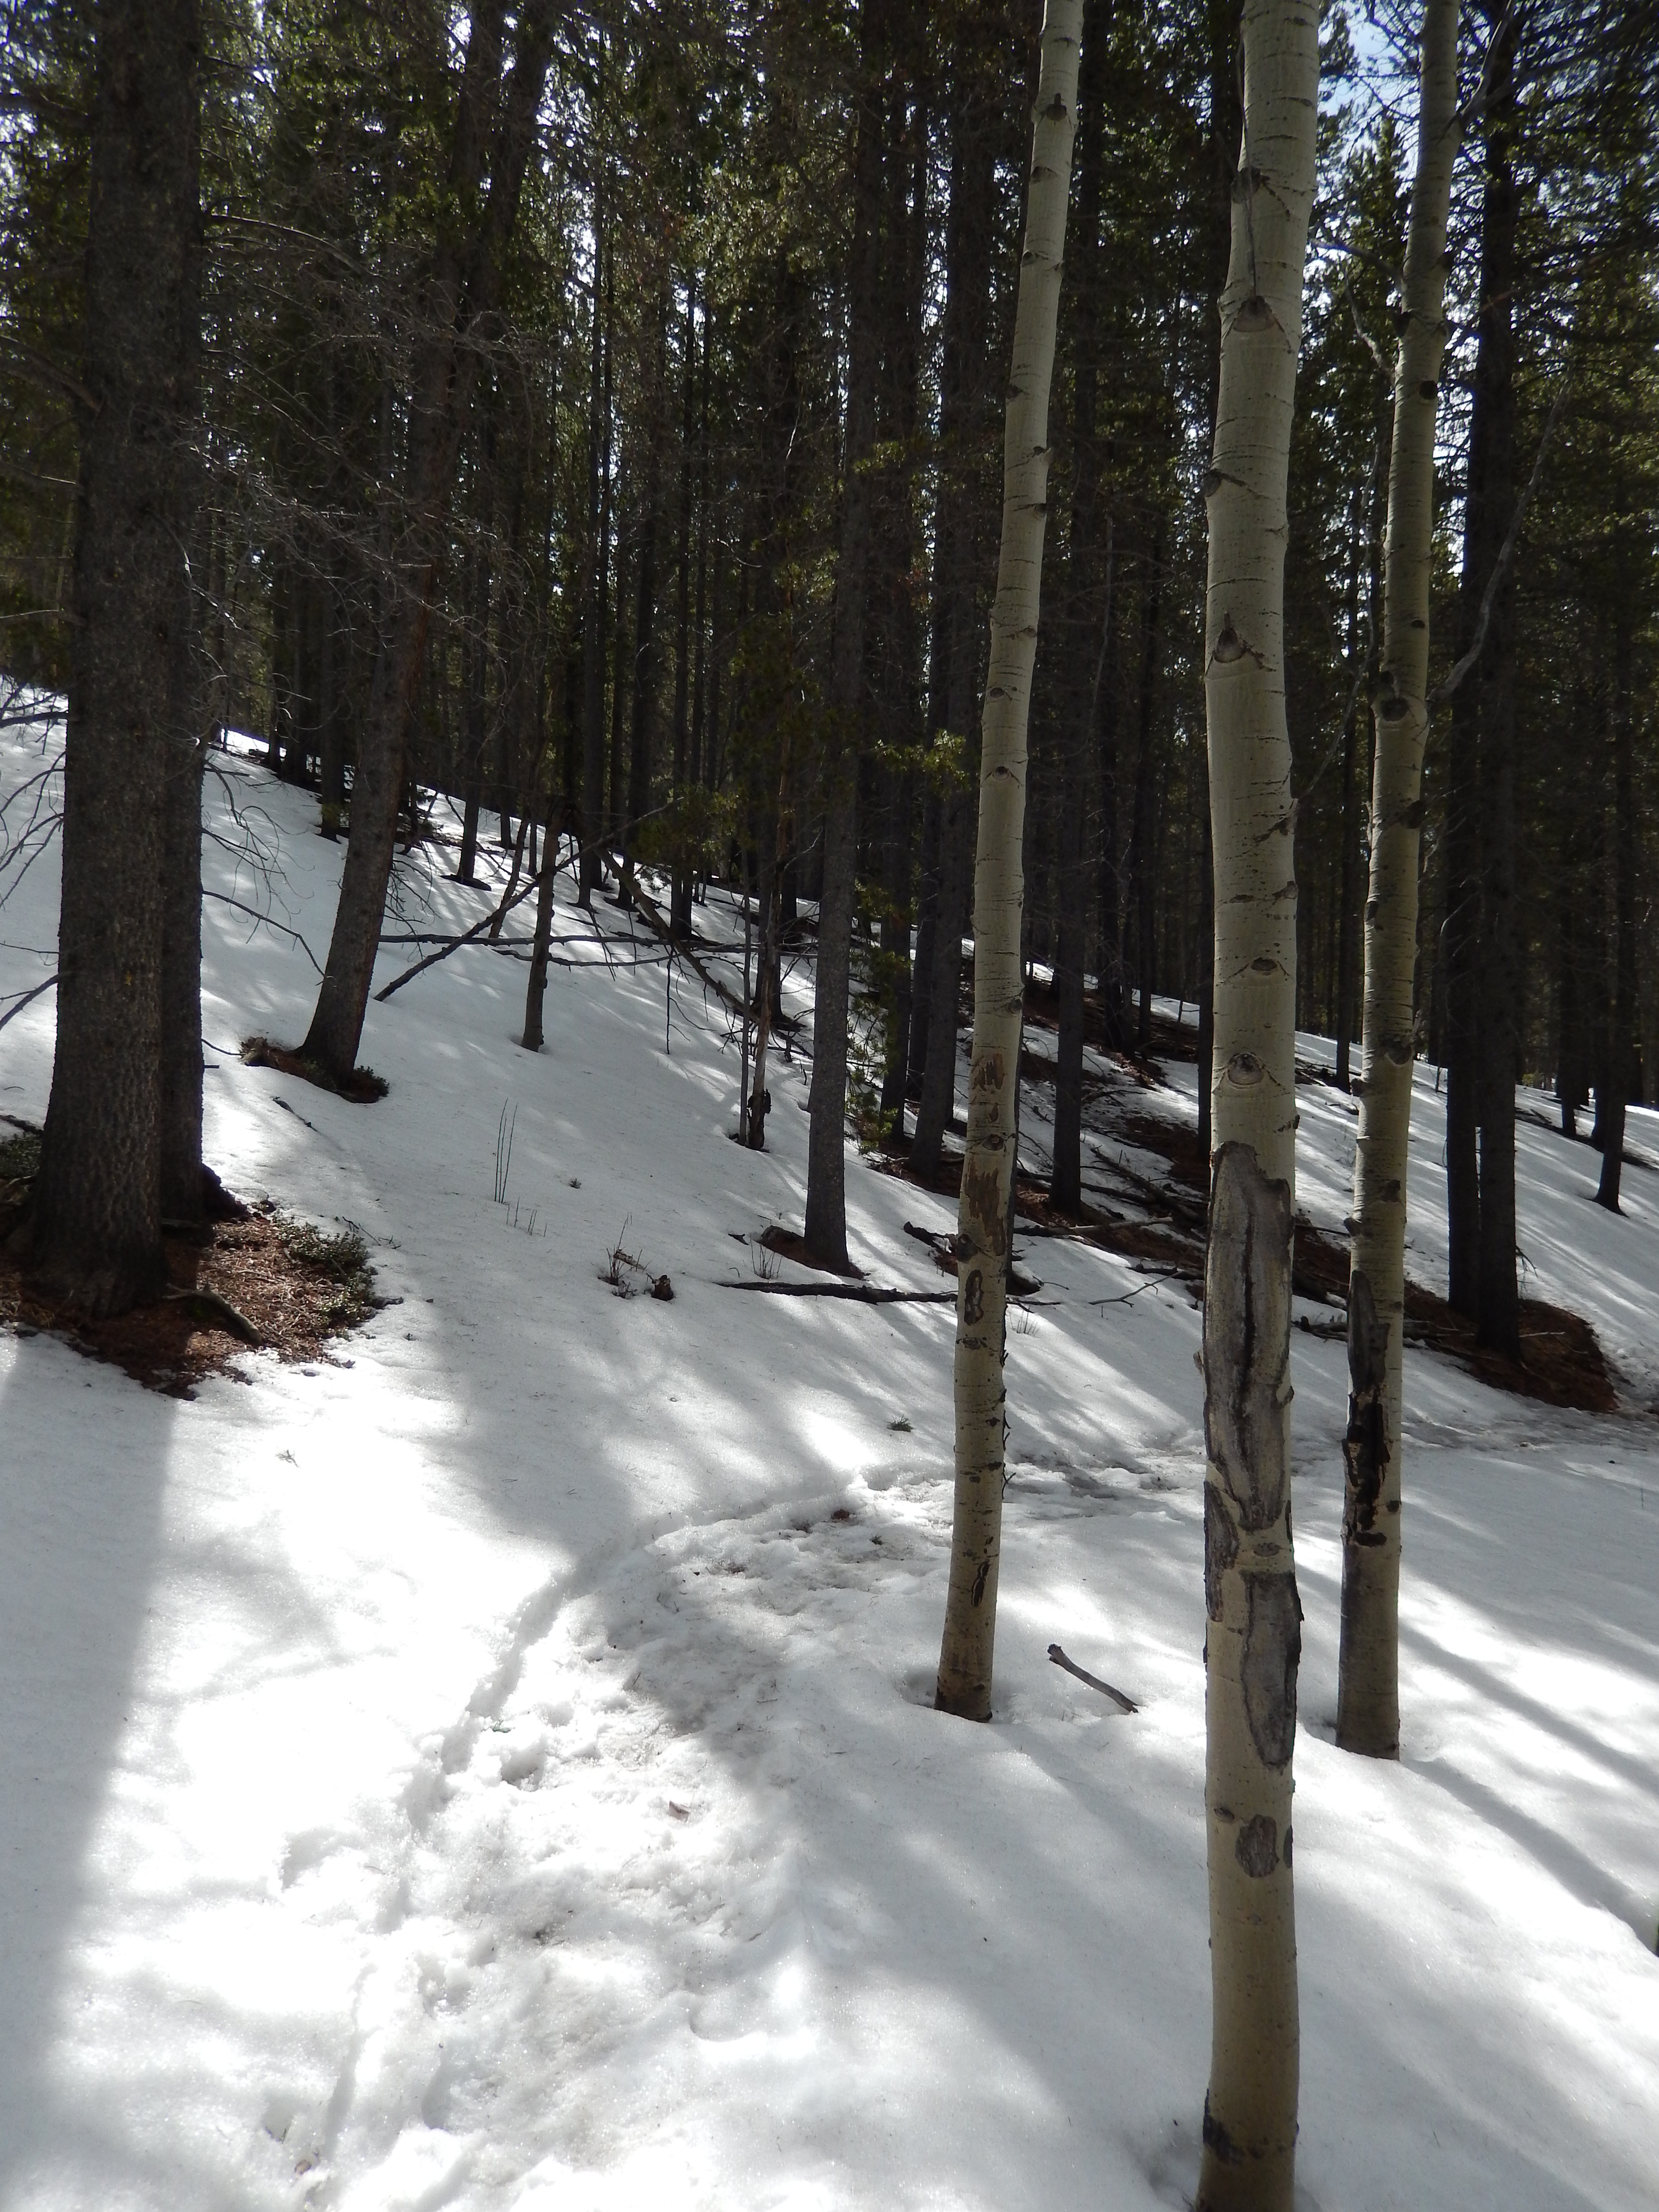
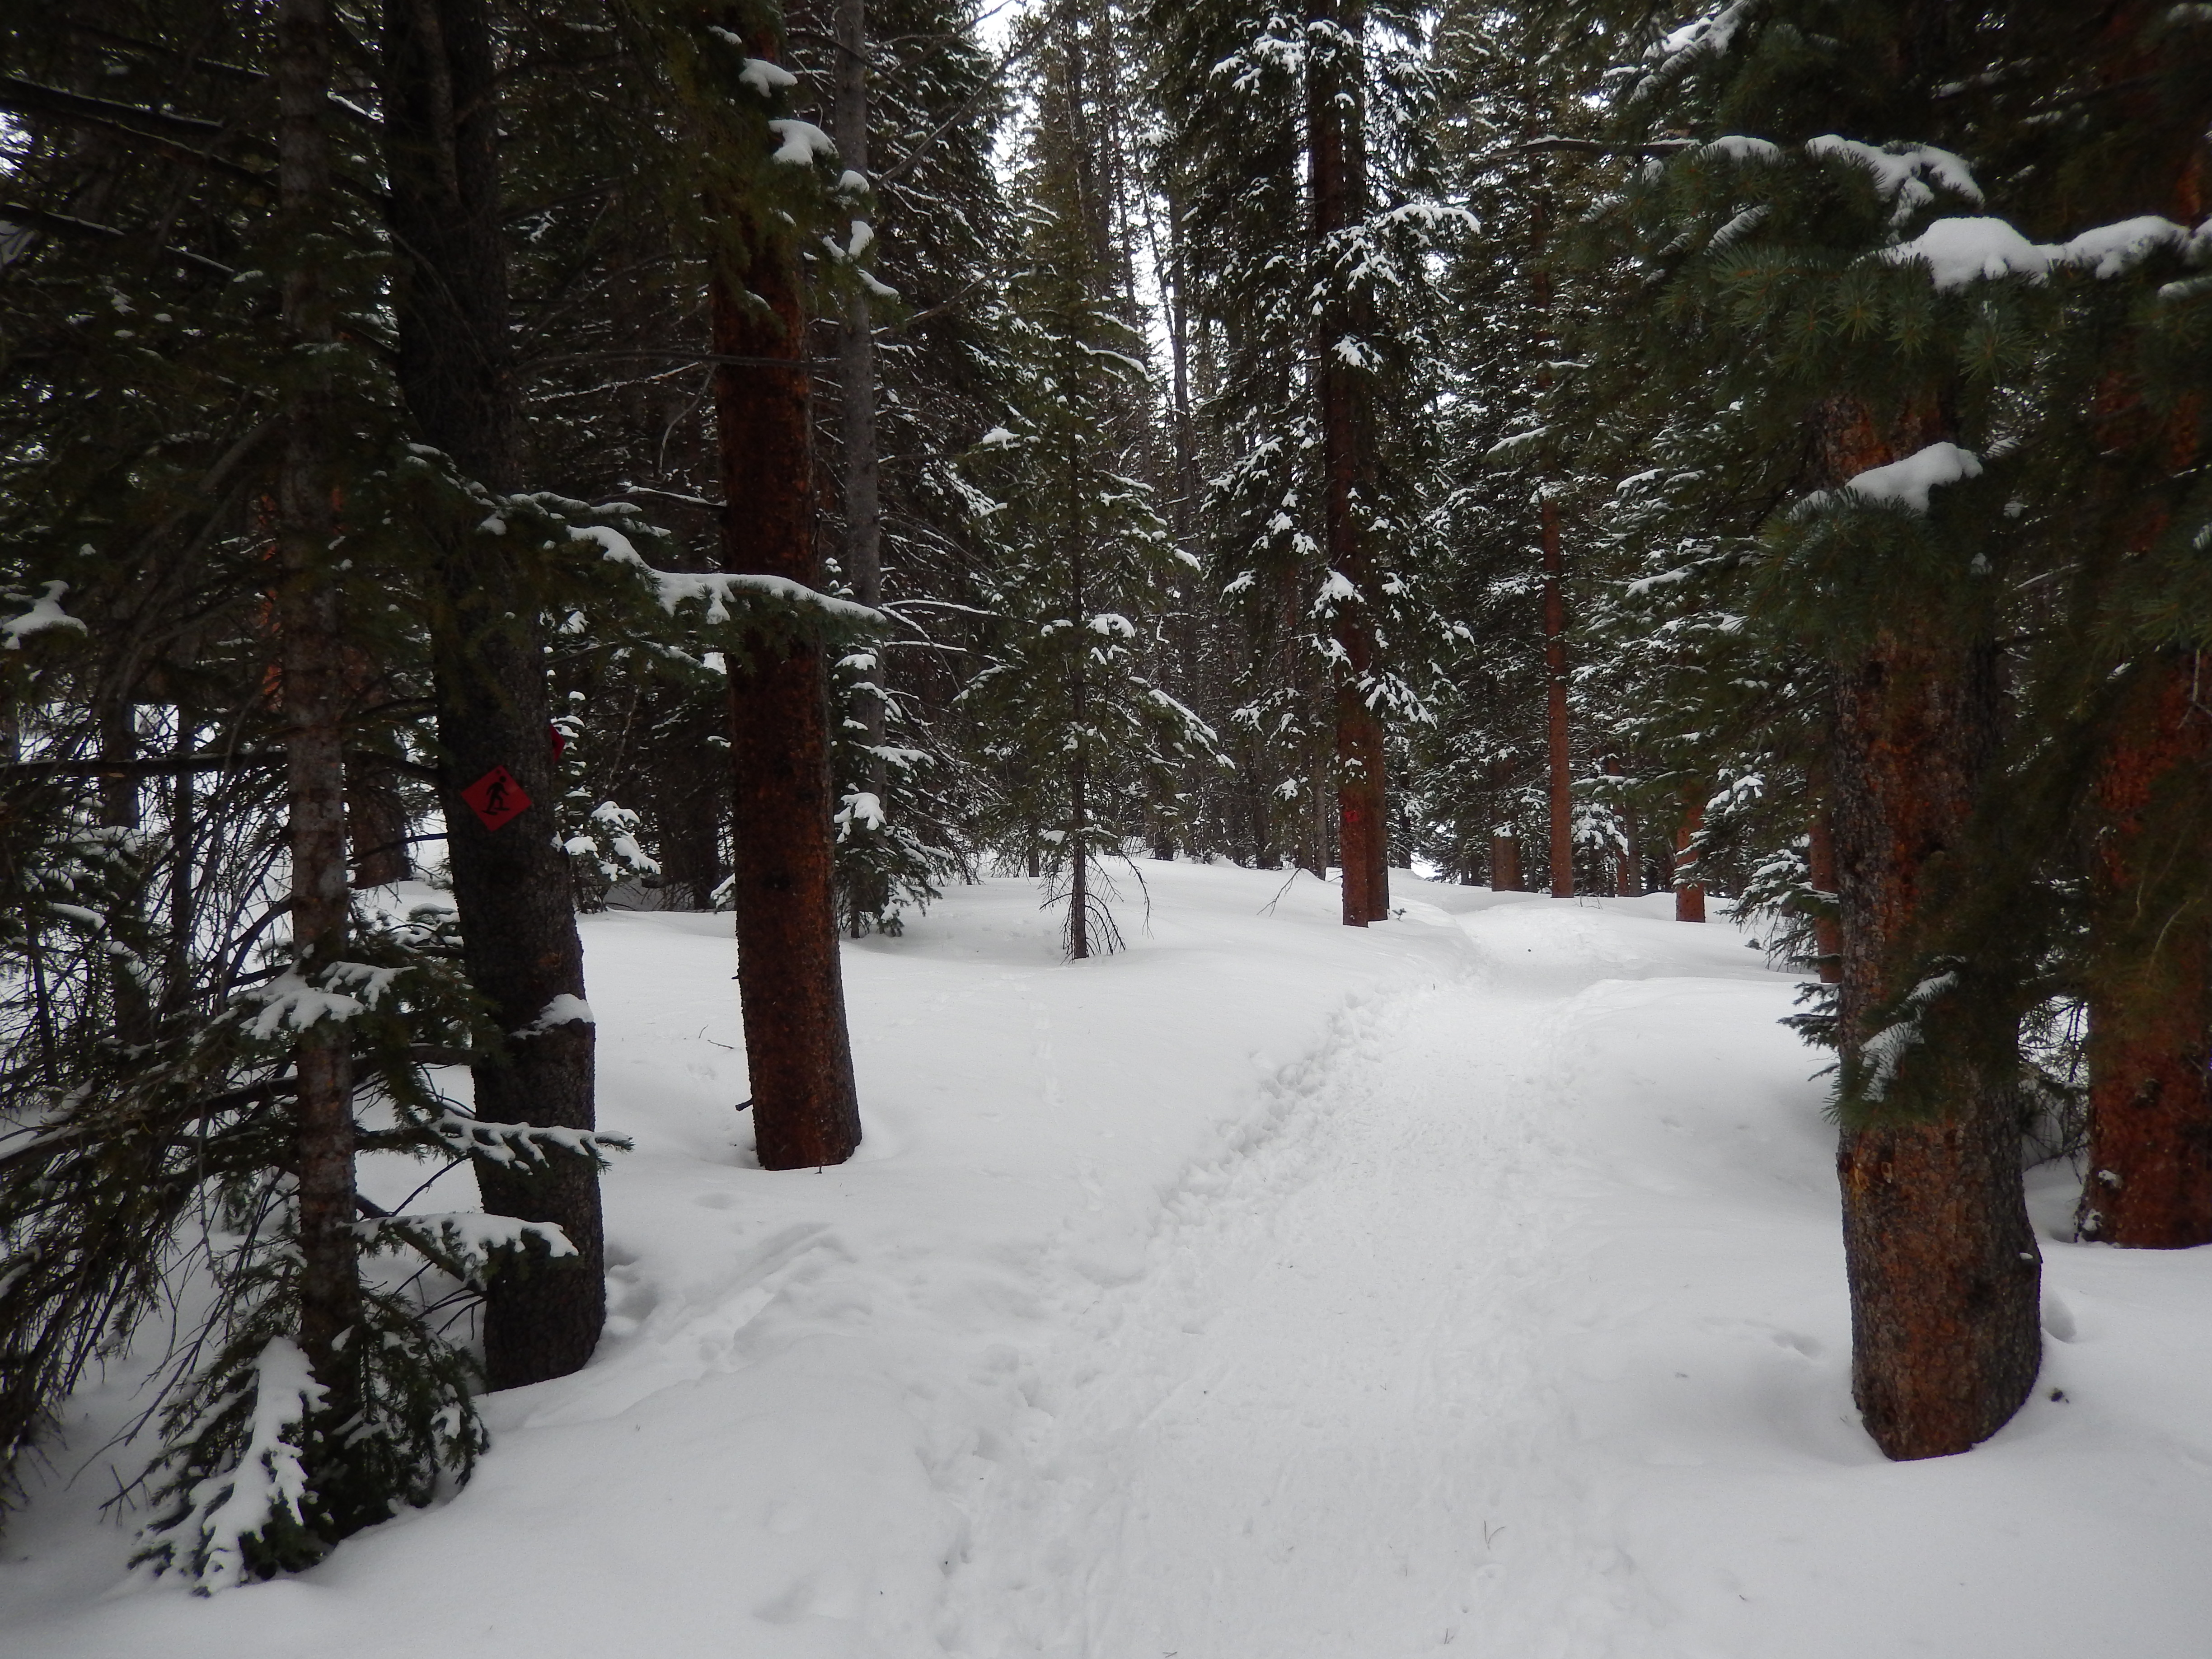
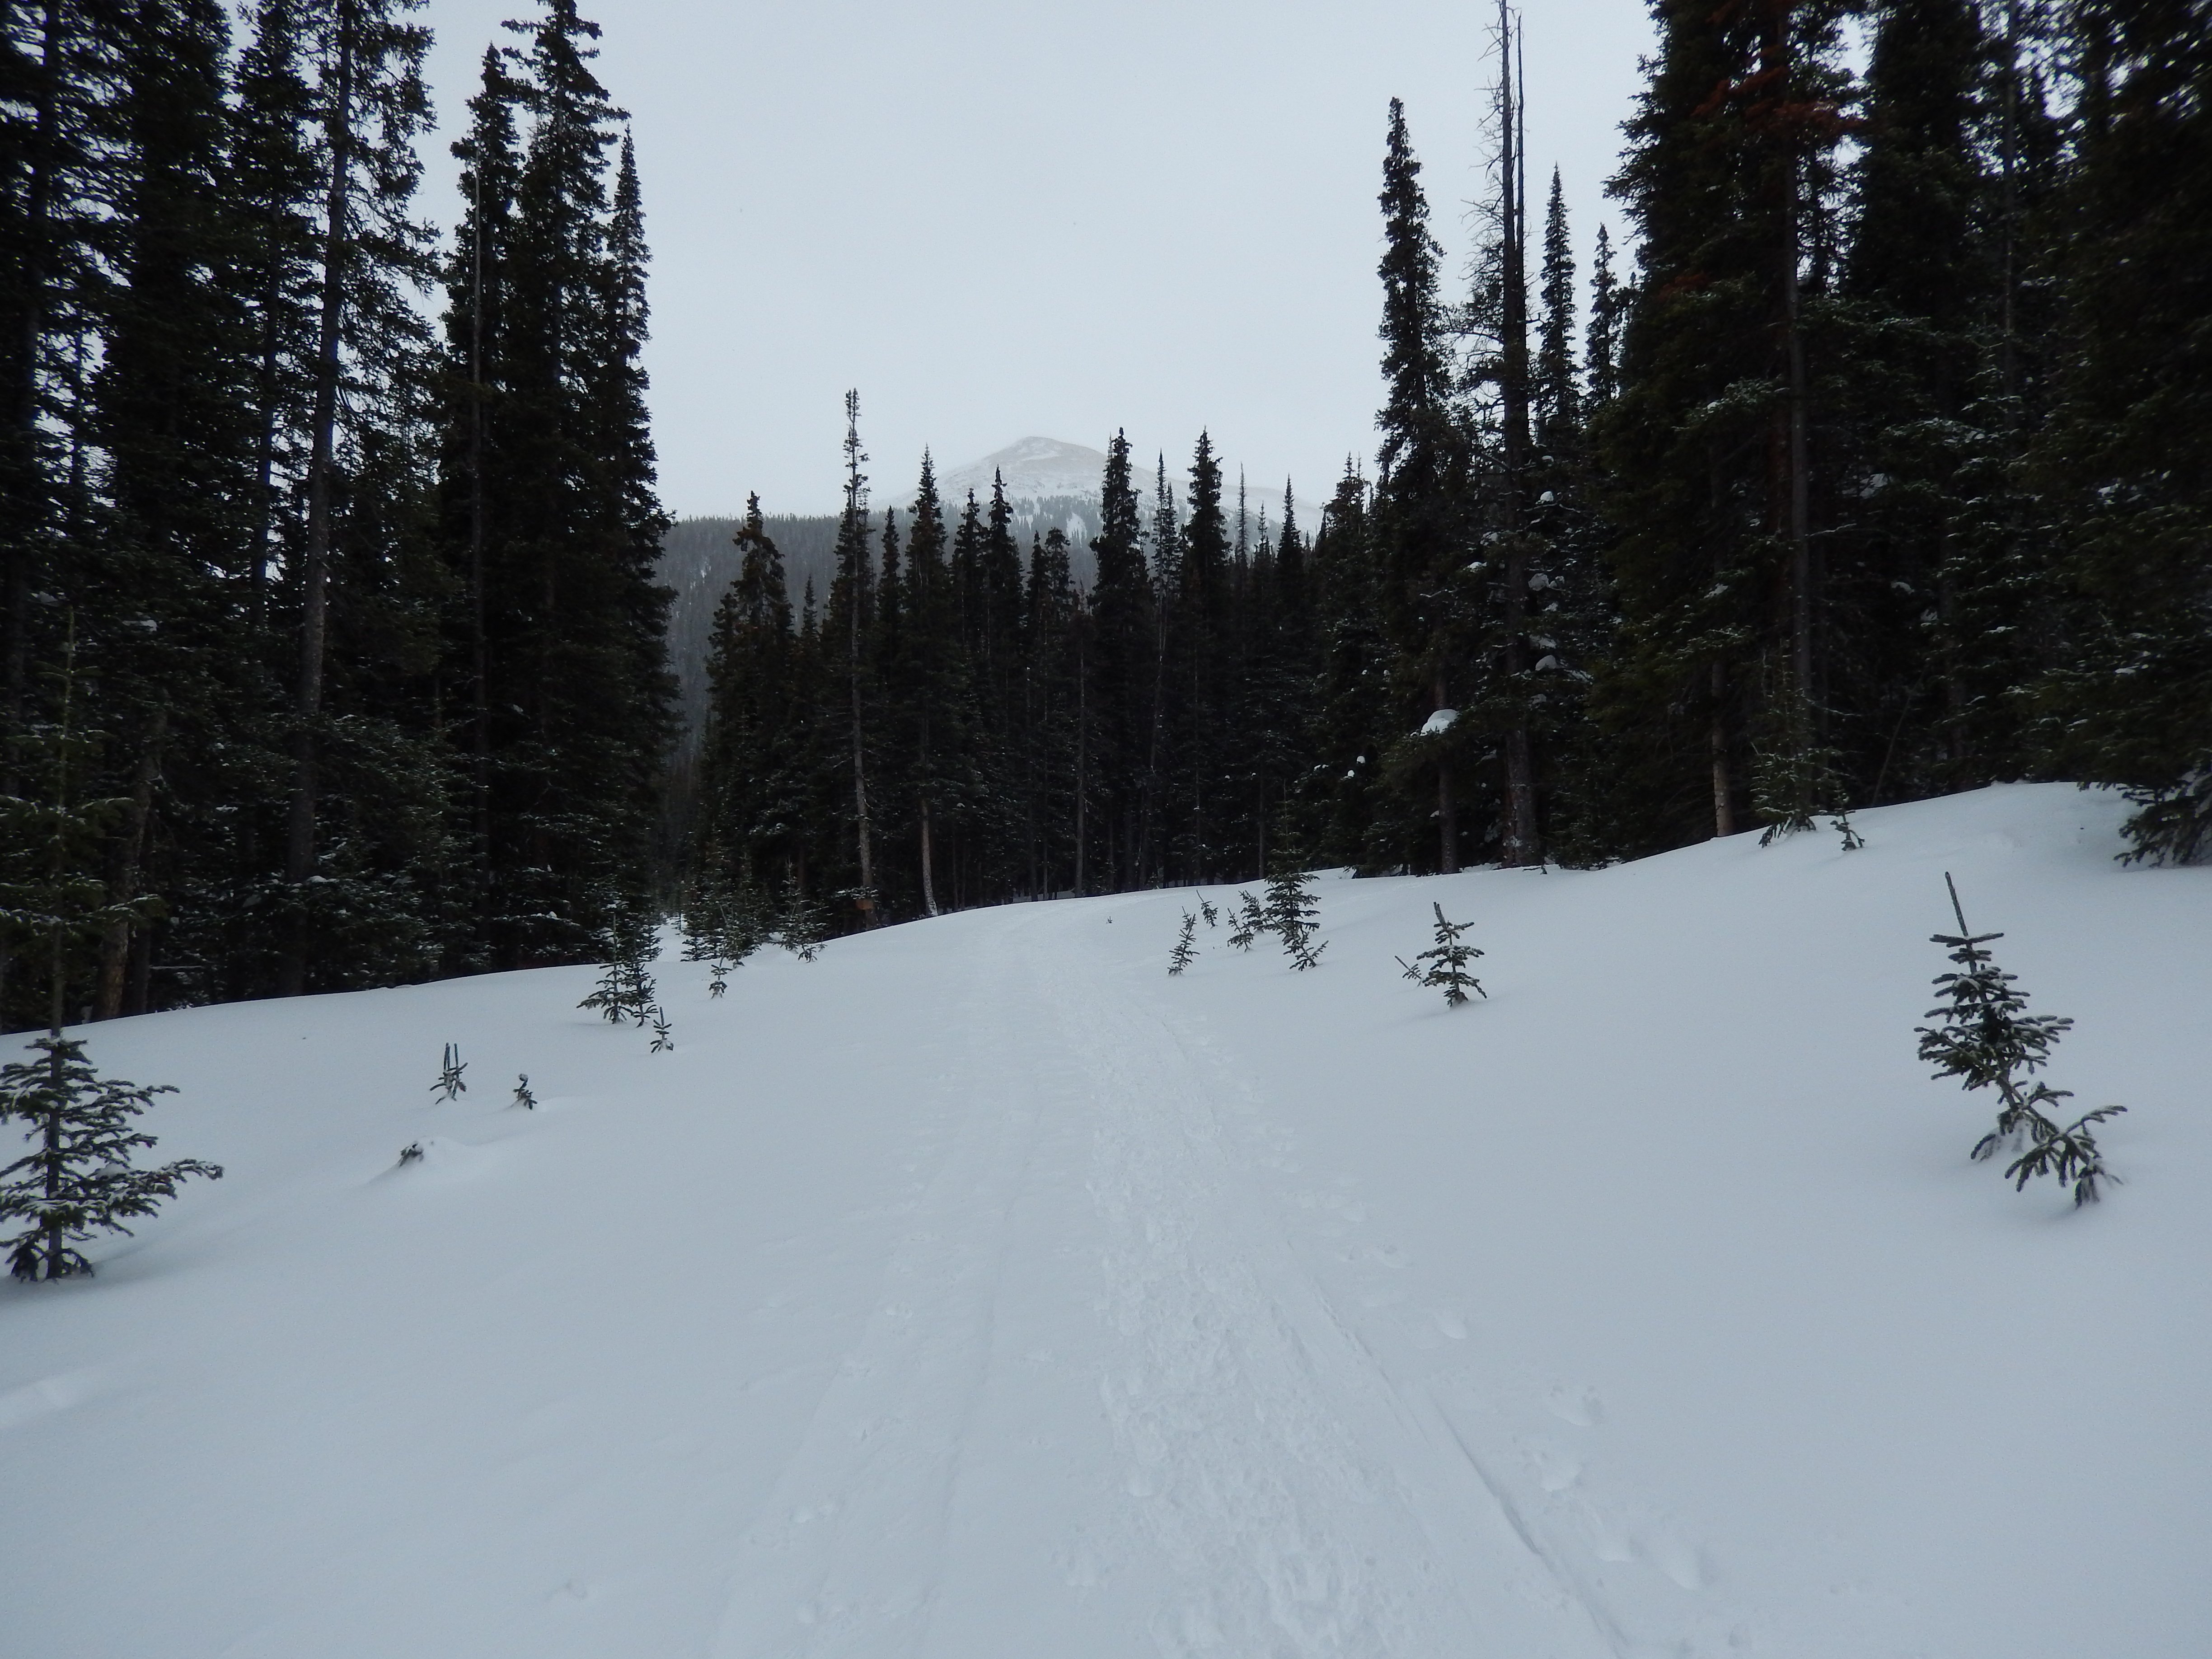
It starts out really well-defined and marked, we took just 5-10 minutes to get to this bridge.
The creek was beautiful and at first the snow was not a big deal, we went along our way for about 20 minutes before the first posthole. Through the trees the postholing was minimal and the views were lovely.
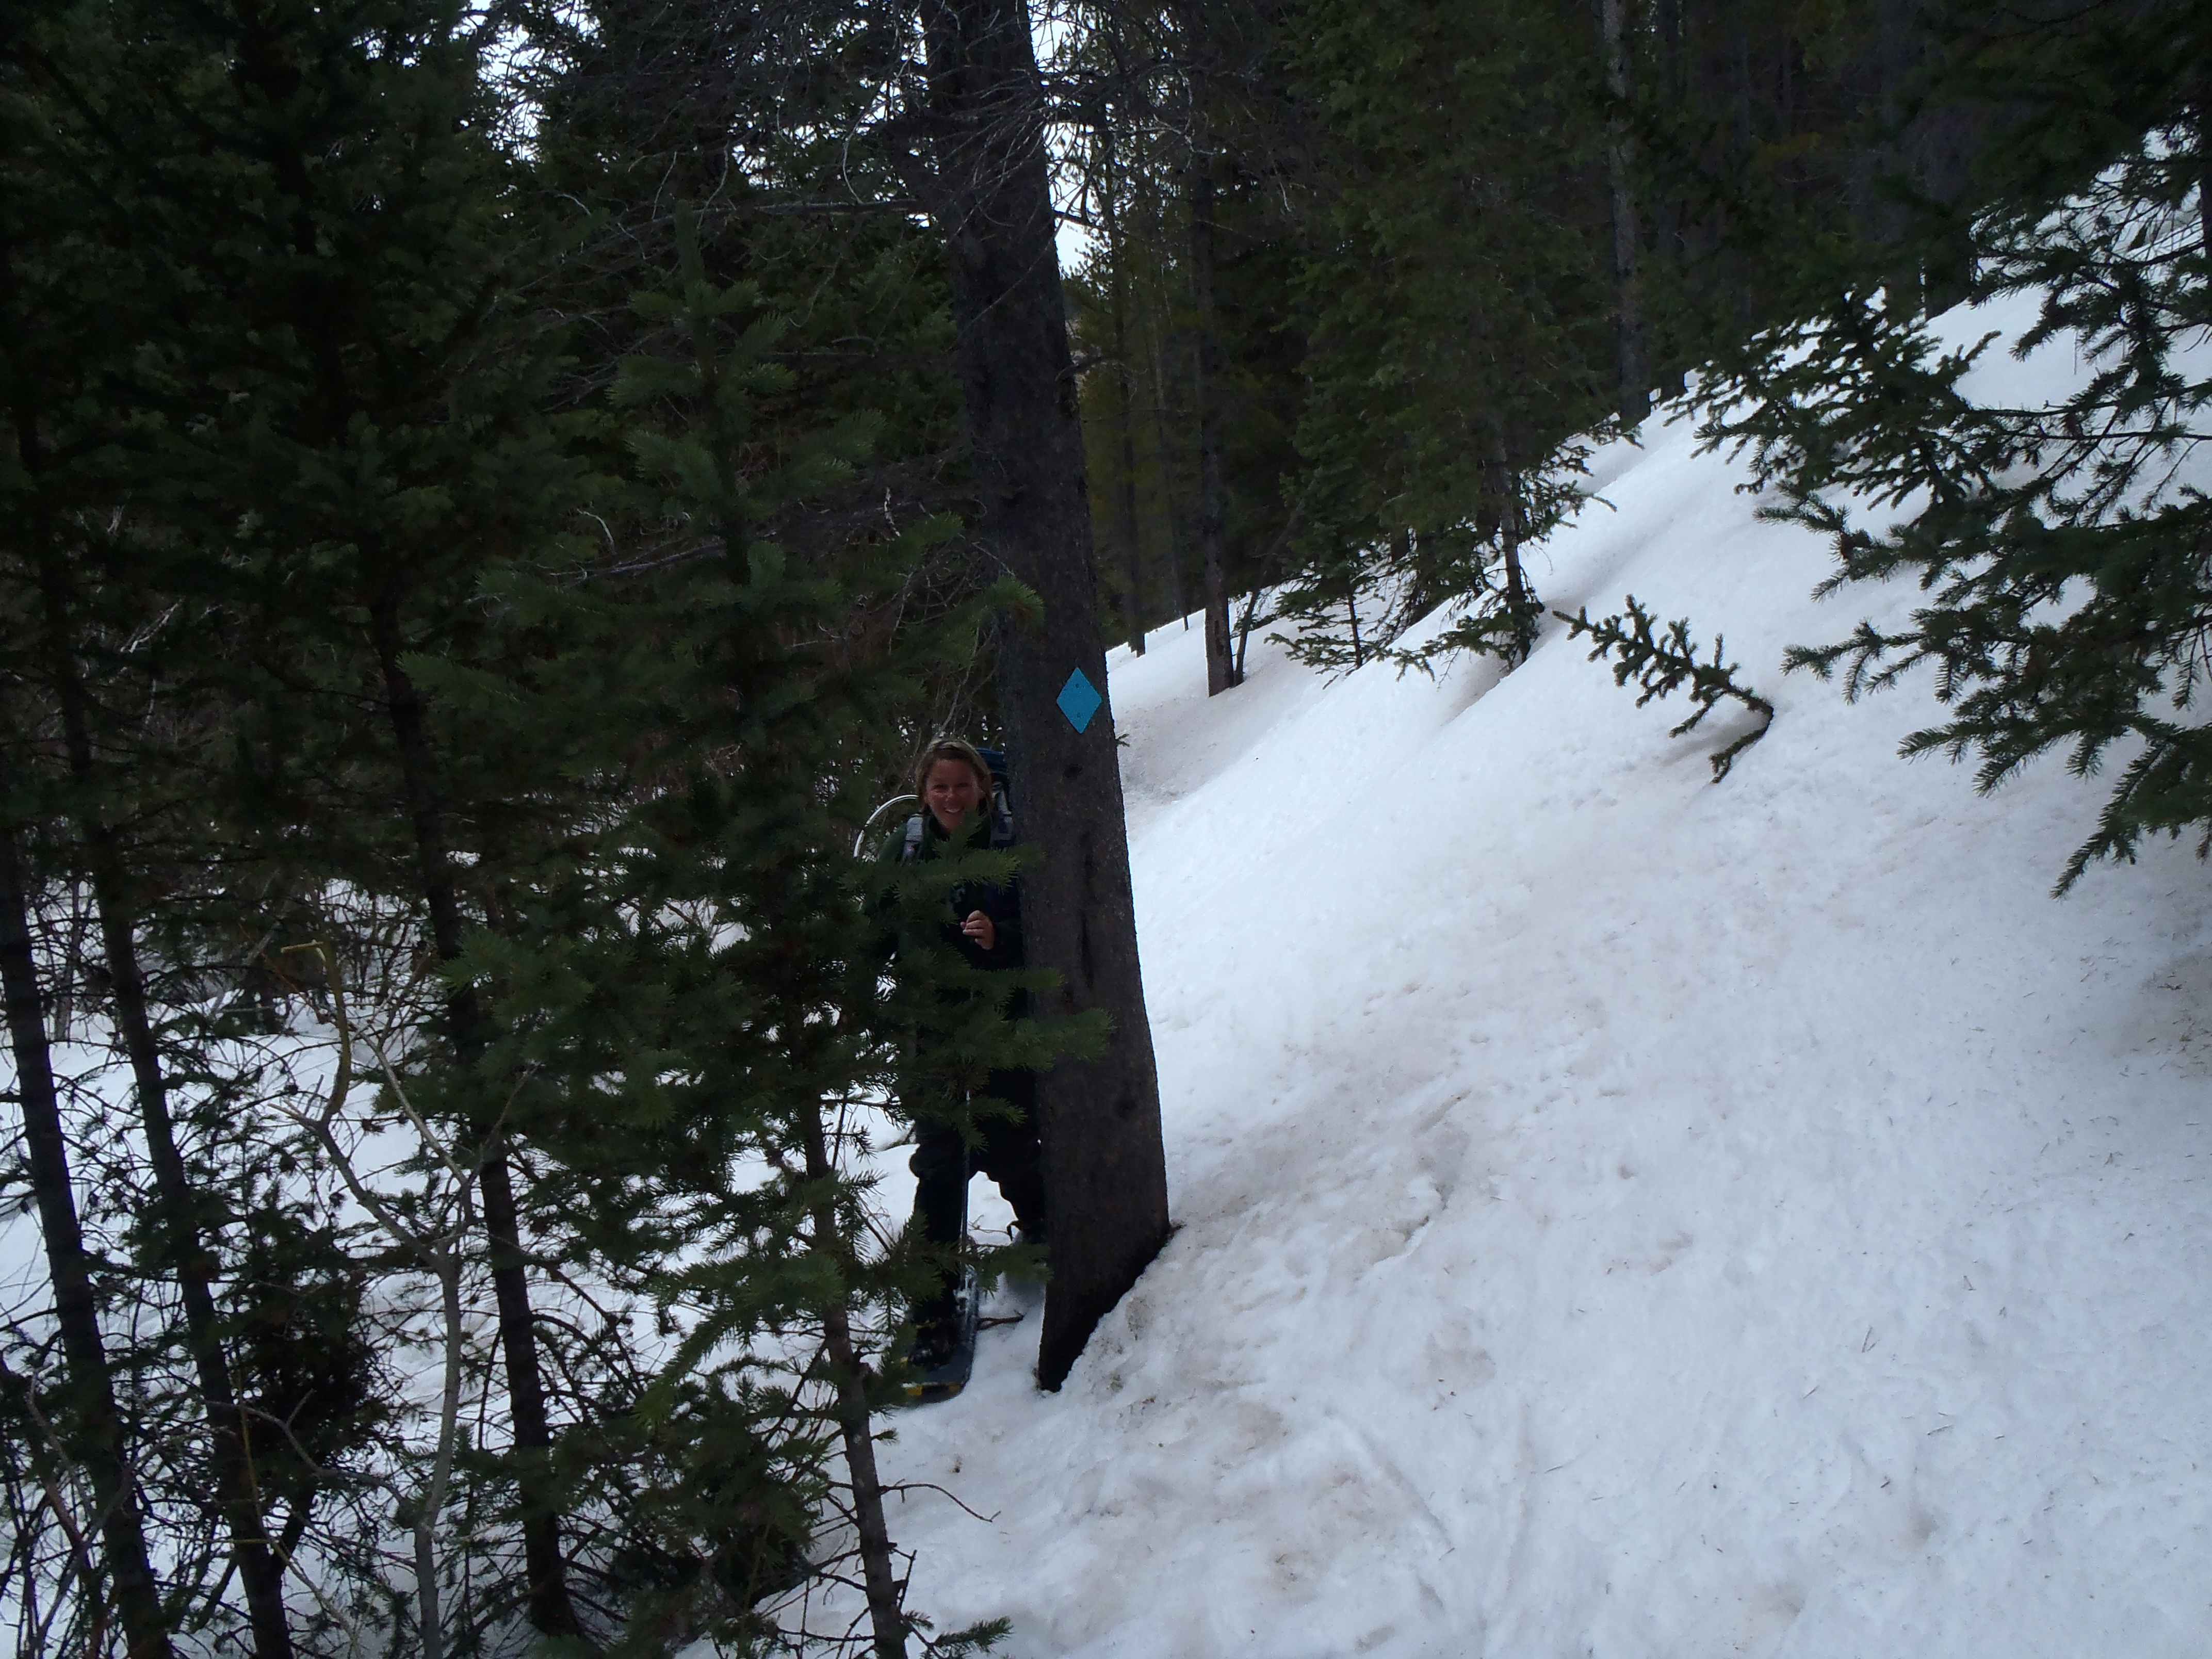
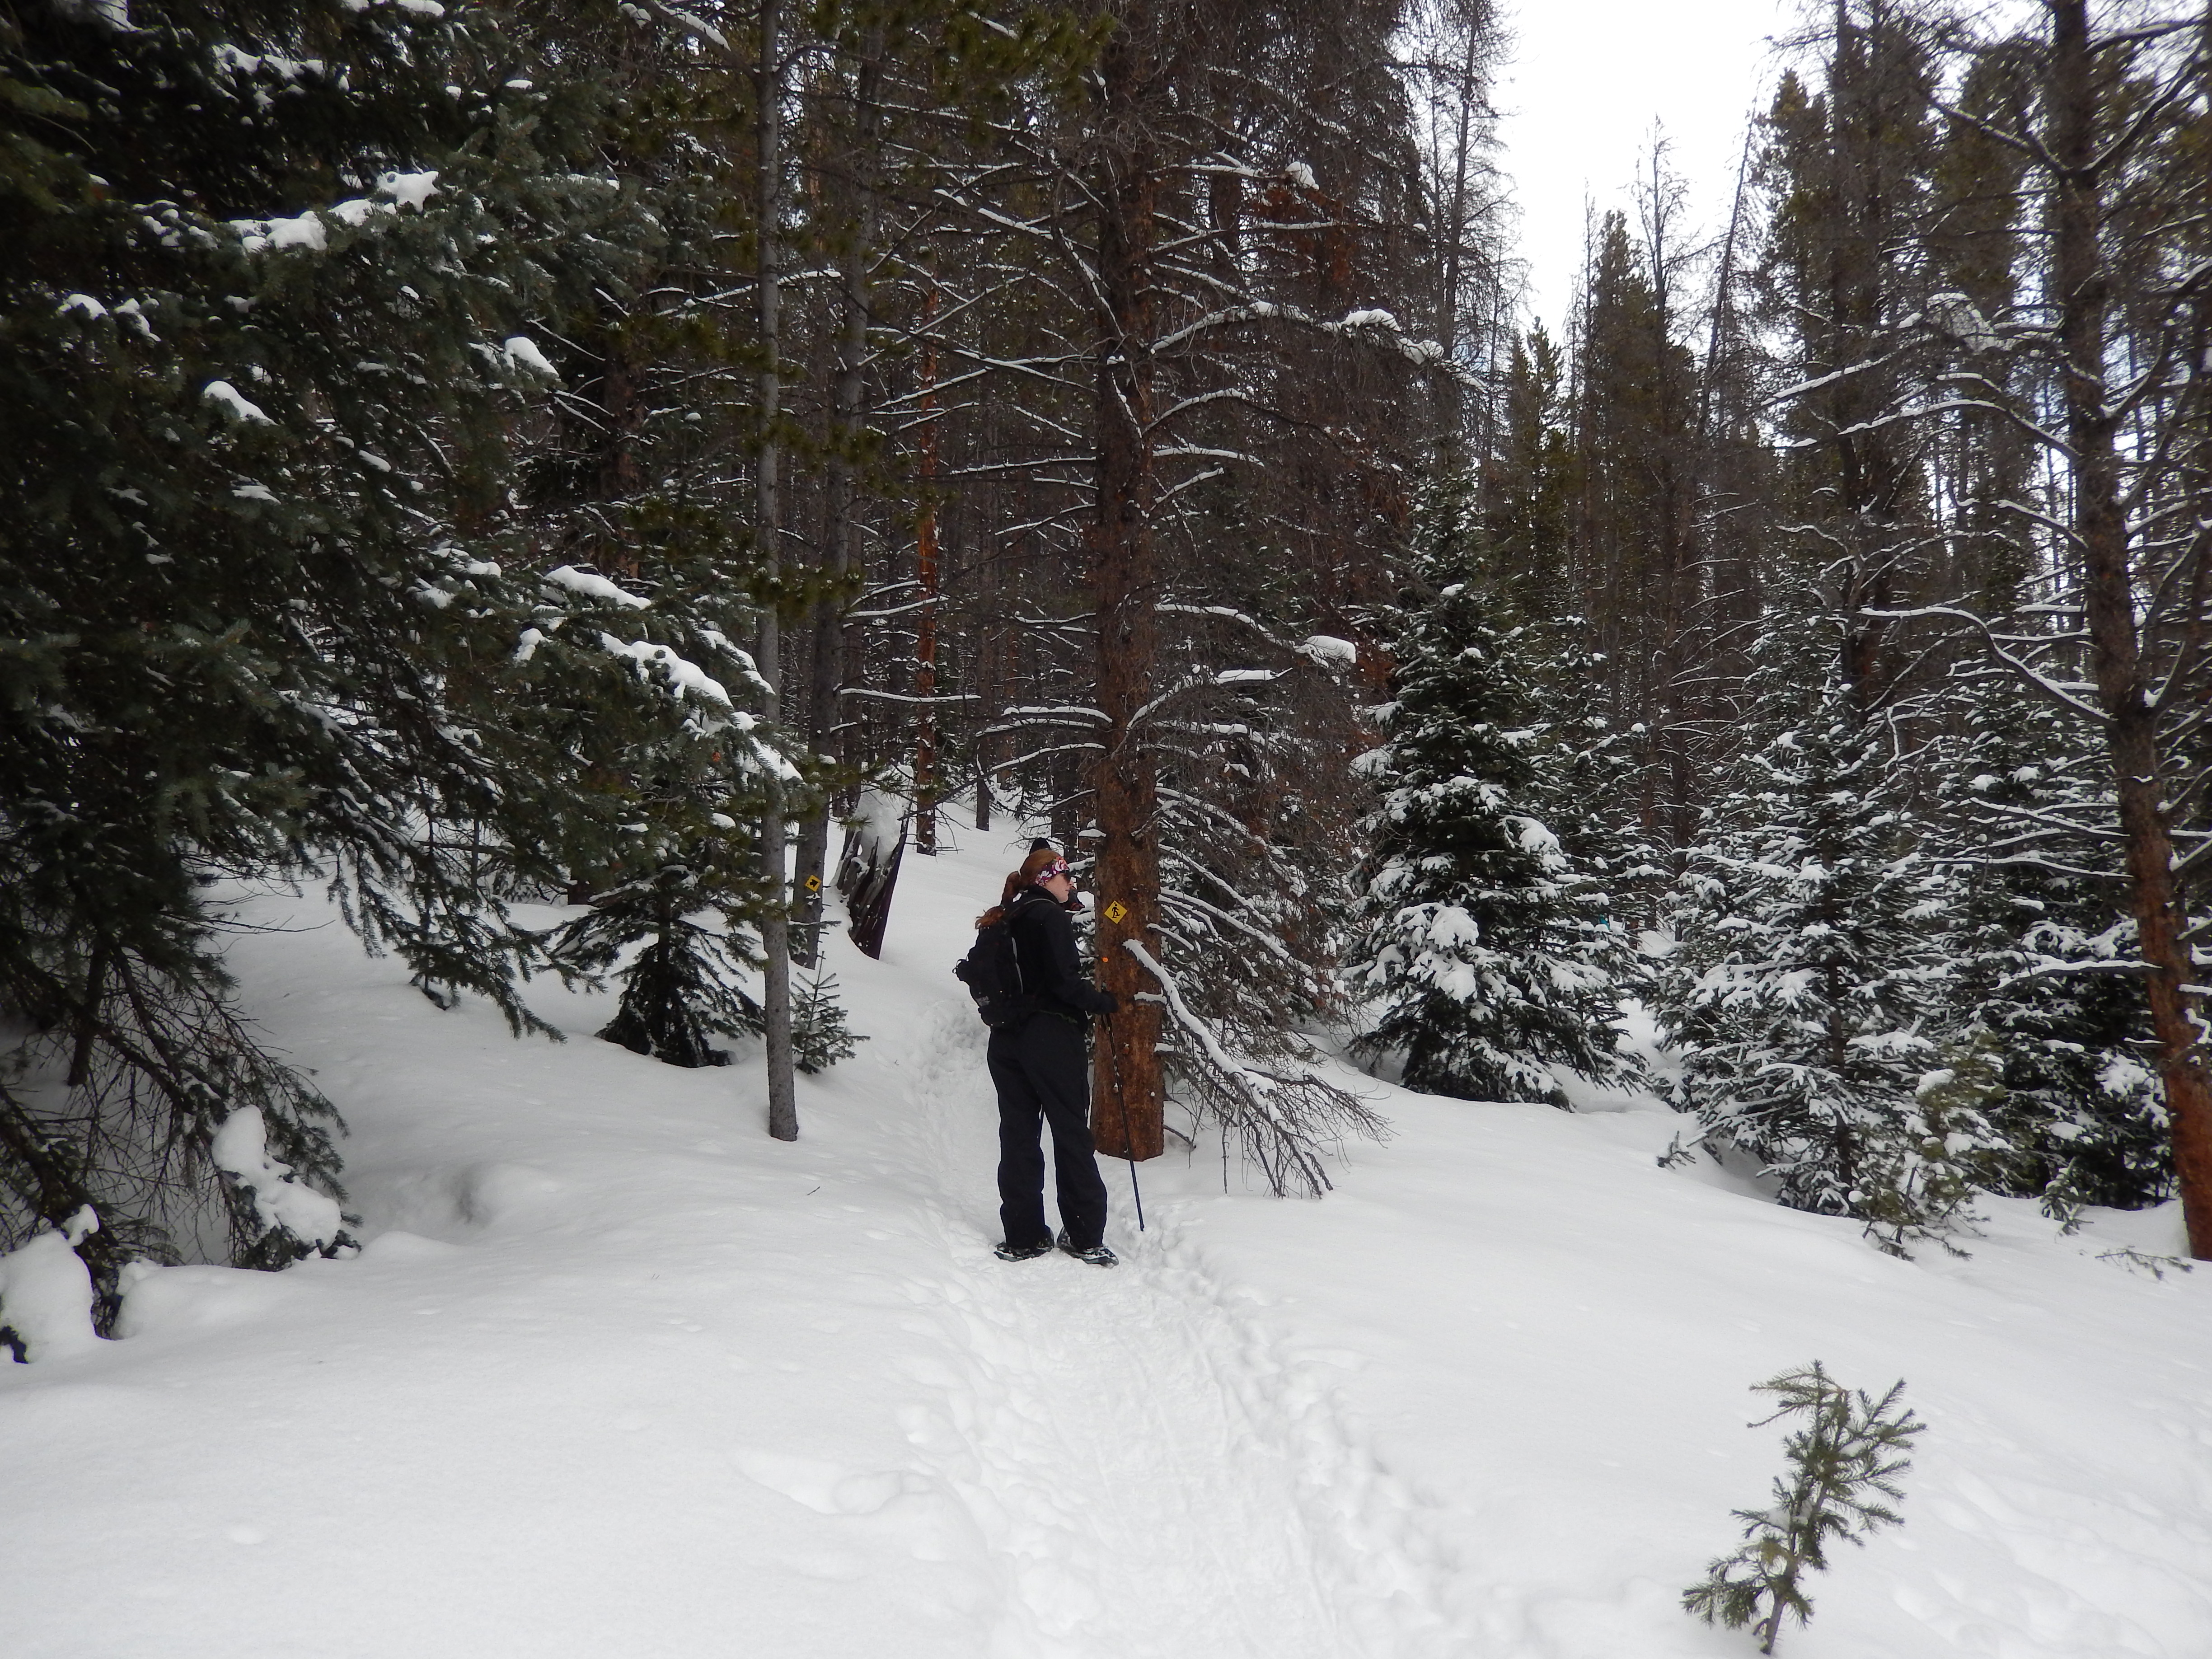
We saw our first trail marker before the meadow of our downfall
This marker is how you follow the trail
We got to this meadow with the next trail sign and the postholing was epic, the last one went above my knee and I hoped Aaron wouldn’t break through when he came over to help me out. Then we shuffled to the most stable spot we could find and put on our snowshoes, just a little more than half mile from the trailhead.
It was much easier going with our snowshoes one, the trail skirts this huge meadow for around a mile when there is supposed to be a trail break left takes you to the ridge( Our destination) or further. While right takes you around the meadow back to Guanella Pass Road (Park CO 62). We noticed lots of old tracks heading left 5-6 times looking for the right path. You really need to follow the meadow for about a mile, maybe a little more with the trees on the left. Once the trail reached the trees we went left, saw a marker and knew we were on the correct path. We were also now thoroughly in the trees with a nice slow climb.
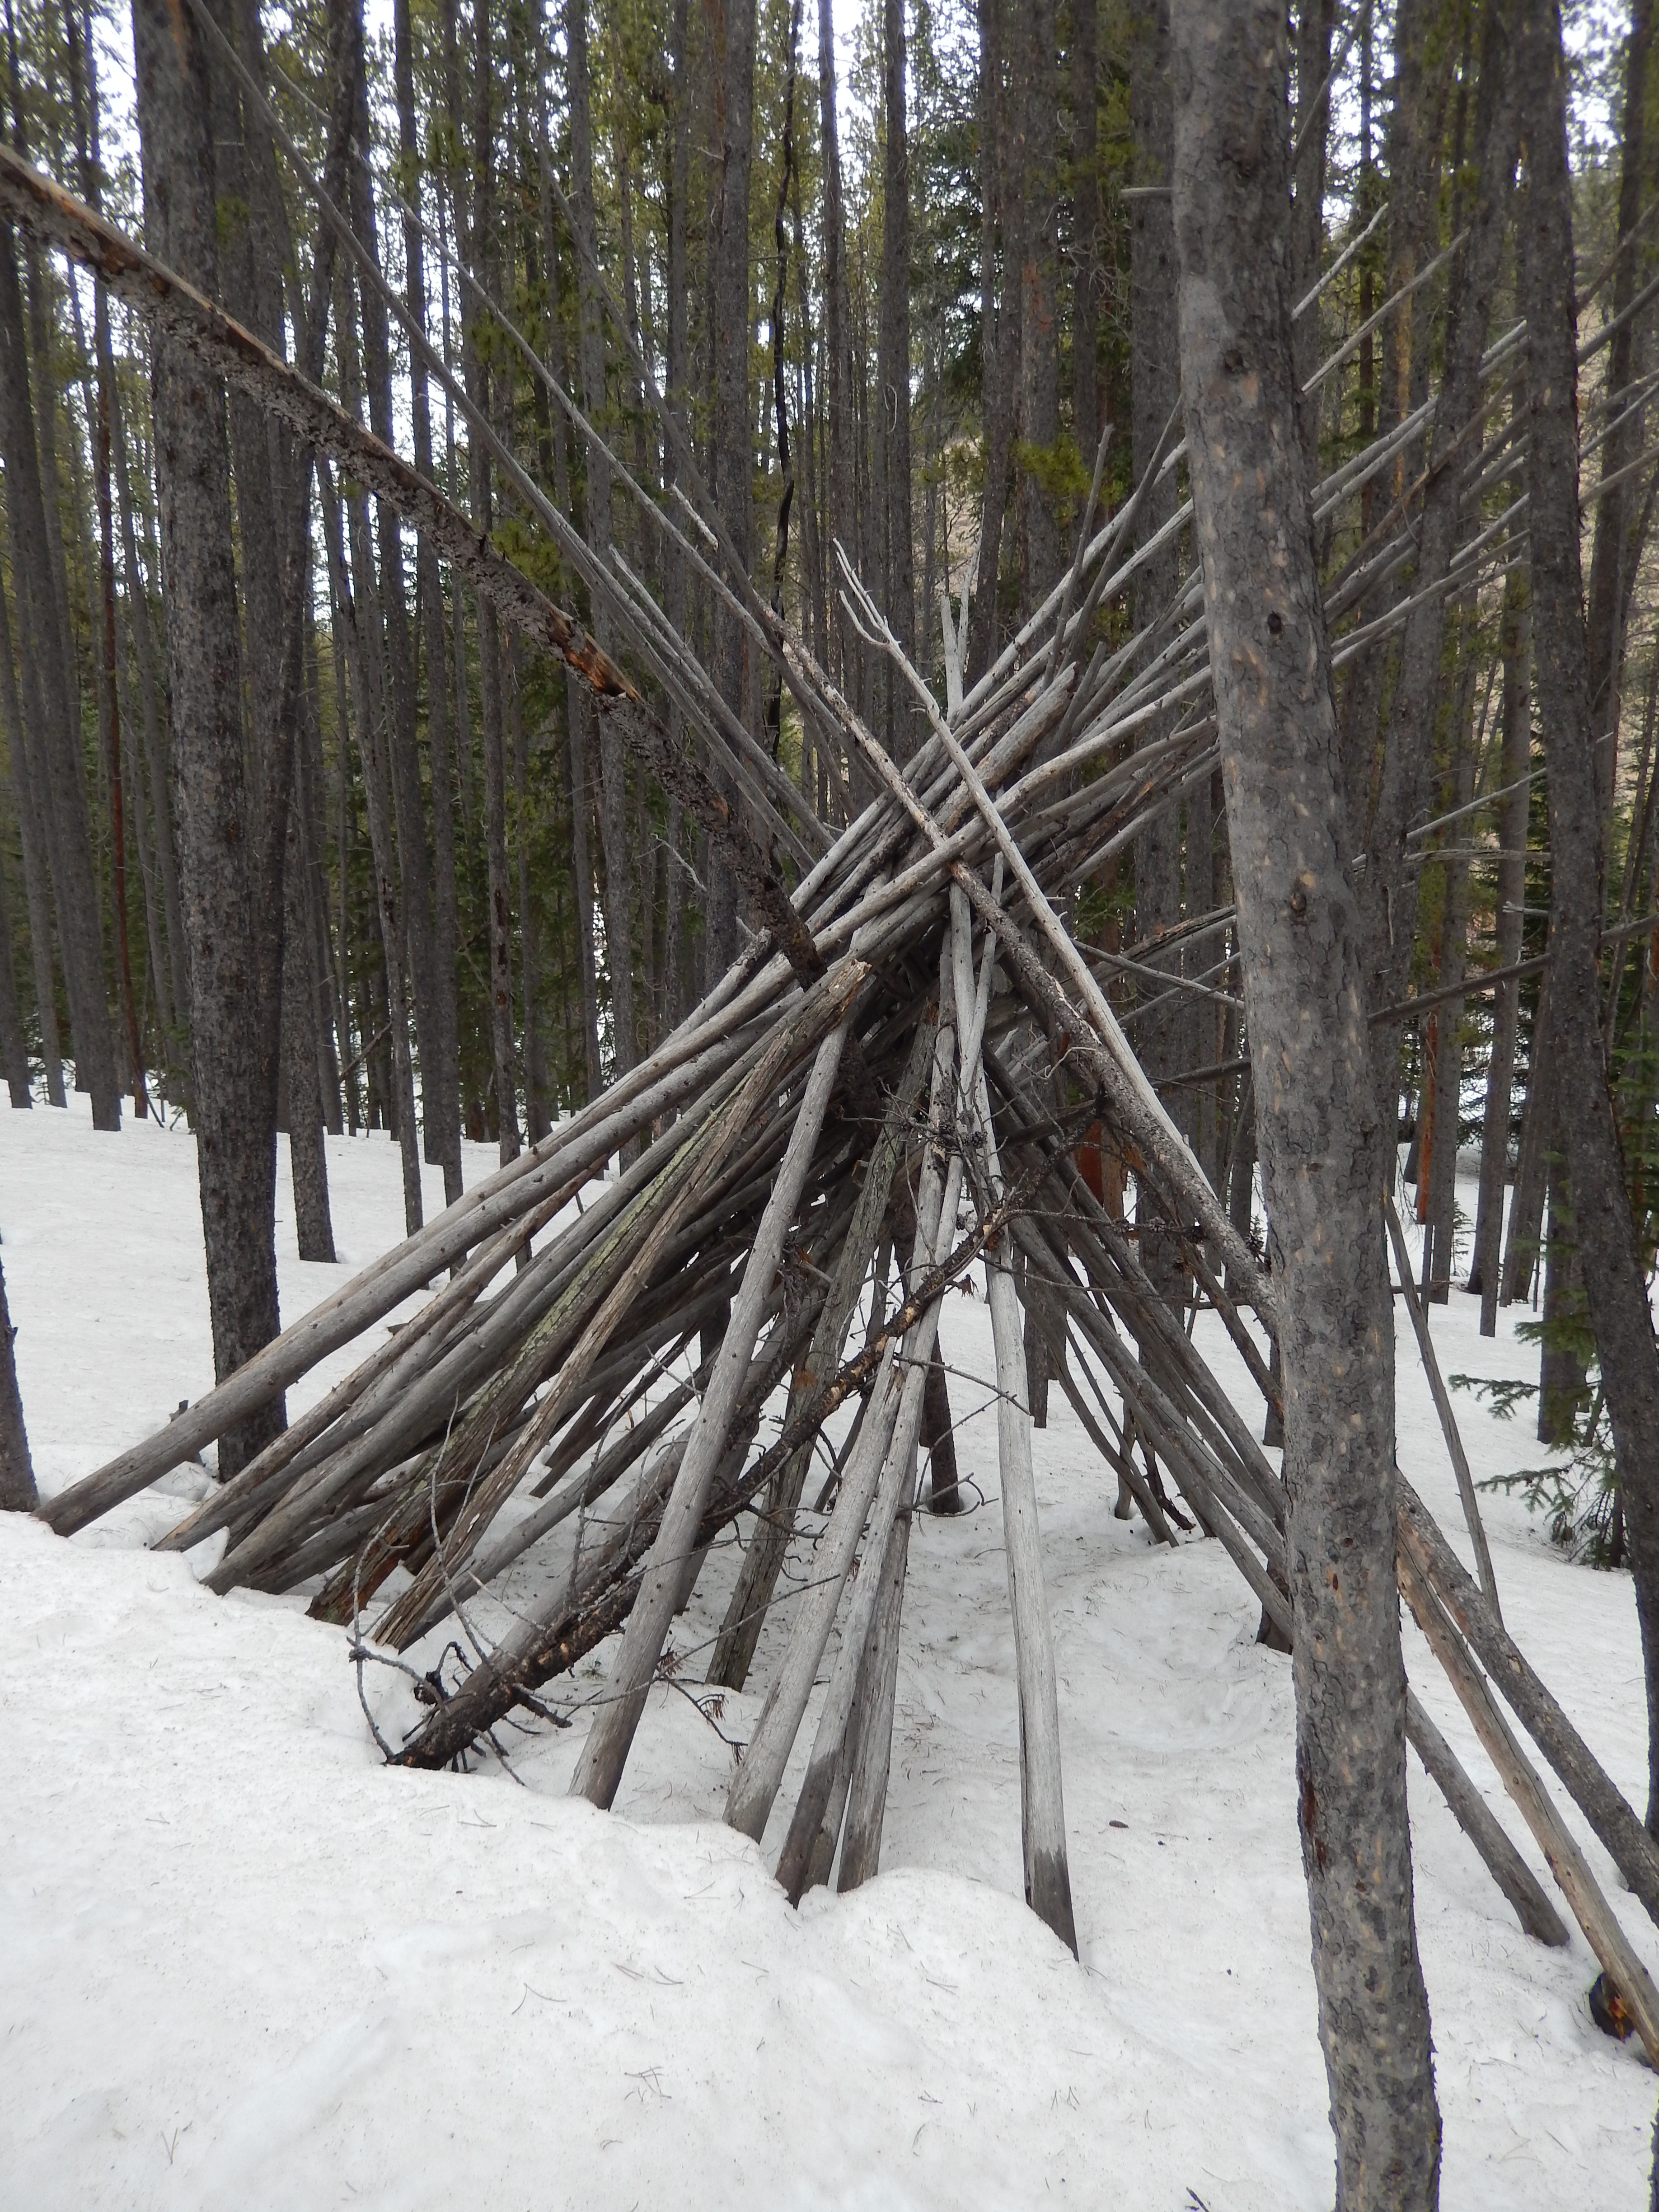
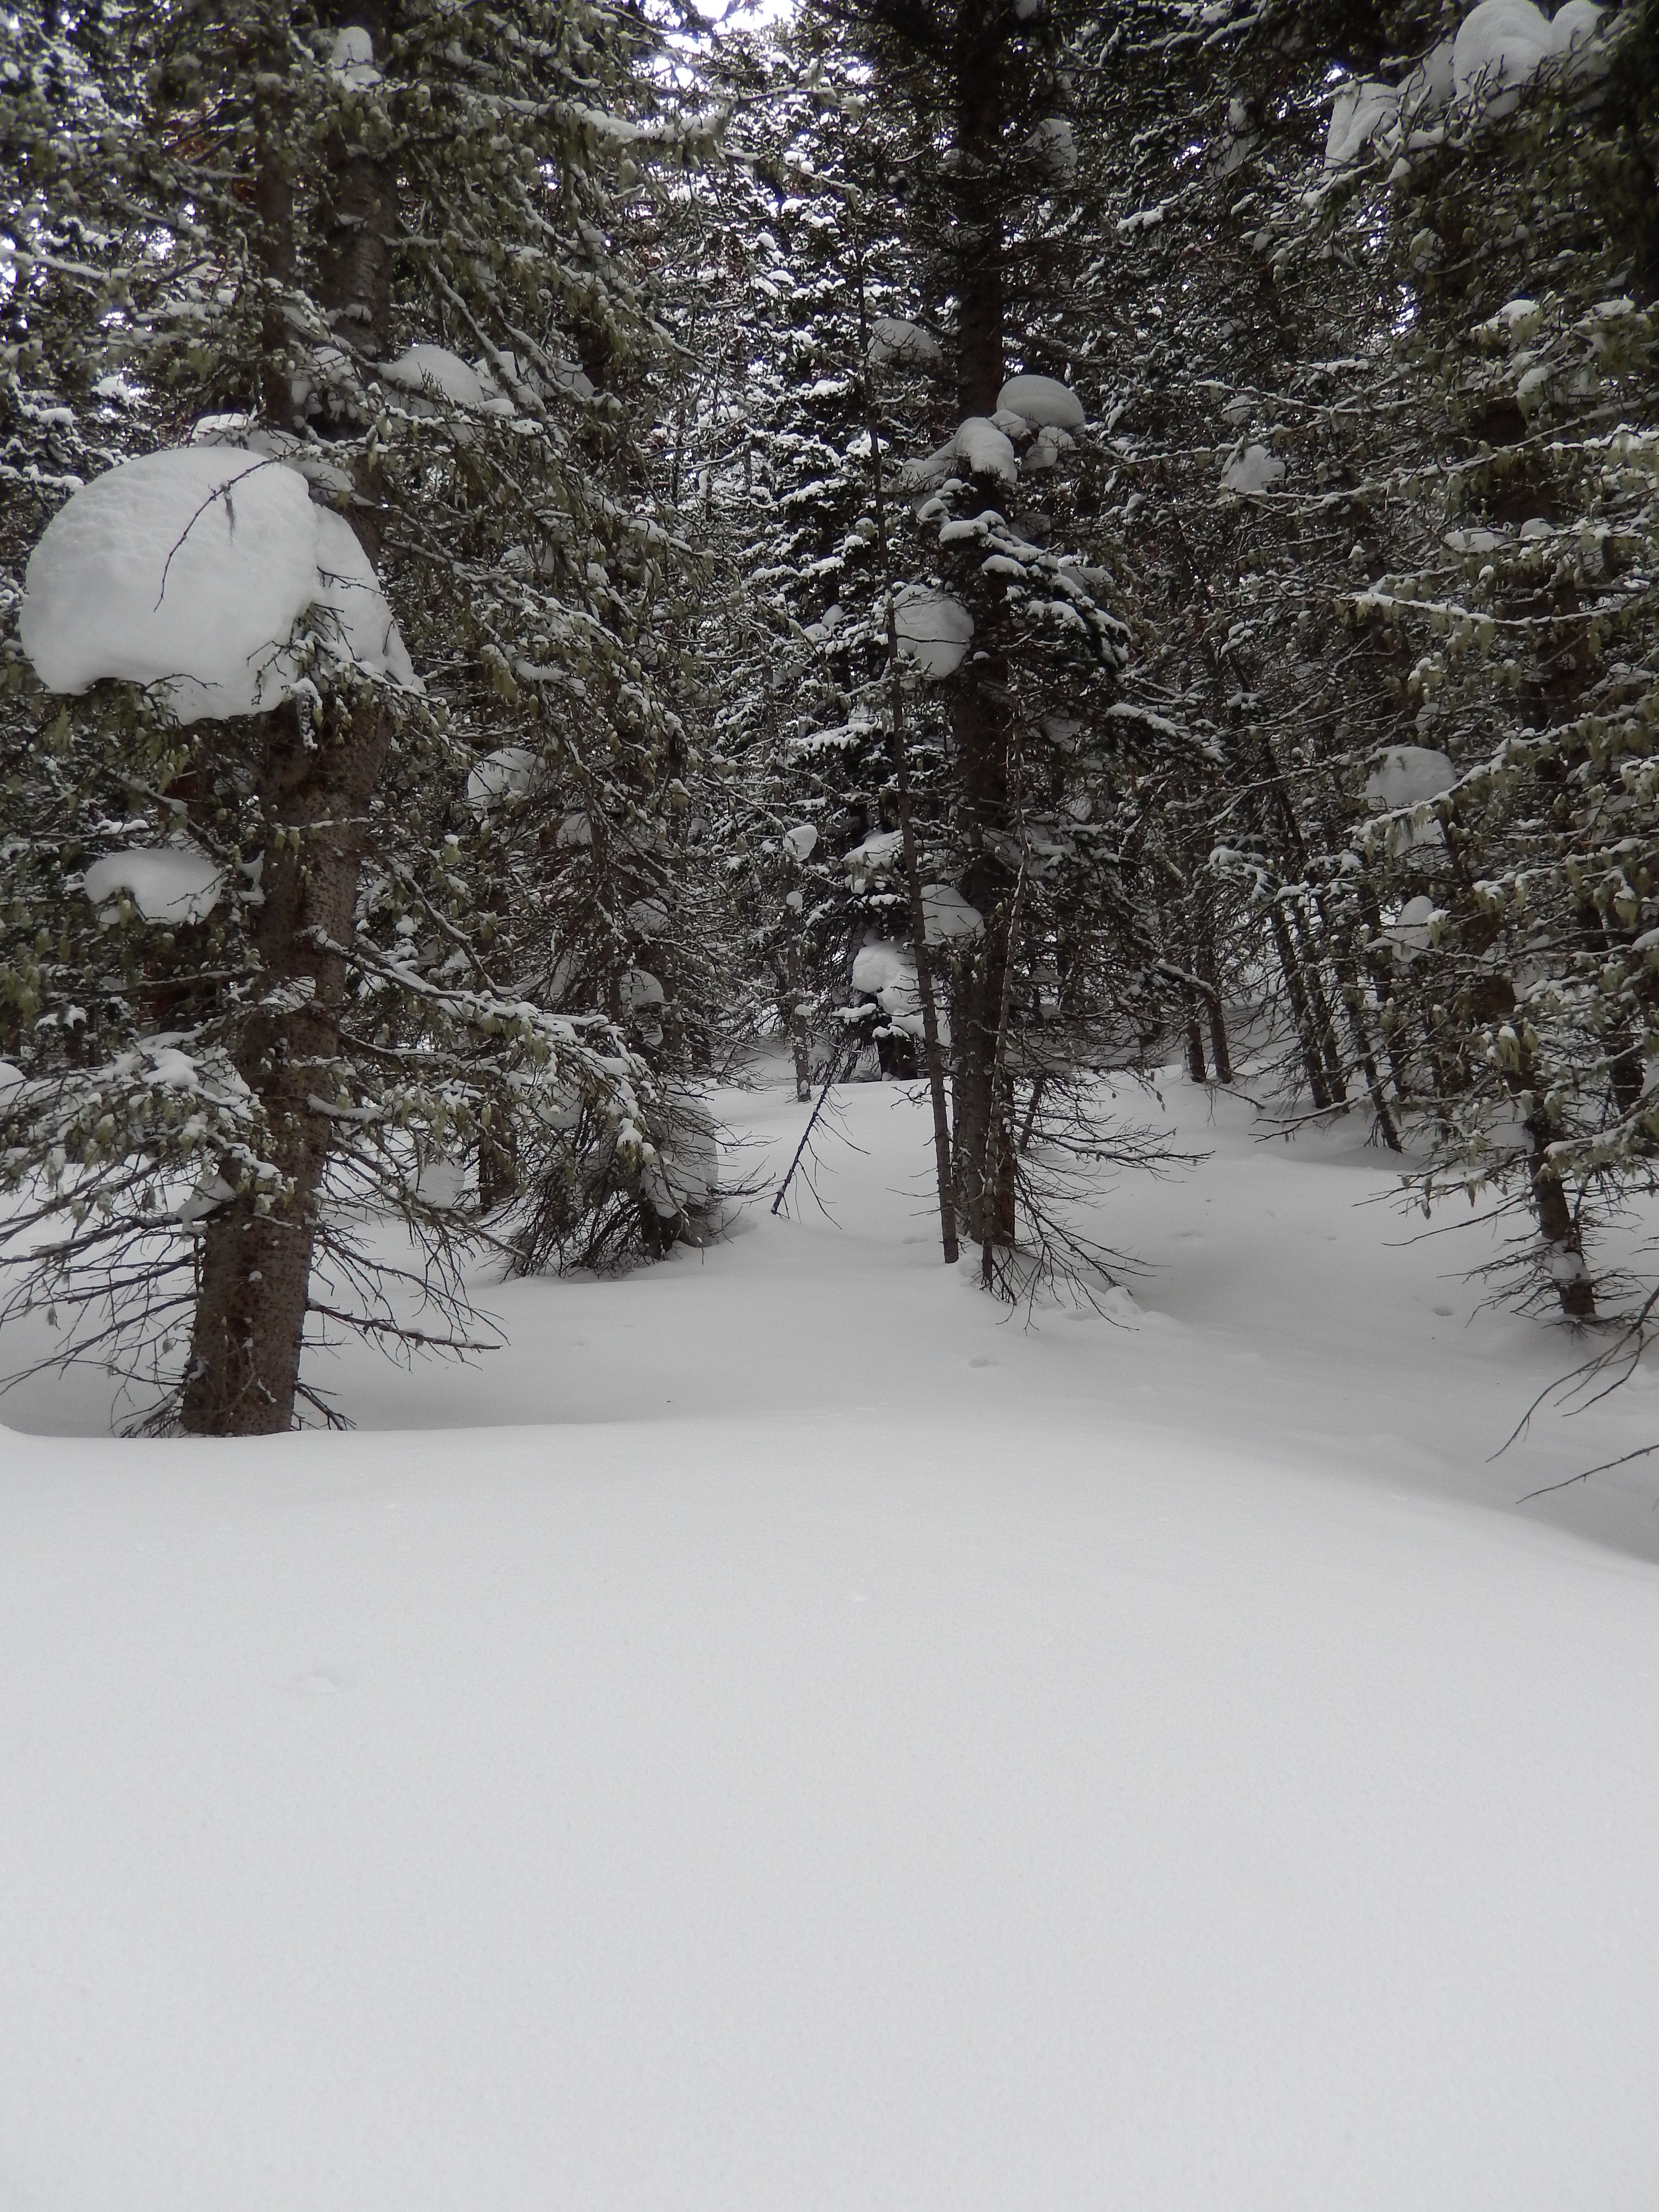
It was in this section we passed this tepee, it made me wonder under what circumstances it was built because it had to take some time to gather all those trees.
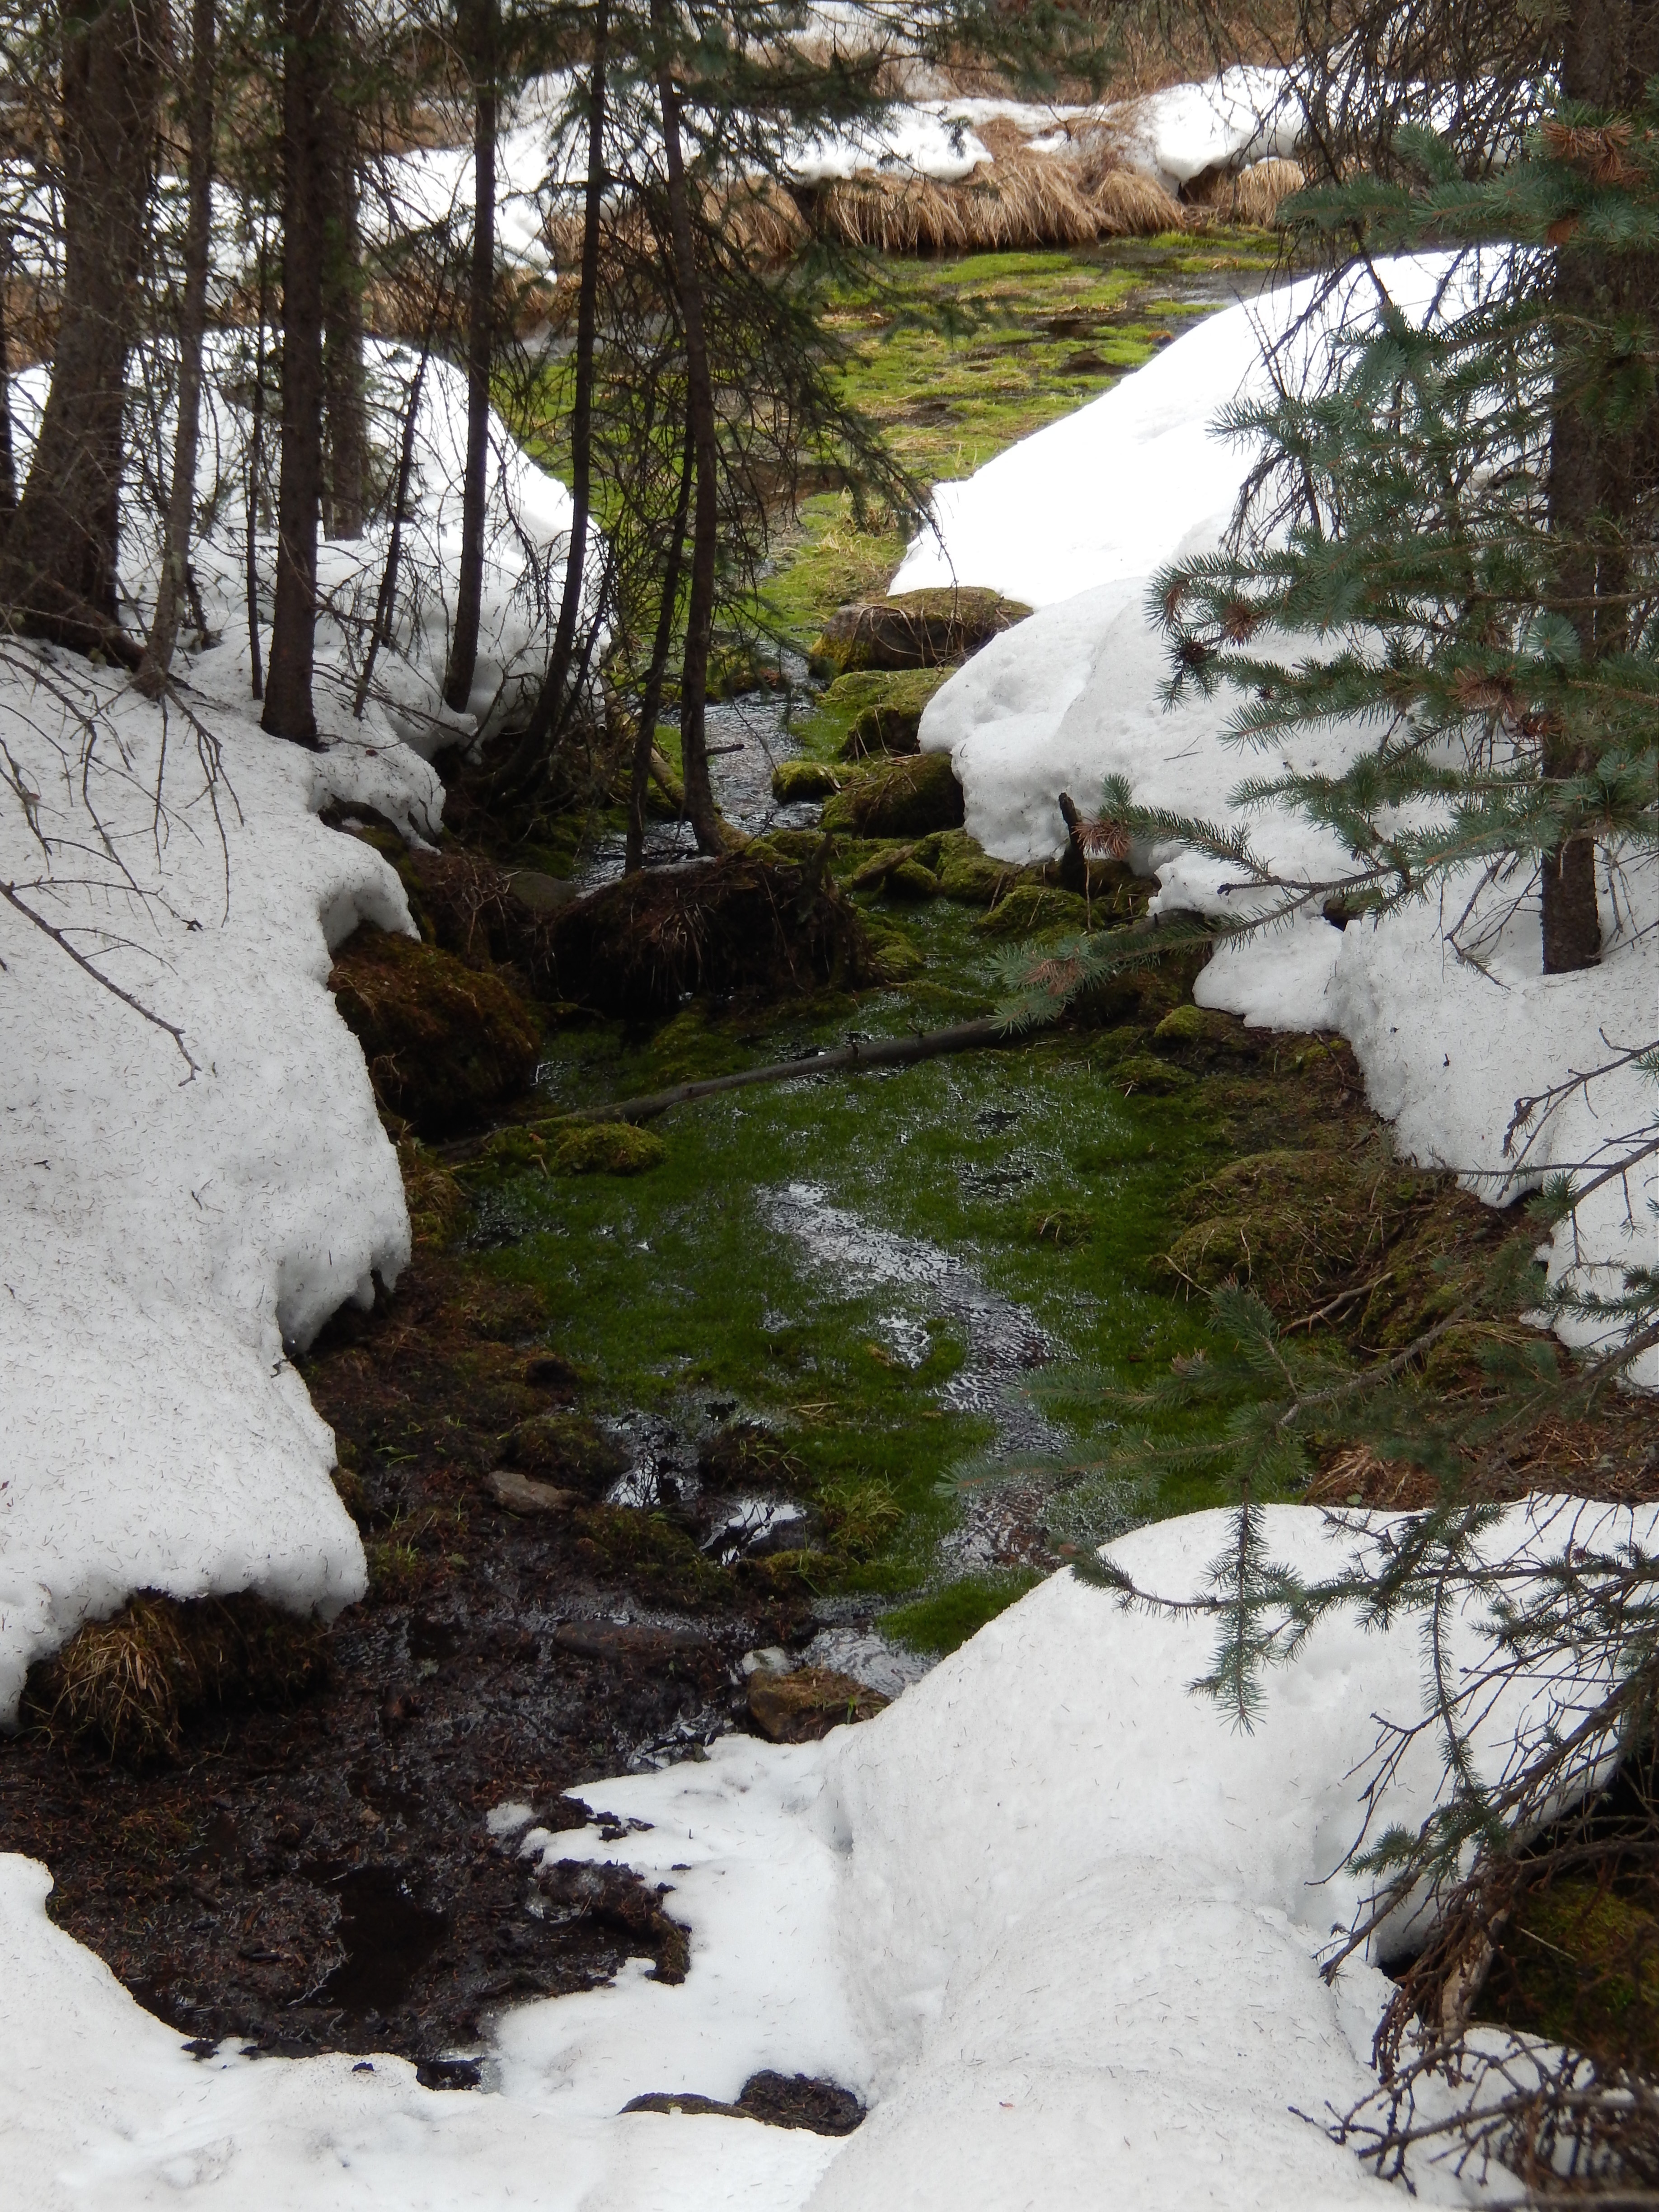
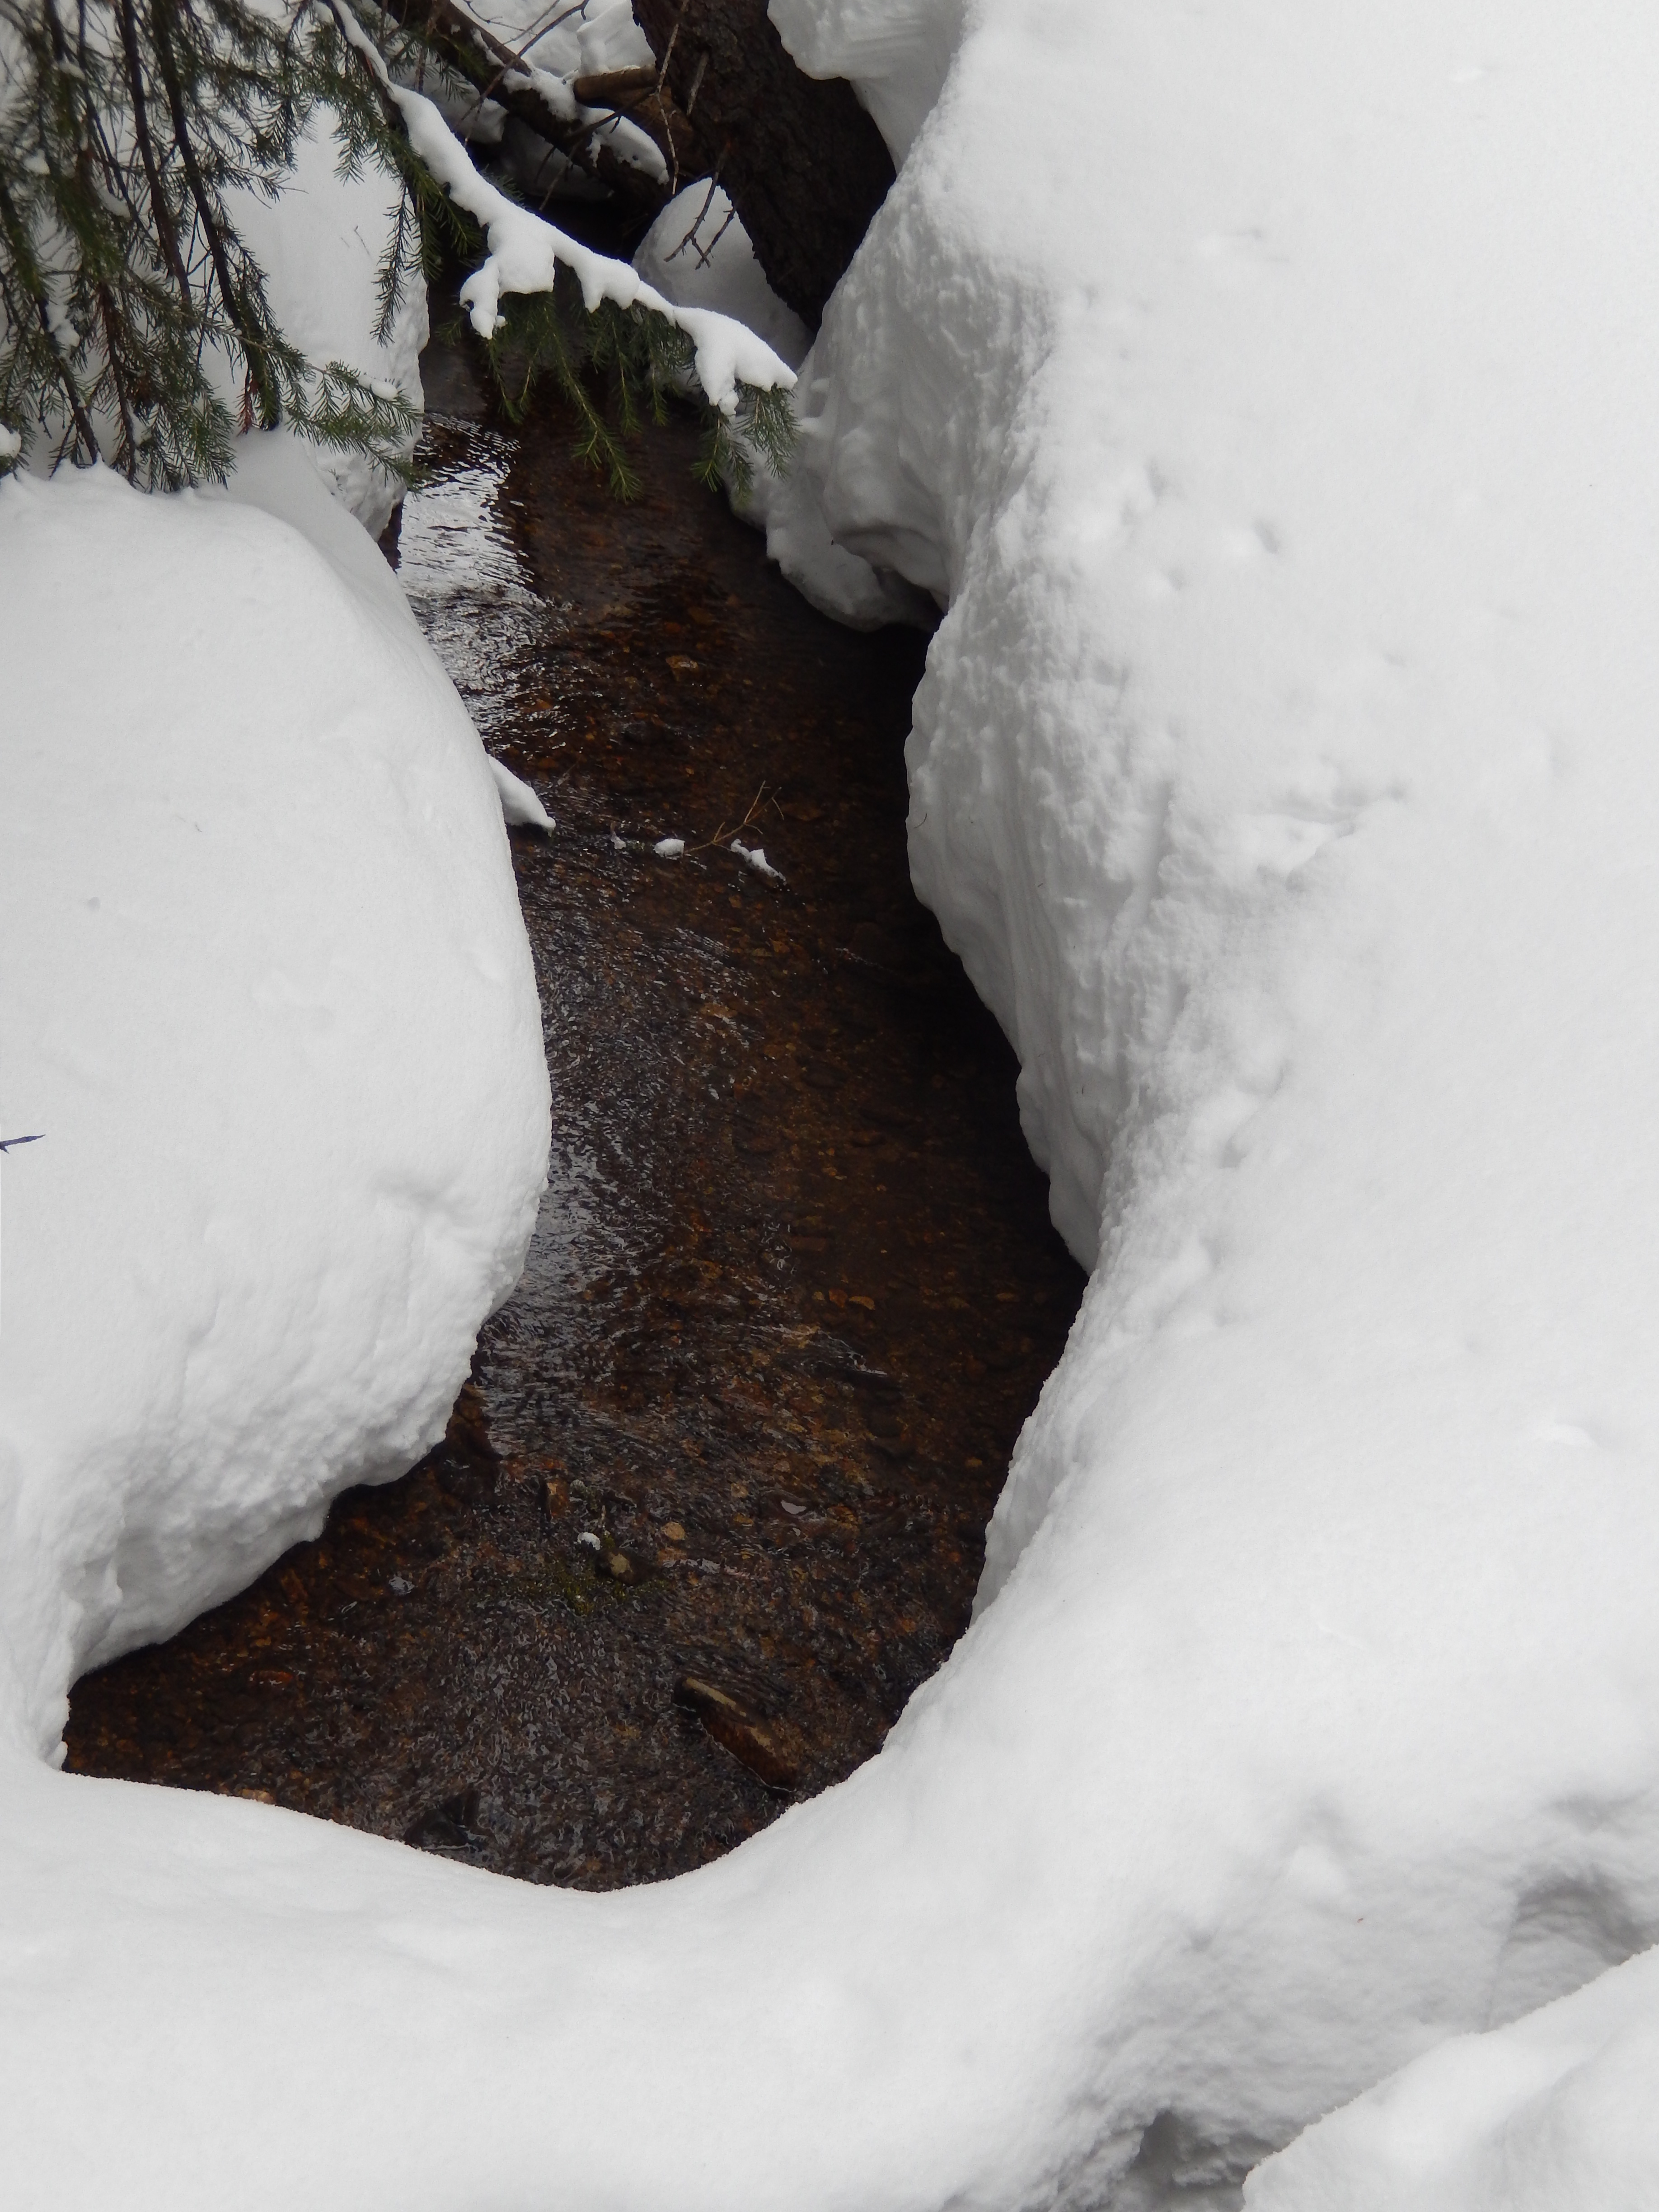
From here we wove over and around the creek.
Along the Creek
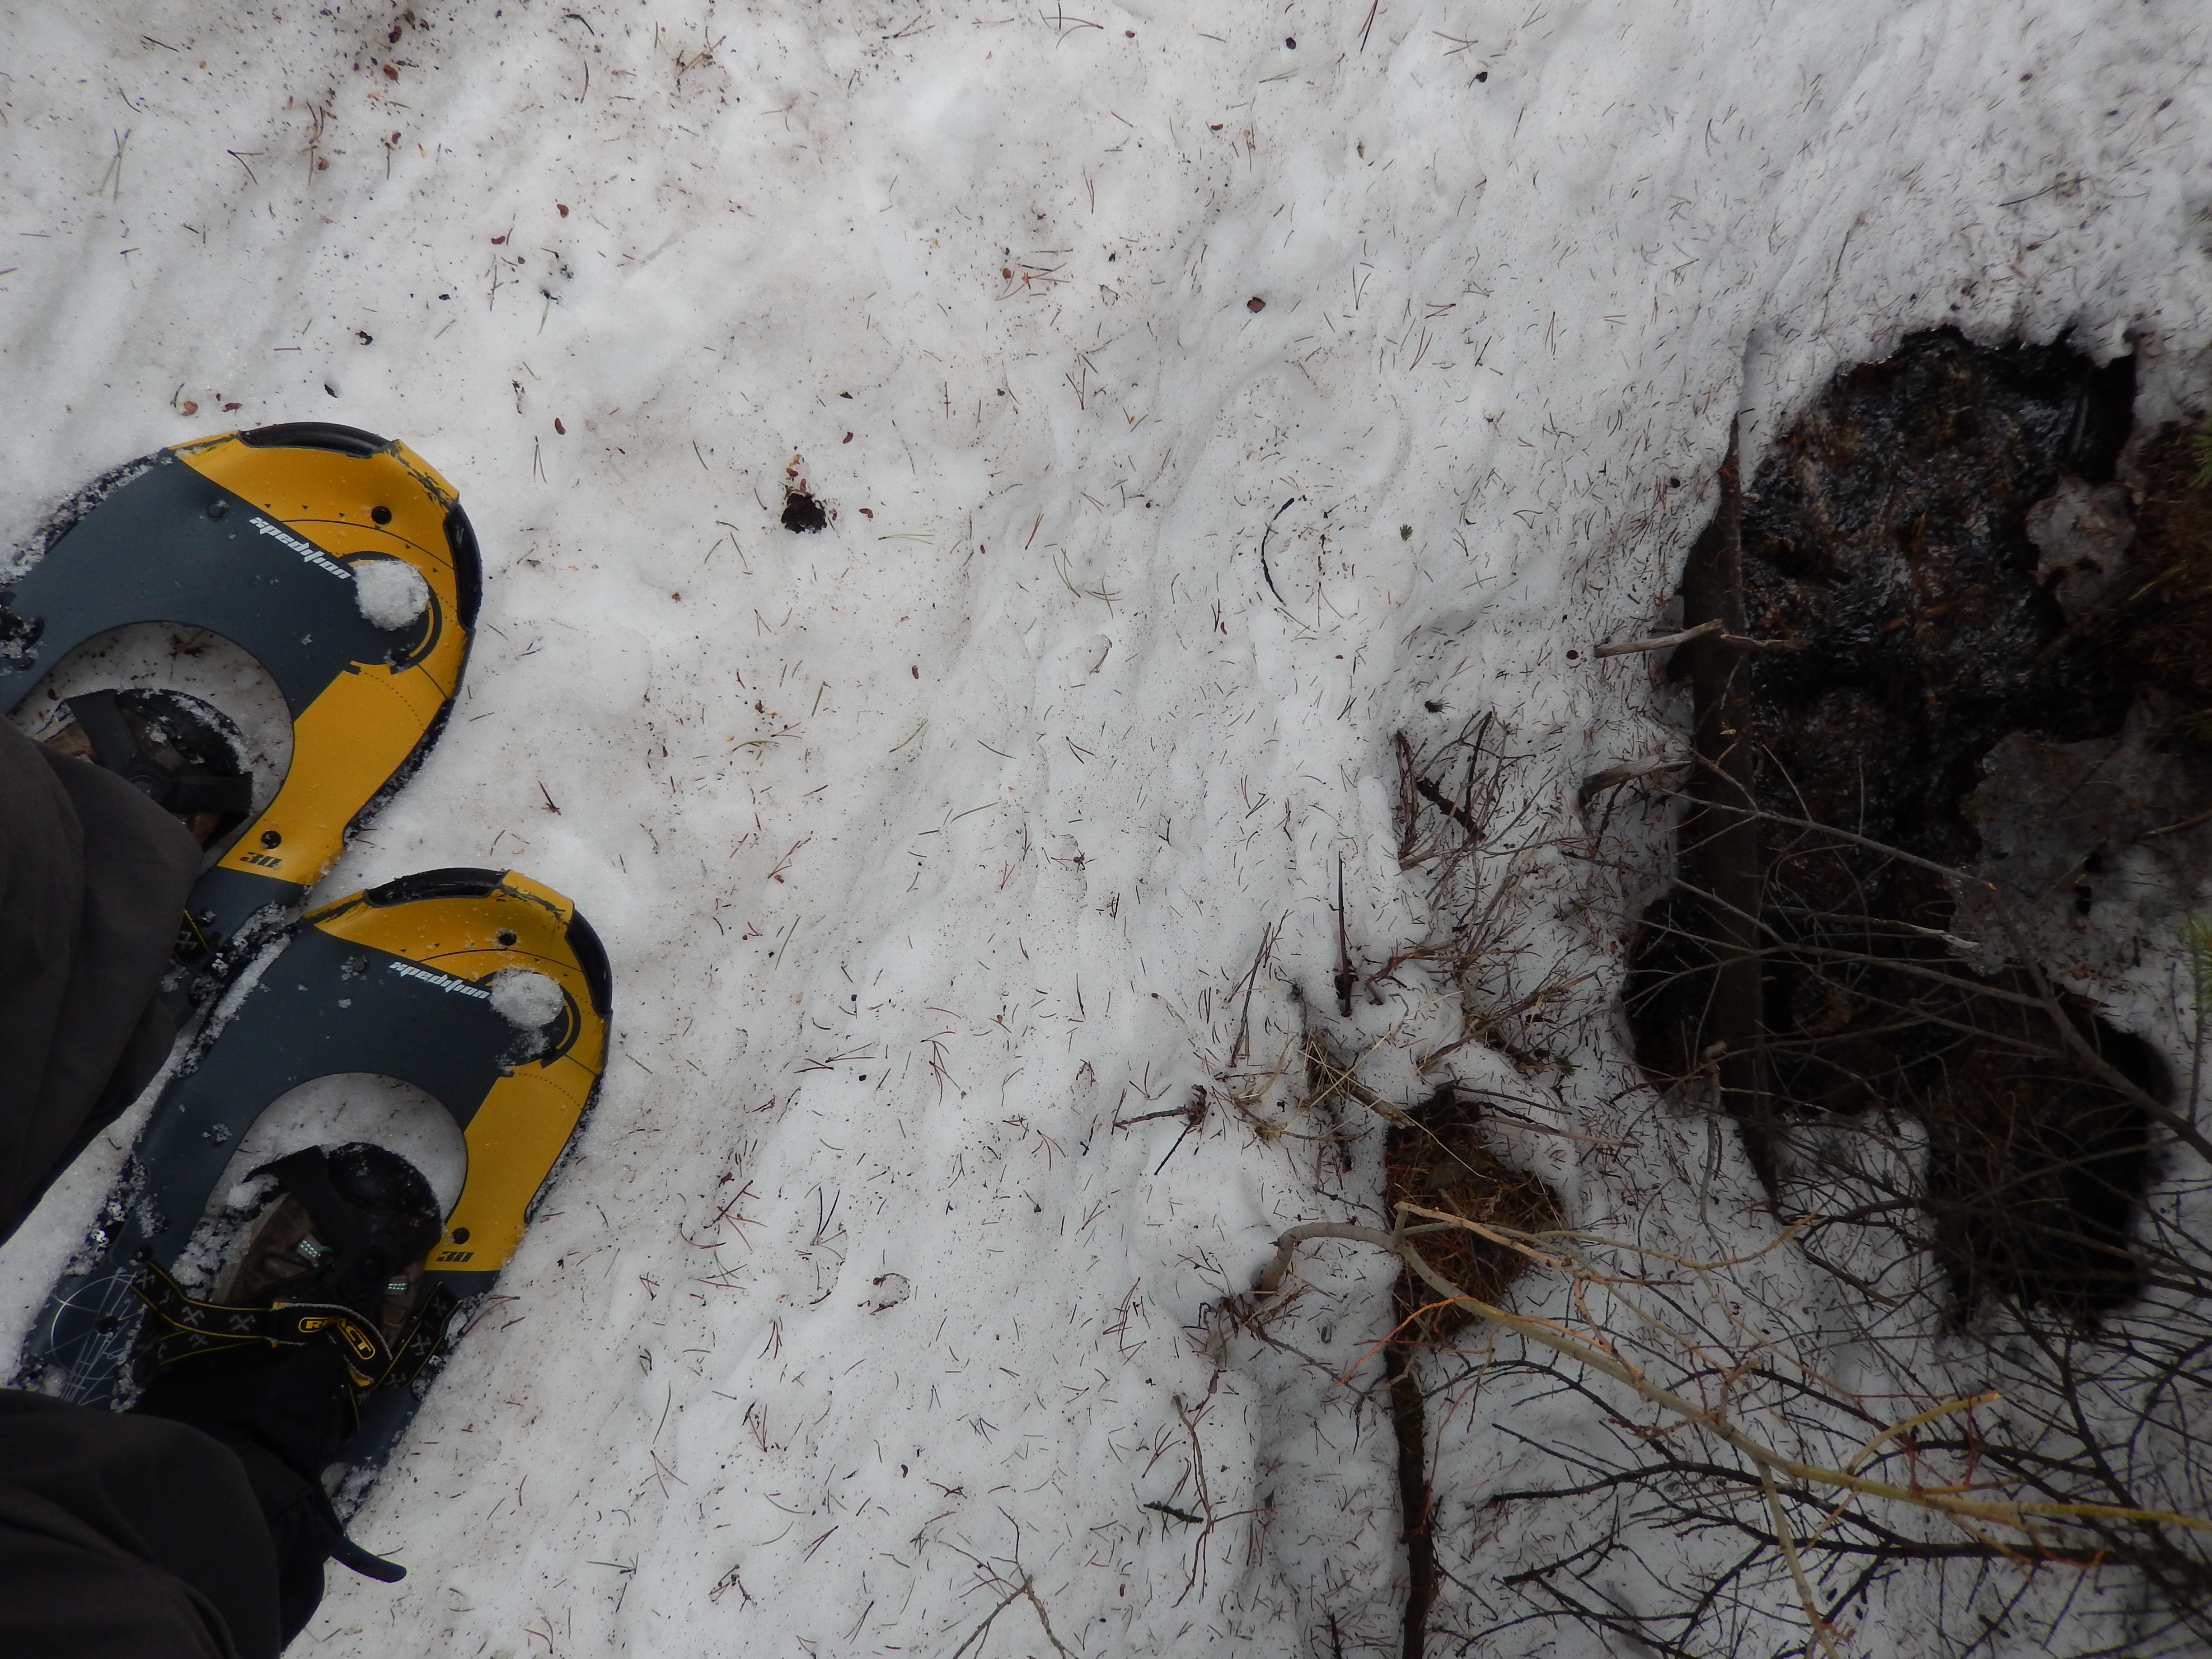
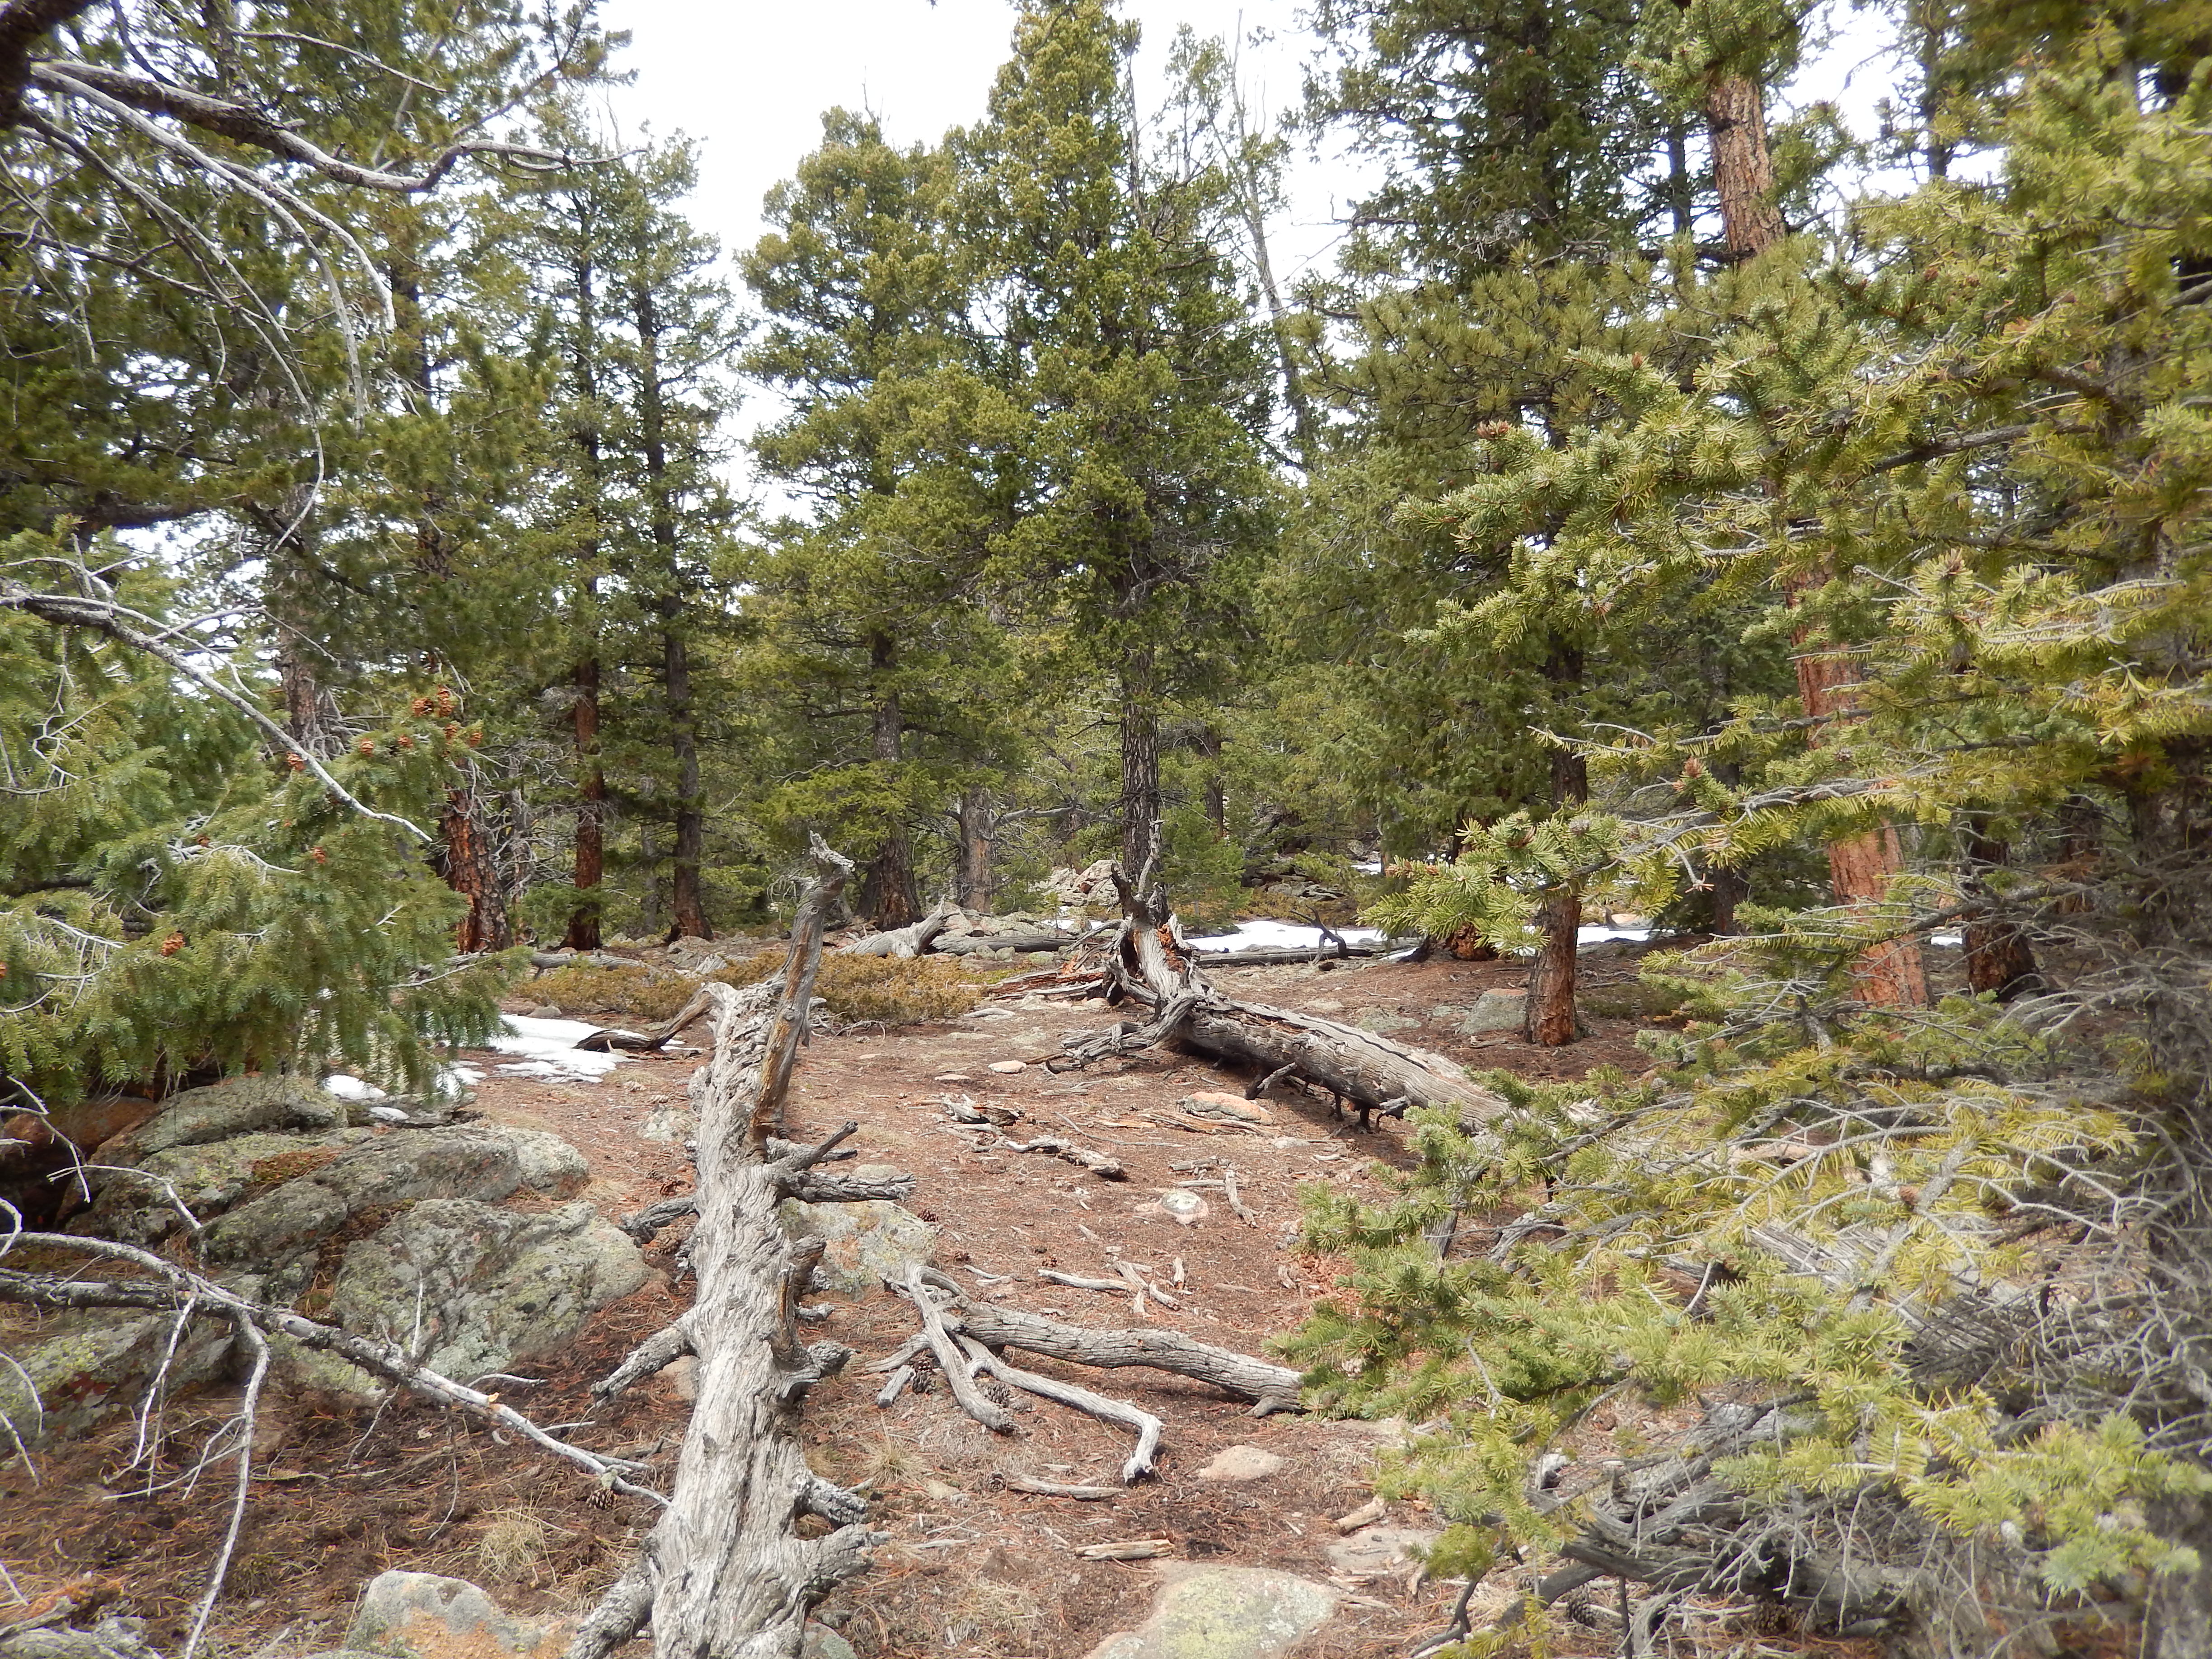
The snow was pretty deep the whole way and just before we hit the second meadow, it disappeared for maybe a tenth of a mile.
Oh so that is what the trail looks likeSecond Meadow before the Sun came out
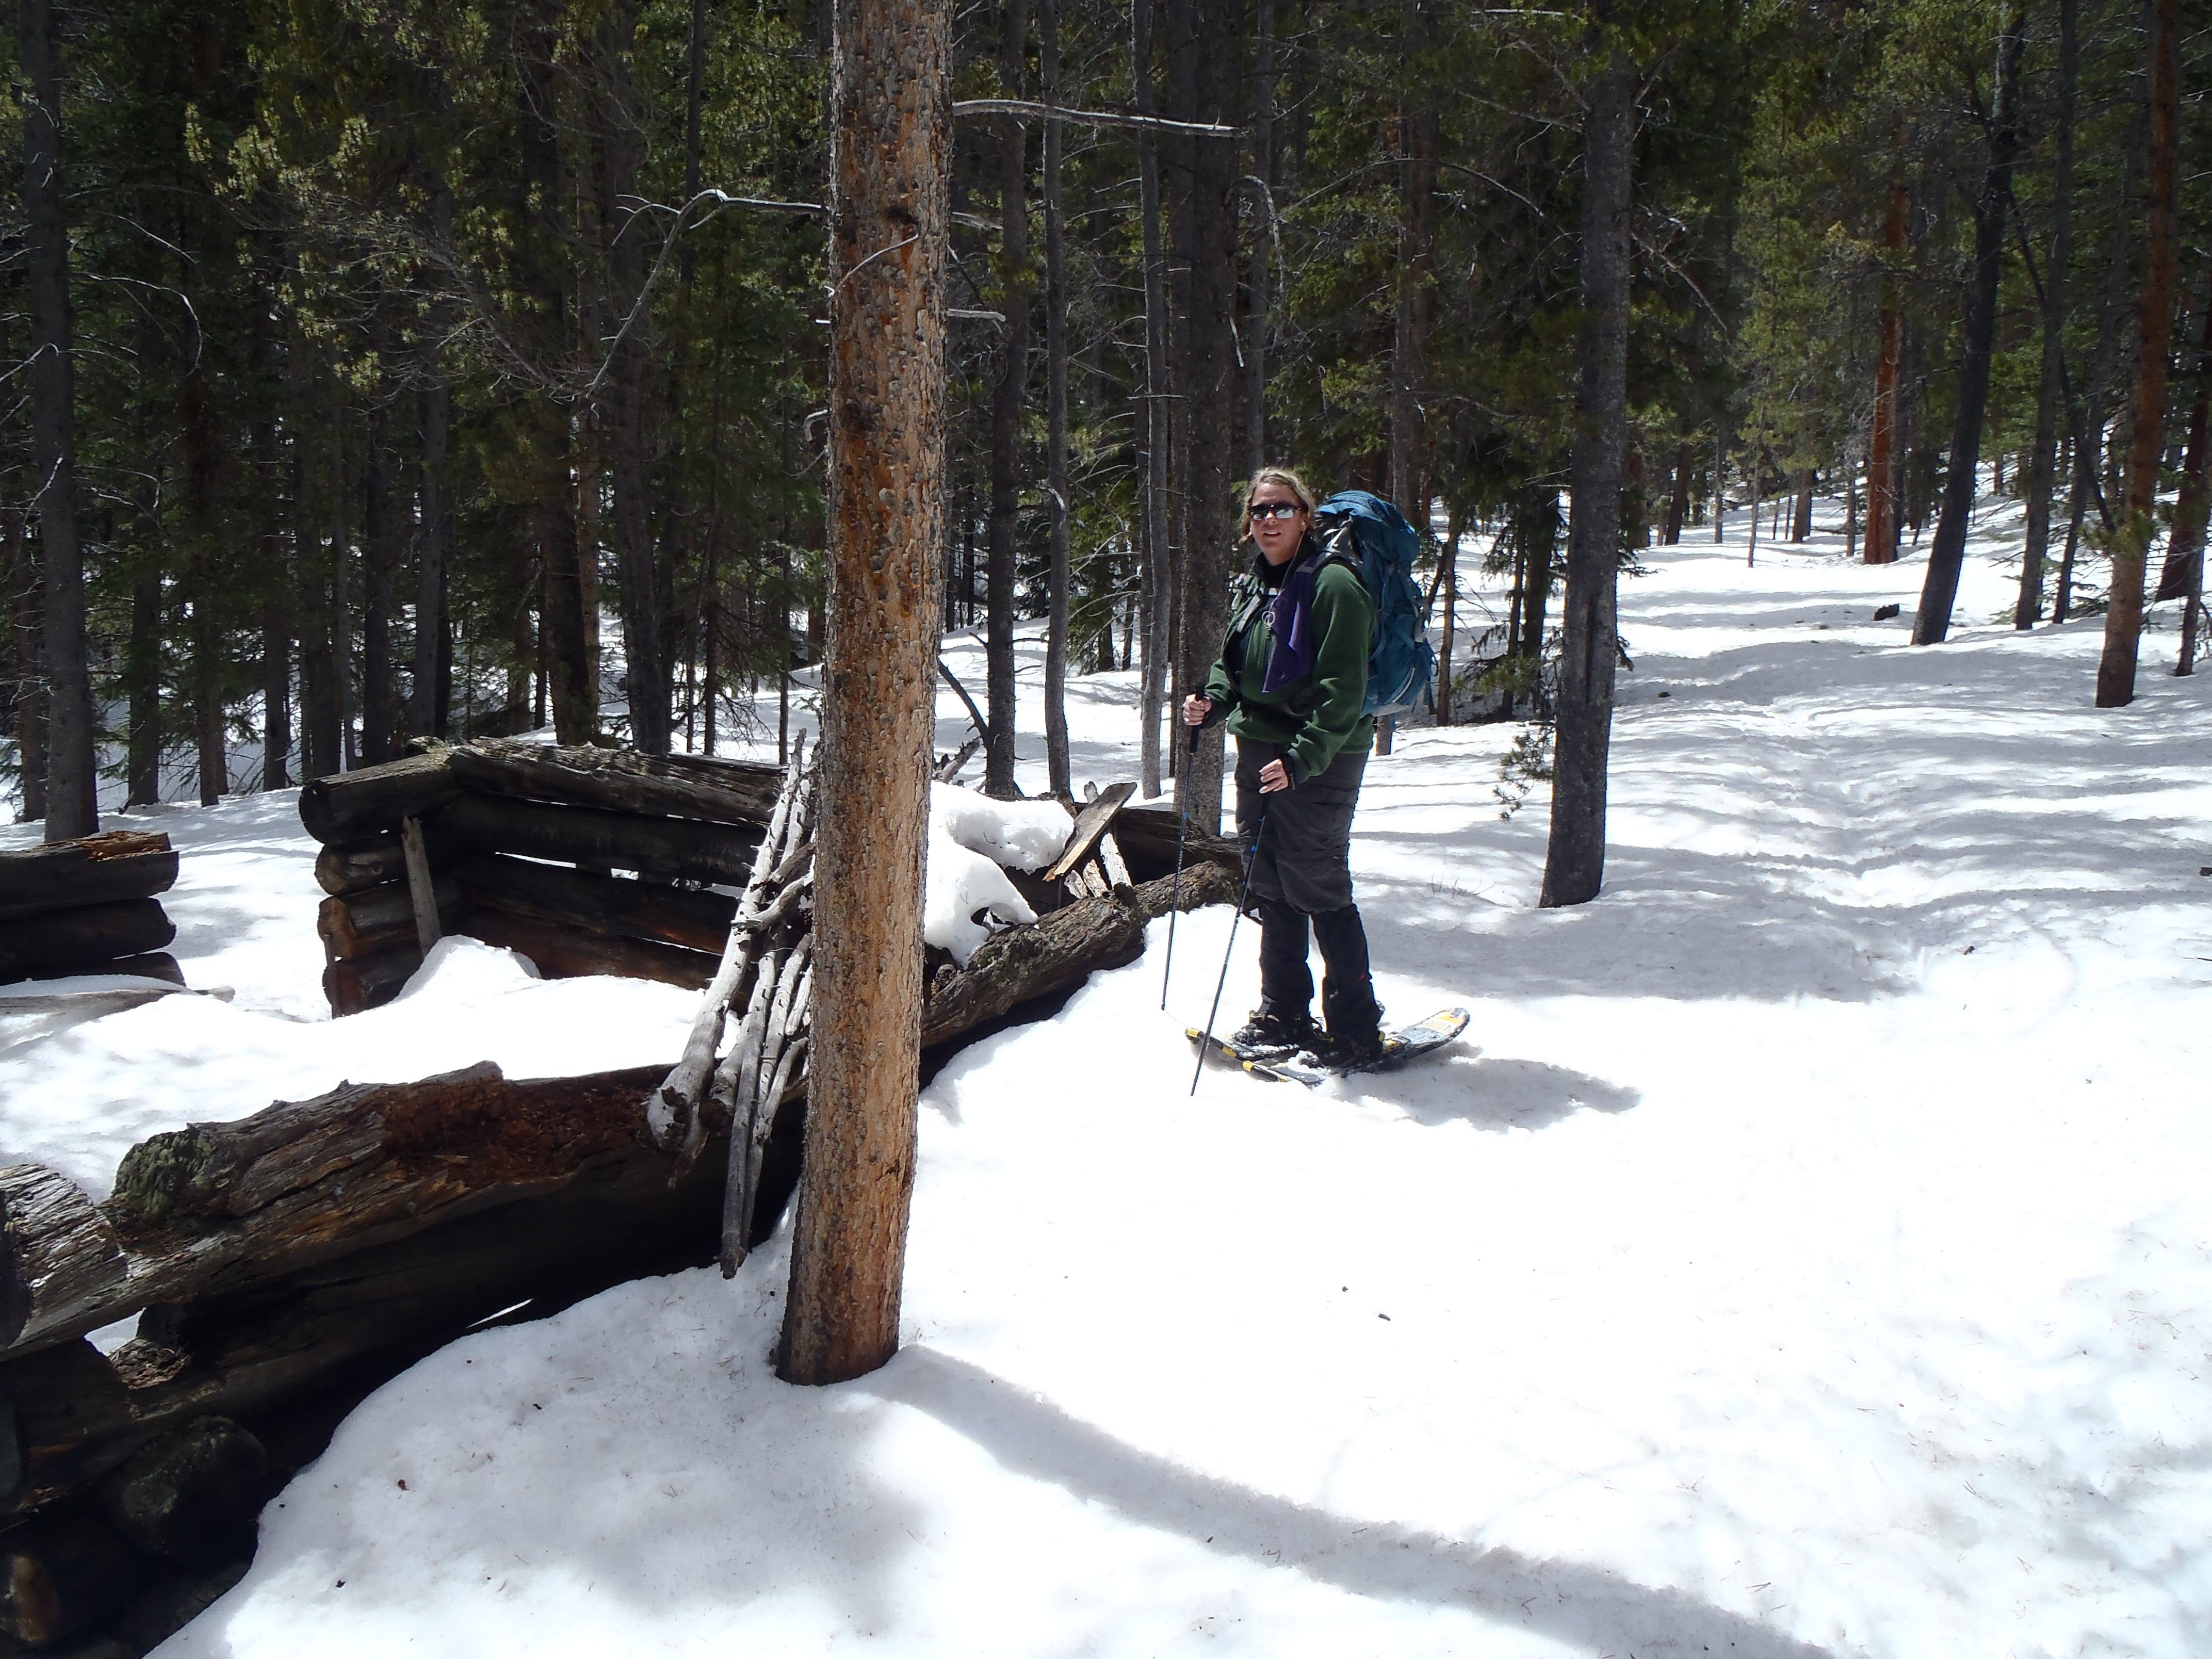
The cabin ruins aren’t too far past this second meadow, about half a mile. Most people turn around here from what I read and from the tracks we saw, no one went past in a long time.
The trail goes past the cabin and then climbs steeply up switch backs to the ridge. The sun also came out strong and bright, which was lovely but super snow destabilizing warm. We decided it was too pretty not to continue on and we felt good, like another mile or so wouldn’t be so bad.
A lot of the plastic markers had fallen down at this point so we used the notches to keep us on track
This last mile was a struggle, in hind sight I should have called it much sooner, my legs become jello so much sooner in snowshoes and while we knew we had to be right at the ridge at 3.75 miles, the trail just continued to climb up as far as we could see. We had two issues to consider… first we knew that while skies were blue, the clouds hanging out were definitely of the thunder storm variety and with the conditions of my legs at this point meant a fast escape if the weather changed wouldn’t be likely.
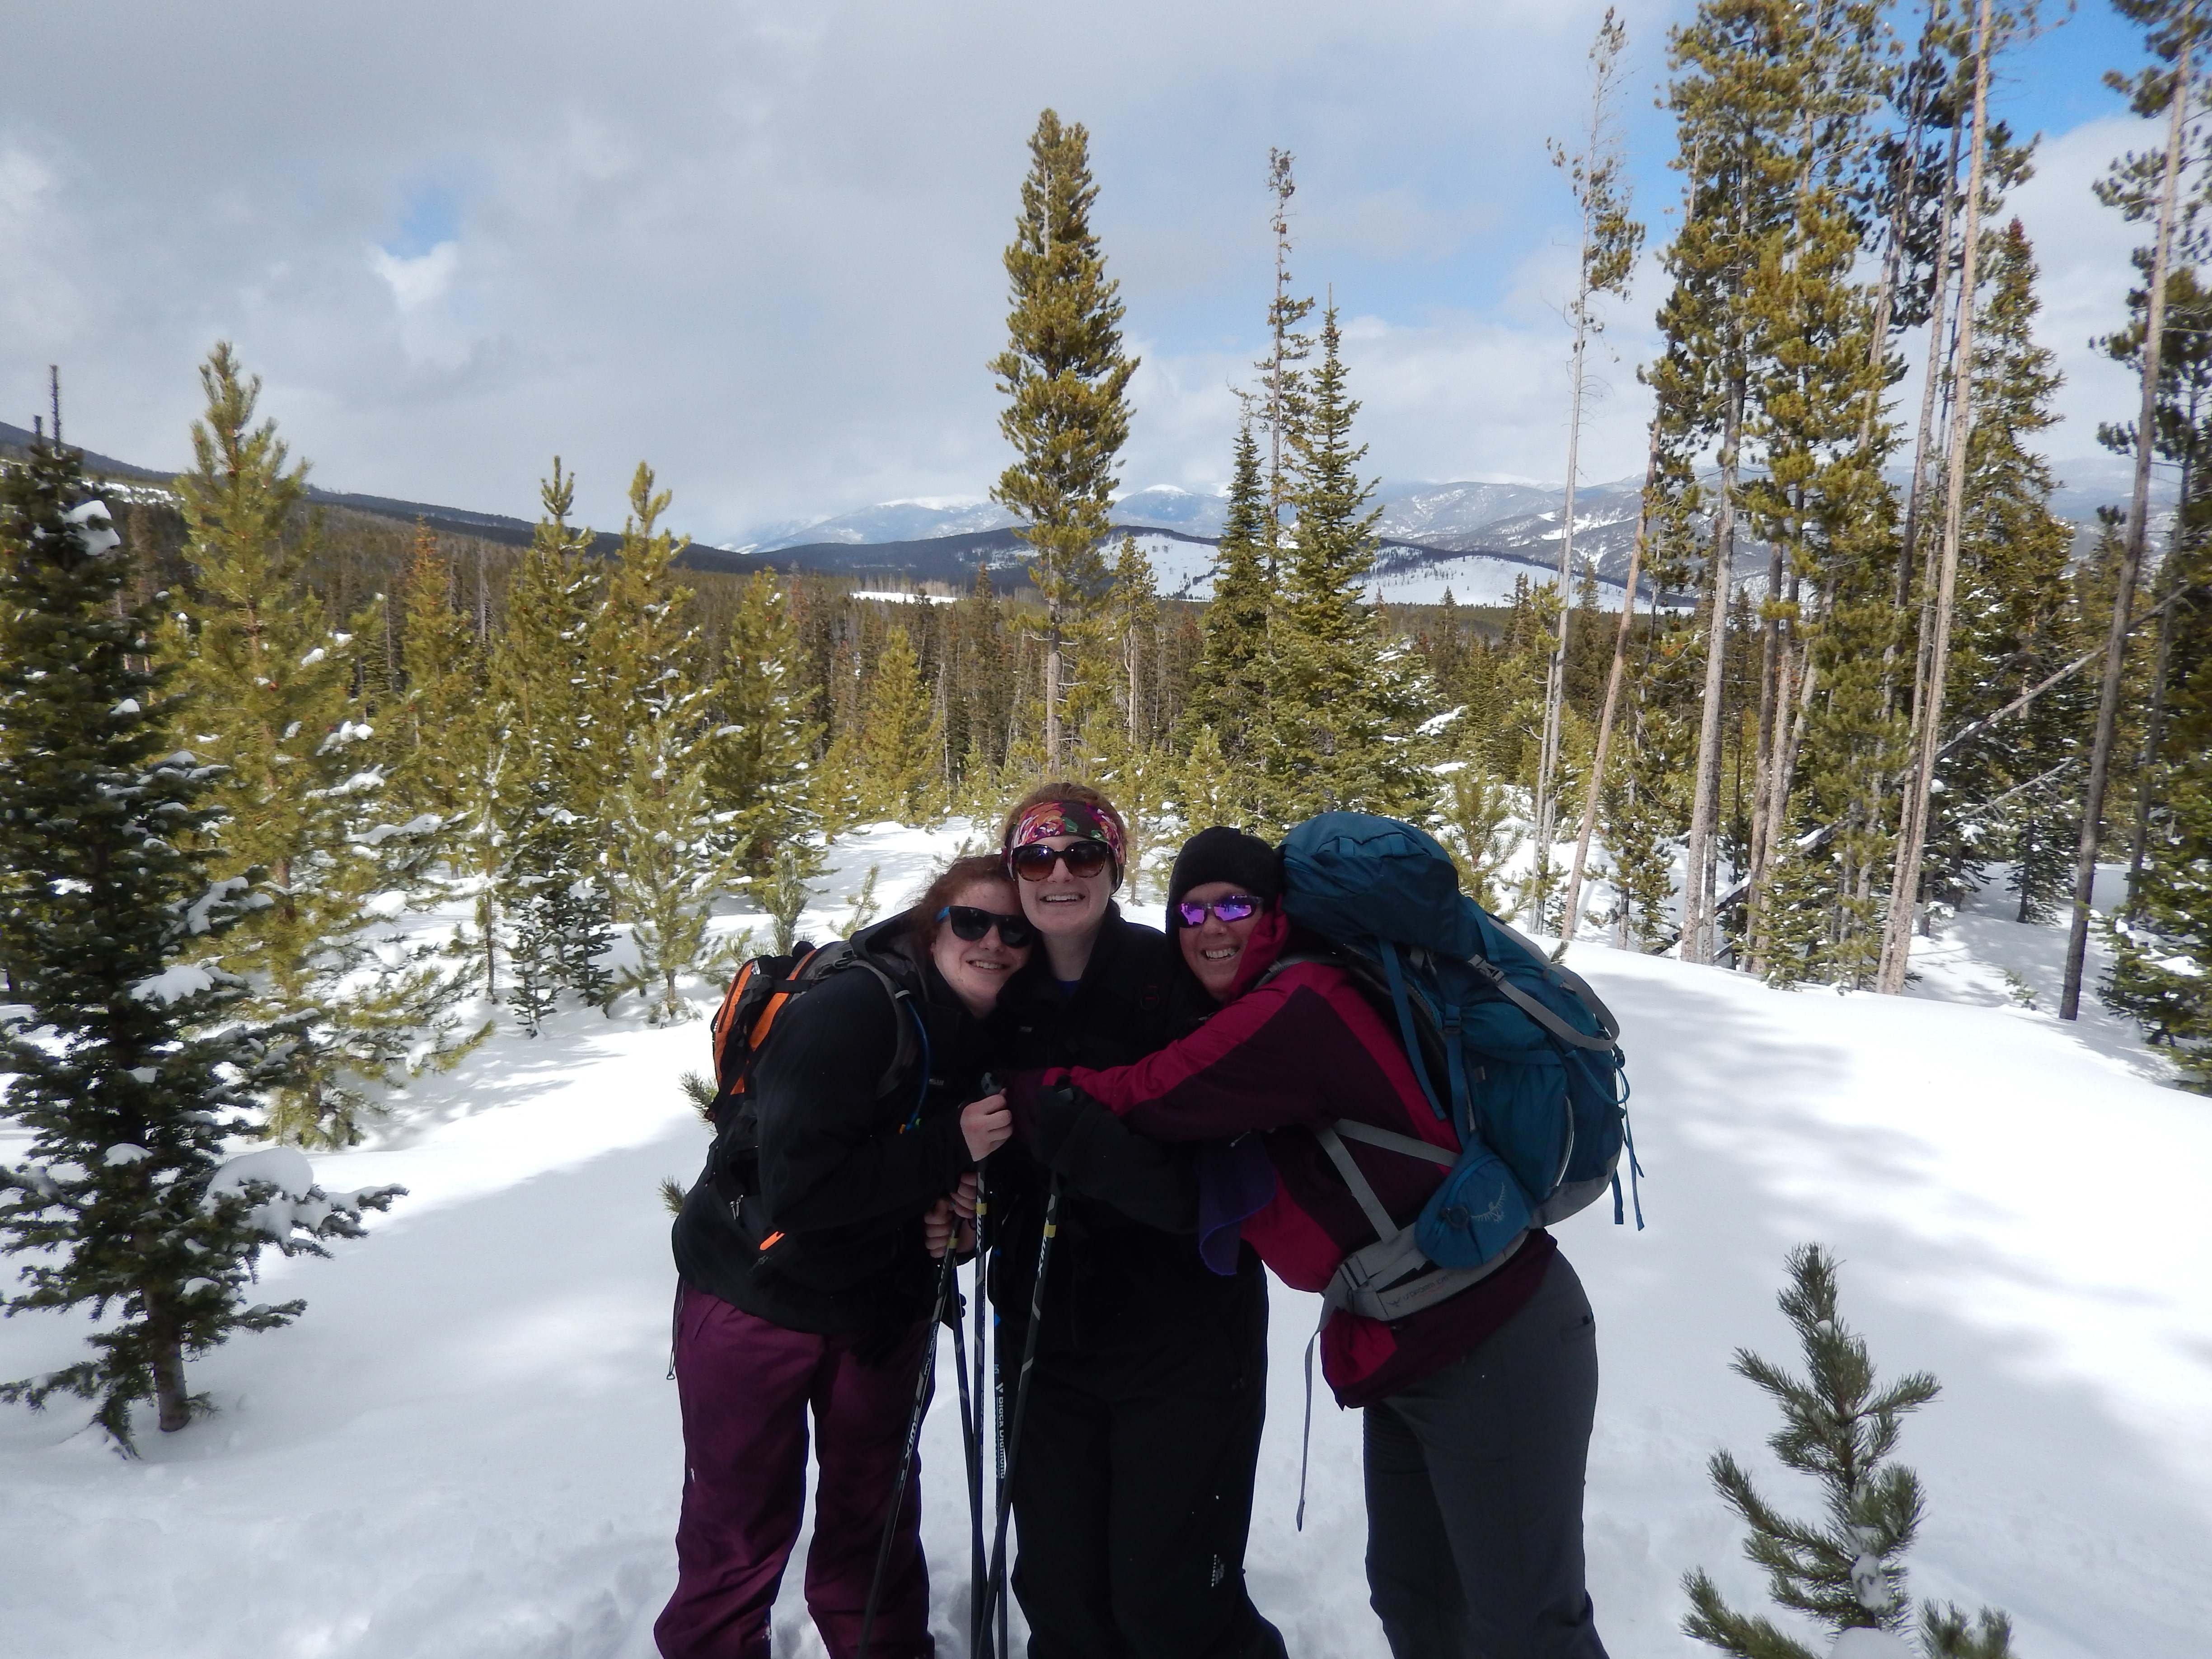
Just us with 4ish feet of snow at the turnaround point
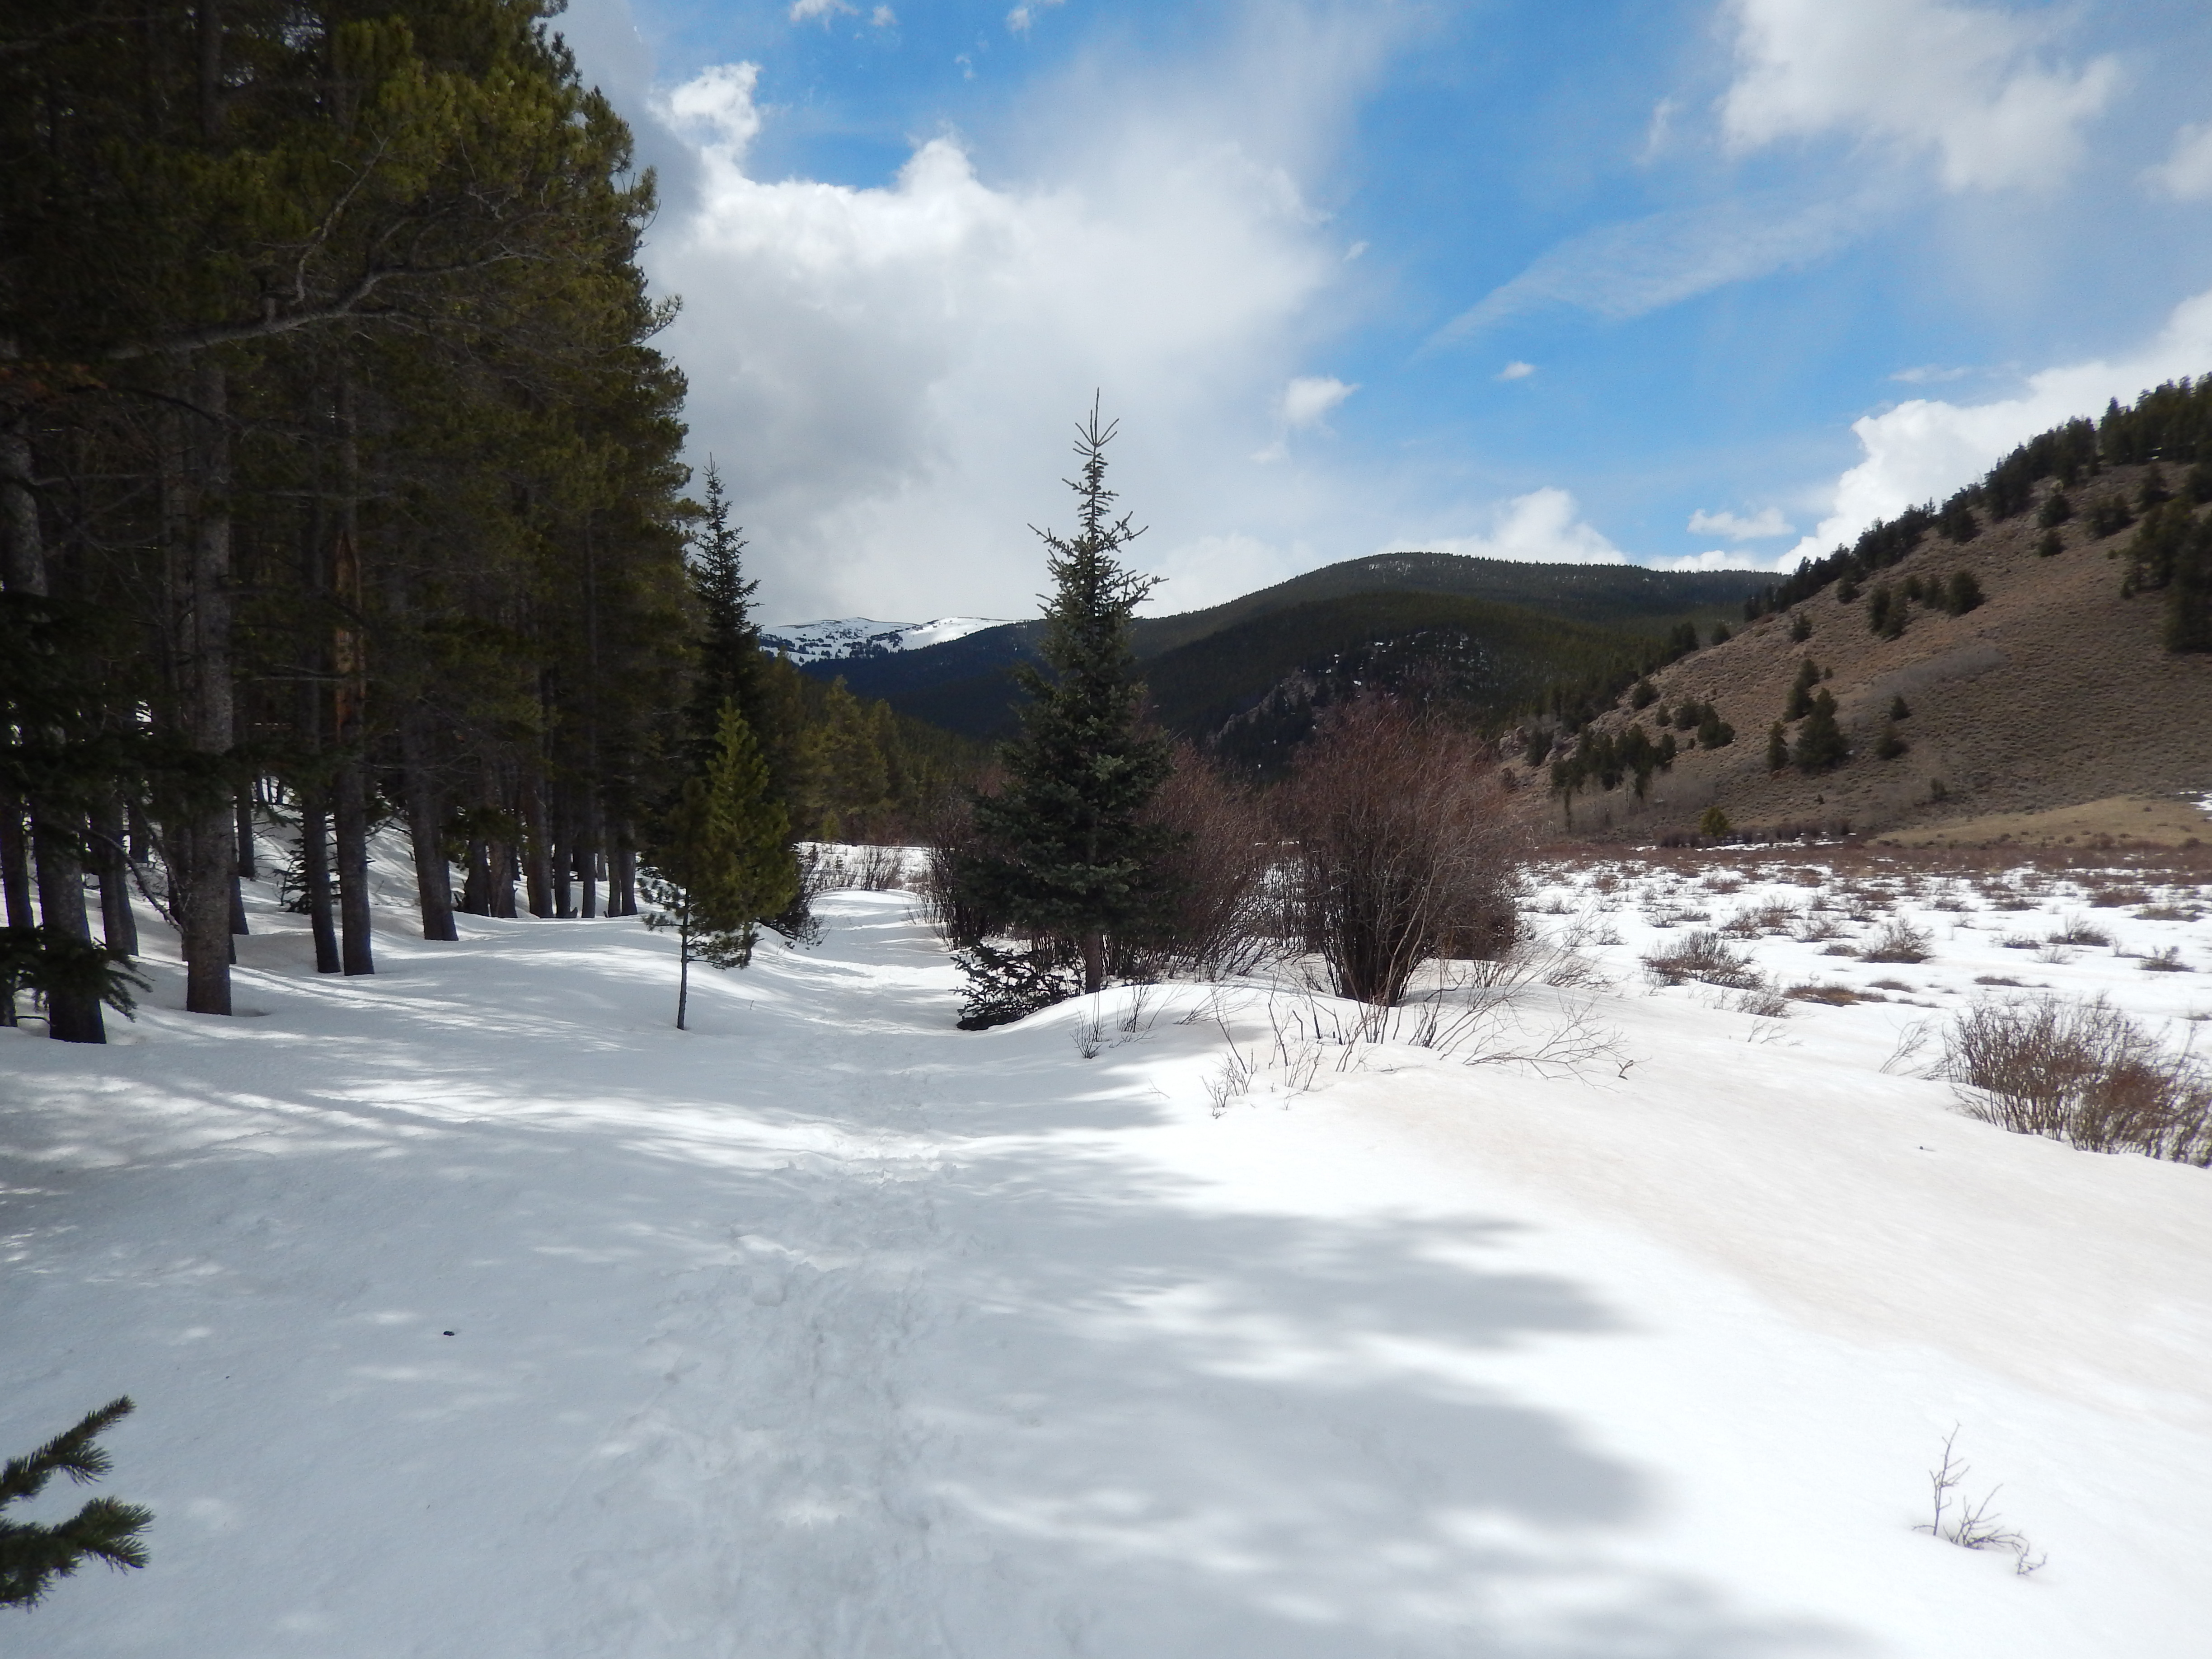
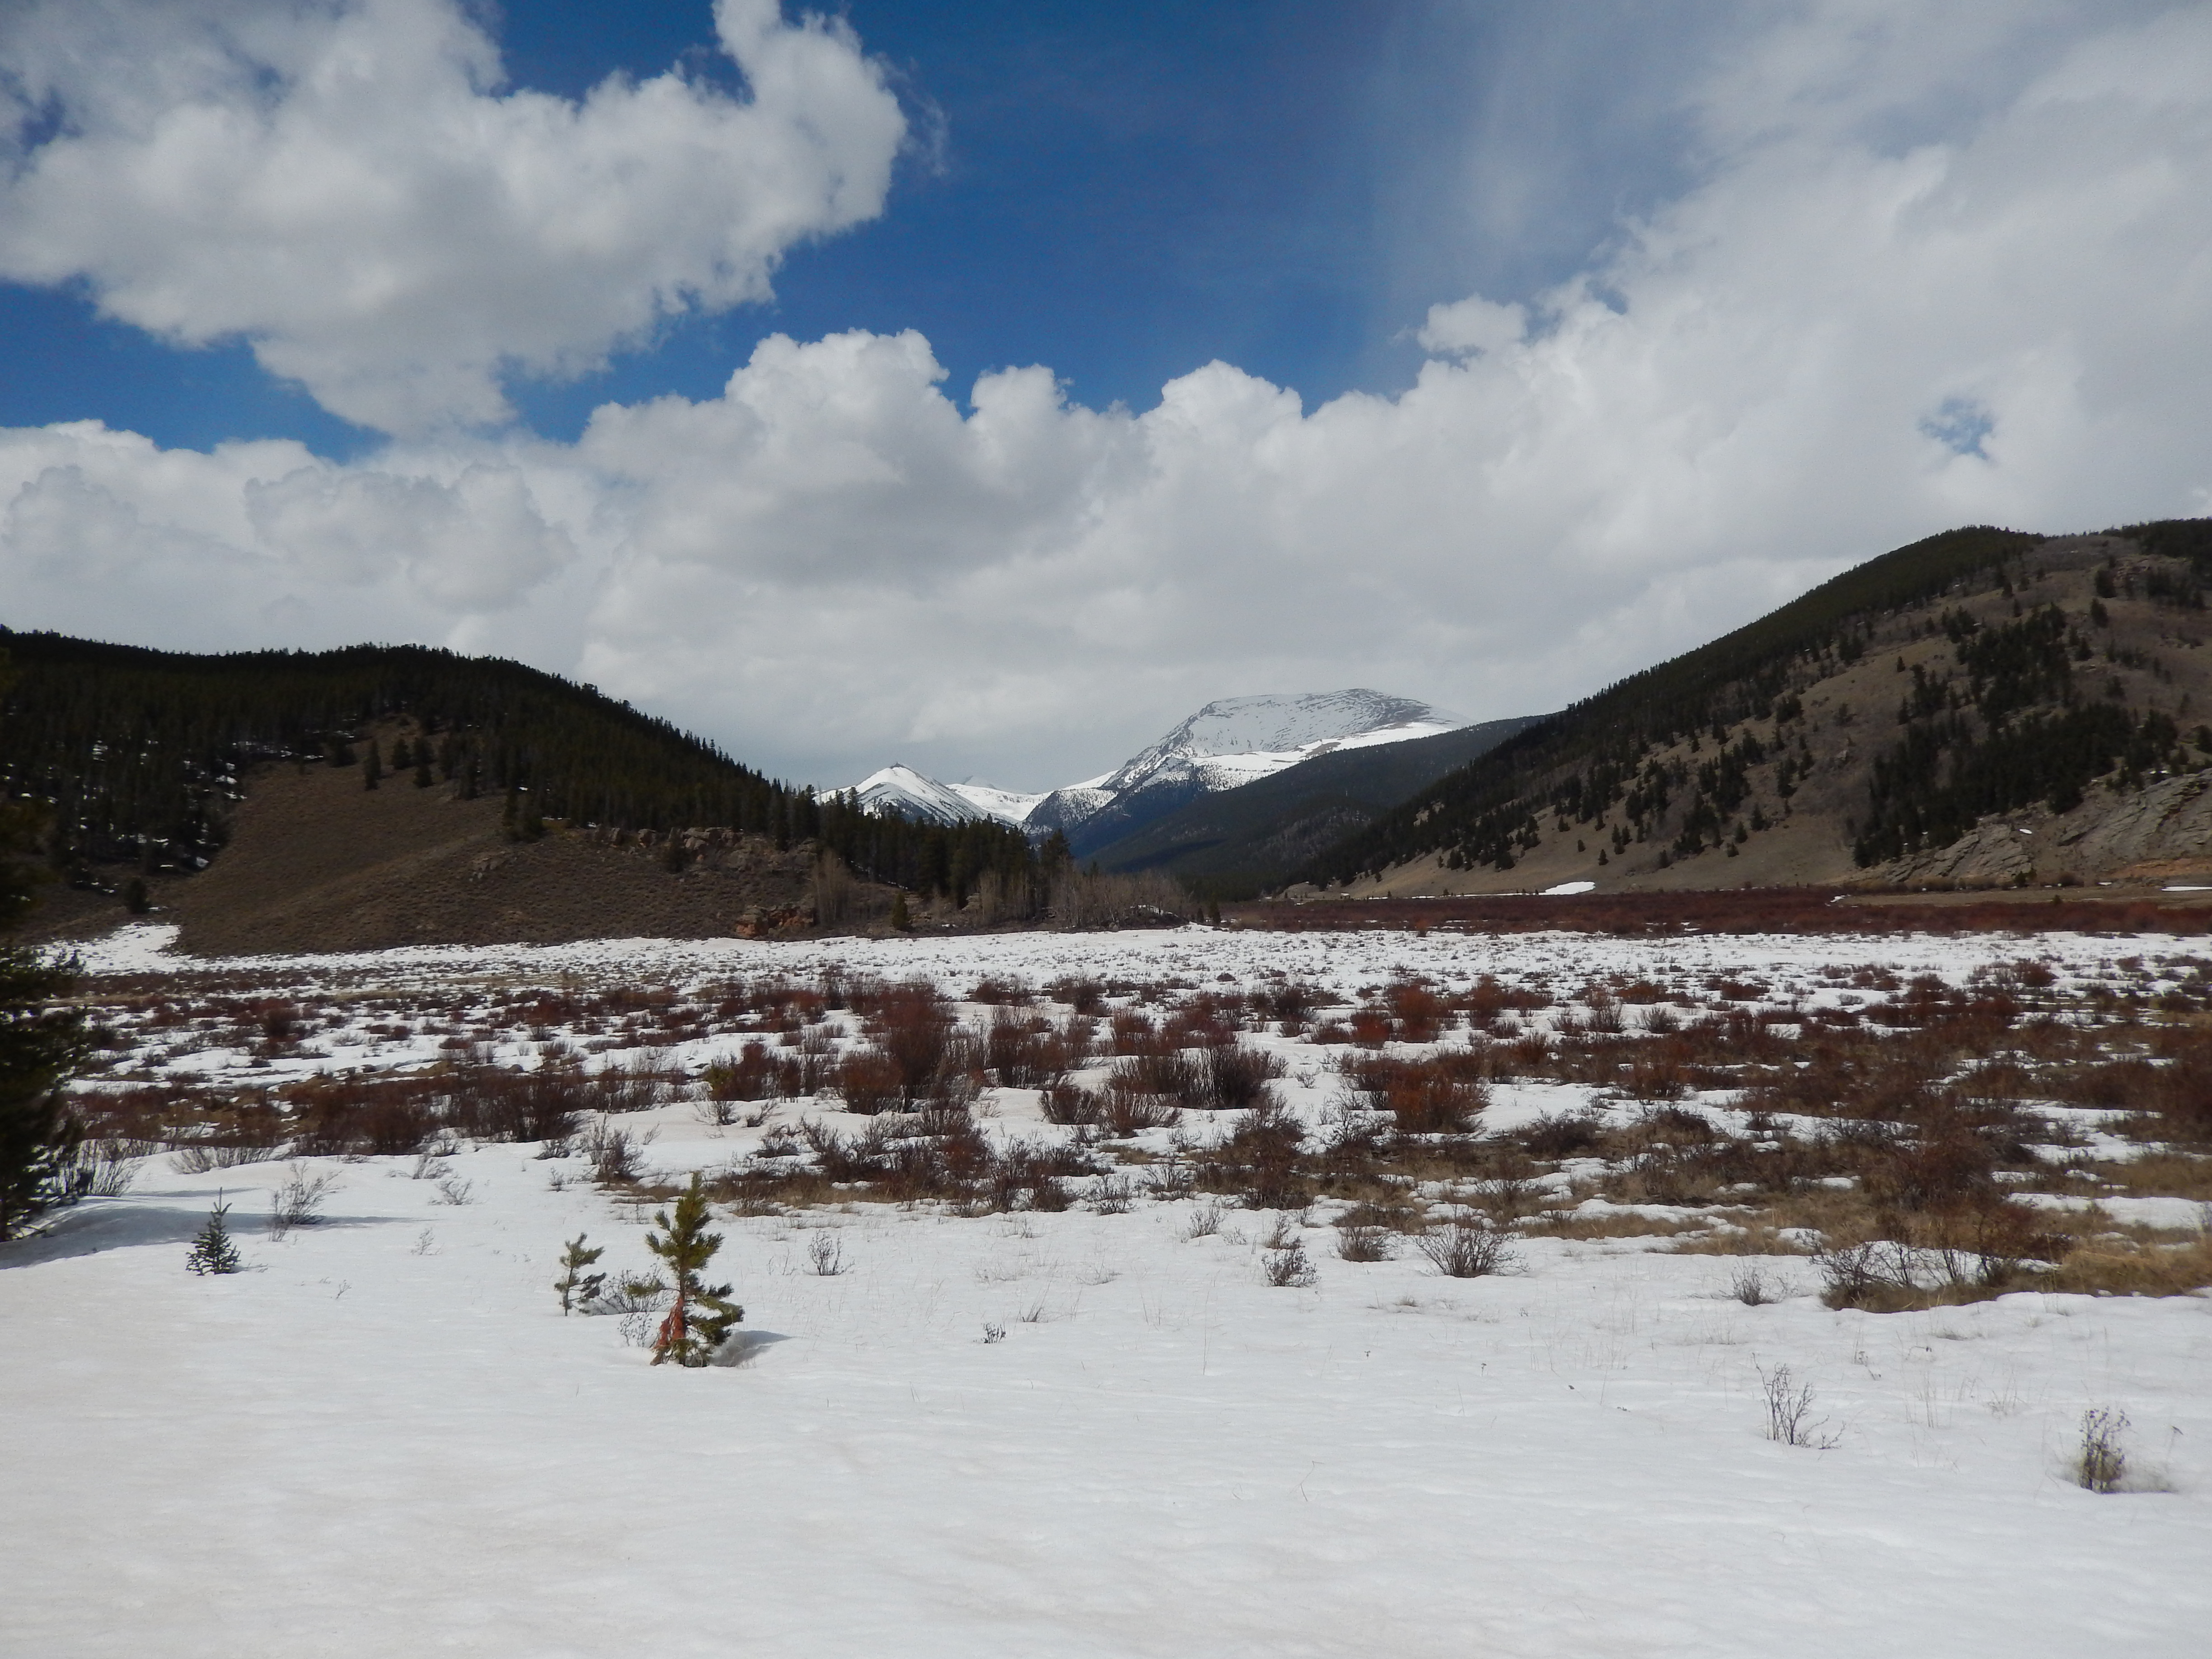
We turned around and headed back down, I fell 3 times in awesome fashion. Then we got to that second meadow closest to the cabin and the effects of the sun made me bummed I didn’t turn us around sooner…. ever posthole with snowshoes on…. EXHAUSTING. Our quick return was suddenly stalled and after an hour of it I was moving very slow when we finally got to that first meadows the views were spectacular.
I will tell you this last half mile or so was painfully long, but I wouldn’t stop moving because we could see the storm coming. As we finally got back to the bridge and took off our snow shoes, the first drops started falling which turned into an immediate downpour. We tried to run but our legs were just toast, fortunately we made it to the car before the sleet started. Almost perfect timing and despite our exhaustion we were also exhilarated, so worth every bruise I woke up with on Sunday.
I loved this trail, the views, the forest climb, the meadows, the creek and everything else. I cannot wait to get back when there is no snow and make it to the ridge, hopefully further.
I hope whatever your weekend has in store for you, it involves getting out there and hiking!!!
Directions: From Bailey drive west on 285 for 10.8 miles to Grant. Turn right on Park county Road #62( Sometimes called the Guanella pass road) and drive 4.9 miles to the trailhead at a turn in the road. There is a sign and a gate on the left (North) side of the road at the trailhead. Parking is available .2 miles further at the parking for Abyss Lake Trail.
Mason Creek Trail> Border Line Trail> Staunton Ranch Trail
Starting Elevation: 8197 ft
Highest Elevation: 9450 Ft ( Almost 1600 ft total with a little up and down from Mason Creek to Border Line)
Trail Length: 10.6 miles officially and my fitbit was pretty close with right around 11 miles
Trail Uses: Hiker, Biker, Horses
Degree Of Difficulty: Moderate to Difficult: mostly due to length.
Fees: $7 a day or $70 for the annual Colorado State Park Pas… we have the pass
Bathrooms: Yes at every parking lot
Pets: Yes- dogs allowed as long as they are on leash.
We have been super enjoying all the snowshoeing opportunities these past 2 months but to be honest I feel like we are totally out of shape. None of our snowshoes were very long or had a ton of elevation gain, we stayed up highish but didn’t climb a ton. I was starting to worry that all that stamina we had fought hard for might be gone. That’s why we went back to Staunton State Park on Saturday. This park is just beautiful, the trail options make it easy to challenge yourself or quickly escape if you bit off more than you can chew.
Picking our Route
The other driver to get in as many miles as possible on Saturday, was the spring snow storm expected for Sunday. The mountains were predicted to get a foot or more of snow and we here on the Front Range 3-6 inches so we had to make a bang on Saturday. I am pretty sure everyone in Colorado had the same goal for Saturday as Spring fever has officially set in!
We started out on Mason Creek Trail and at first it was straight forward so we cruised through the 2.2 miles without blinking an eye. It was wild flying through this part when the last time we attempted it in the snow it took us forever! I am torn which I liked more. It is beautiful for sure, but I think I might actually like a snowy Mason Creek ( our first hike details here) a little more… but I need to see it in summer. It wove beautifully along the creek which was babbling in and out of ice and snow. We crossed it a few times and once again I was so impressed with how they planned this state park, everything is so well thought out! Overall the trail mostly climbs and the last half mile or so declines to the trail break.
Mason Creek Trail conditionsone of many creek crossings on Mason CreekThe last half mile on Mason Creek went down…on ice and snow
When we got to the trail break, we had a choice to do just 7 ish miles or push on and try for the 10.3 miles. If you get here and want the shorter route take Old Mill, it is just .9 miles to Staunton Ranch and then 1.7 to the parking lot. The old original Mill is here too, surrounding by fencing to protect it but it was cool to see.
Old MillBorder Line TrailThere is actually an Old Mill in ruins at the trail break
We took Border Line and decided further was going to work… honestly I felt good and just doing the whole original planned loop felt really good.
From here it means climbing again and the first mile is straight up but not a super steep grade or anything plus it is a lot of switchbacks.
Border Line Trail Conditions
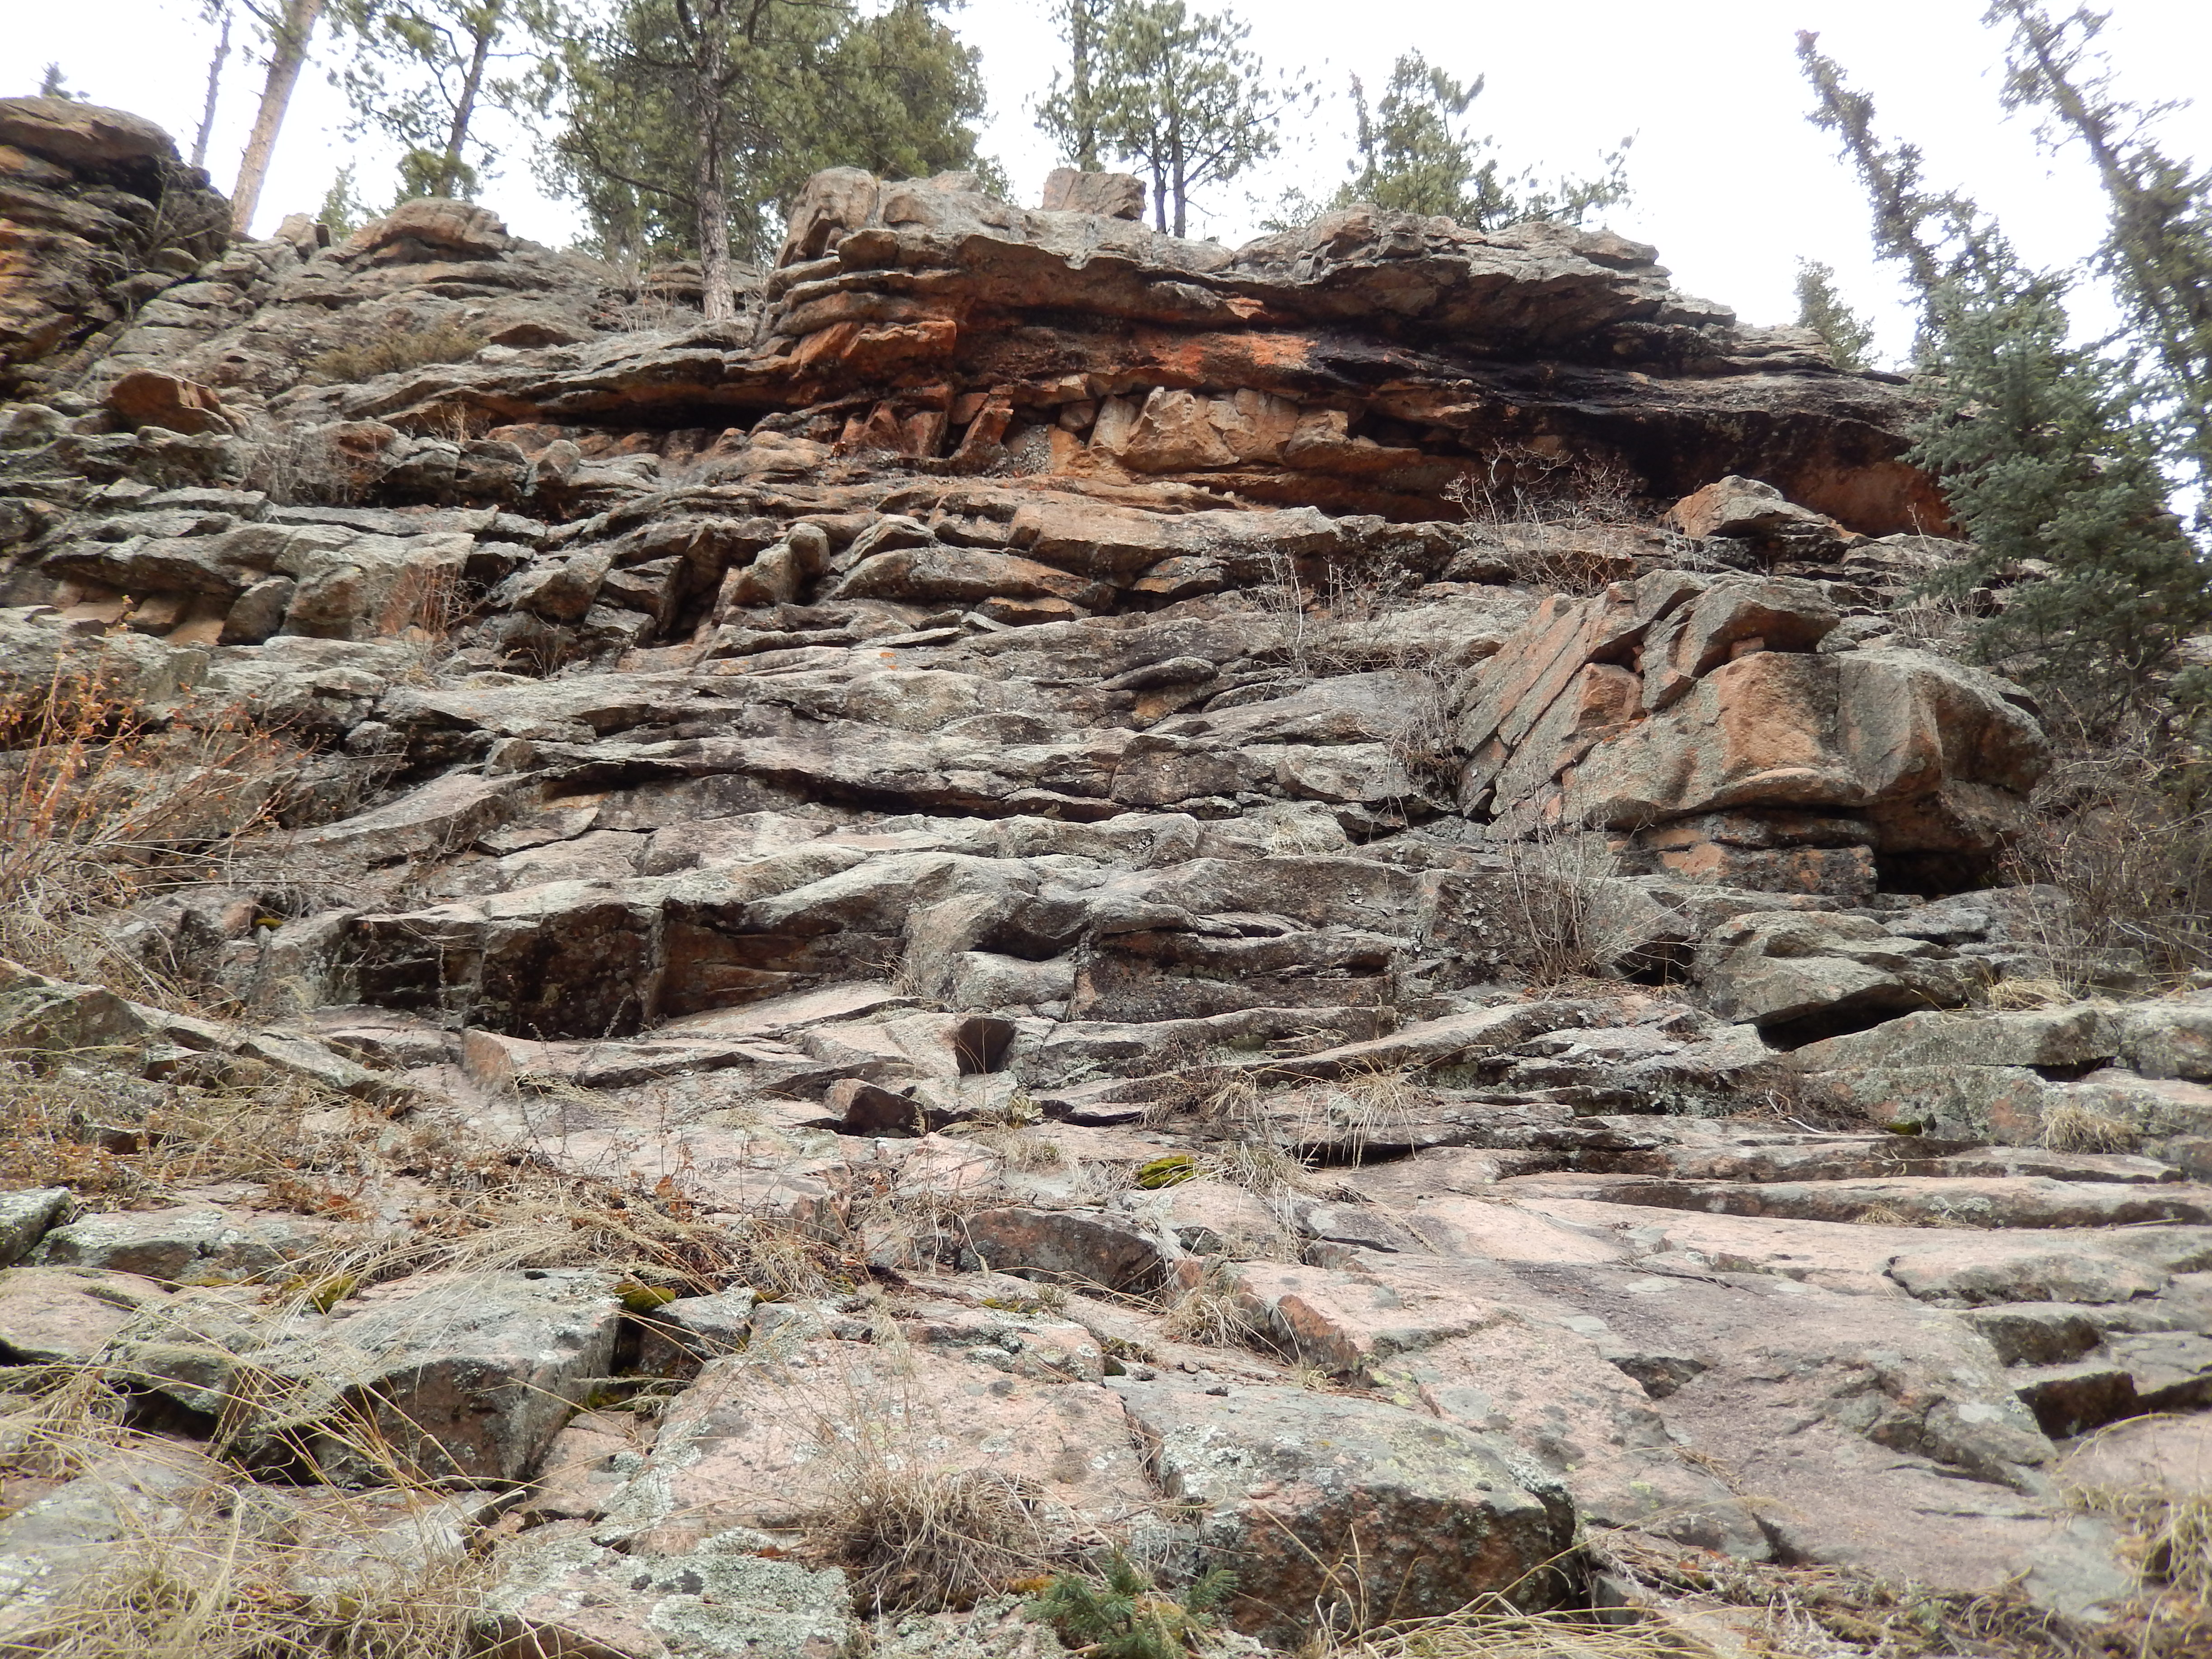
I was loving the views as we climbed, all the beautiful rock faces we saw as driving to the parking lot were right there…..spectacular.
Views on Border Line
We got to the Staunton view-point after a mile on Border Line, it is a little offshoot from the Border Line trail and we took it knowing it added .2 miles to our overall hike. I am so glad we did, the views were perfect. It would have been better had the sky been cloudless but there is something about the moodiness clouds add that make it a sight to behold! It is just .1 miles to the official view and then we kind of adventured to this other outcropping and got 180 degree views of everything….. I super love Colorado.
Conditions at the overlook
From this point we climbed a little more and then it was straight down to the Staunton Ranch trail.
Coming down on Border LineStaunton Ranch from Border LineGetting on to Staunton Ranch Trail
The Staunton Ranch Trail does a little up and down throughout and overall it is the easier stretch of the hike, just 3.3 miles of a stretch so be prepared if you do this loop. I will admit the last 2 miles were a struggle for me on Saturday, my feet and legs were protesting the whole way but it felt great to get our original goal accomplished.
I am excited for the next hike, the weather is changing and so am I…. I am struggling with my healthy part but I am so looking forward to so many new hikes. I want to be higher sooner and the snowshoes helped with that, we are comfortable at 10K already, thank you snowshoes!!! Now I need to get better at carrying my snowshoes so we can be good at 11k, 12K, 13K and finally some 14k. As always after the directions will be our favorite pictures…
I Hope your spring also started beautifully, so now just get out there and hike where ever you are!
Directions: Take US Highway 285 south to Shaffers Crossing, about 6 miles west of Conifer. Turn north on Elk Creek Road and follow the signs 1.5 miles to the park entrance
Pikes Peak was all lit up whenever we saw it from the trail.Rocks along Mason Creek Winter 1/19/14Same Rocks on 4/12/14
There is a Facebook Page called Enjoy Estes Park and every Thursday they run a contest for an all expenses paid trip to Estes Park, free lodging, free meals, Free beer and wine, free snacks throughout the day, free rental of sporting goods and they even gave us money to spend in some of the stores in town. They started doing it in October and it runs for 36 weekends through May. They start every Thursday then pick someone by Saturday night for 2 weekends ahead. 2 weeks ago I won! So this past weekend we had a fun weekend in Estes. I wasn’t sure with all we had to do for free that we would get in time for hike or snowshoe but we did.
Saturday was crazy beautiful when we woke up at 6AM…. I was determined to get in a hike or snowshoe! What was not so great… the headache and disconnected head I woke up with. I will admit I still thought this was my crown work at this point since it had been hanging around all week at weird times. I am not one to give into things like this when I have so much planned and like so many before me, I just pushed through…..
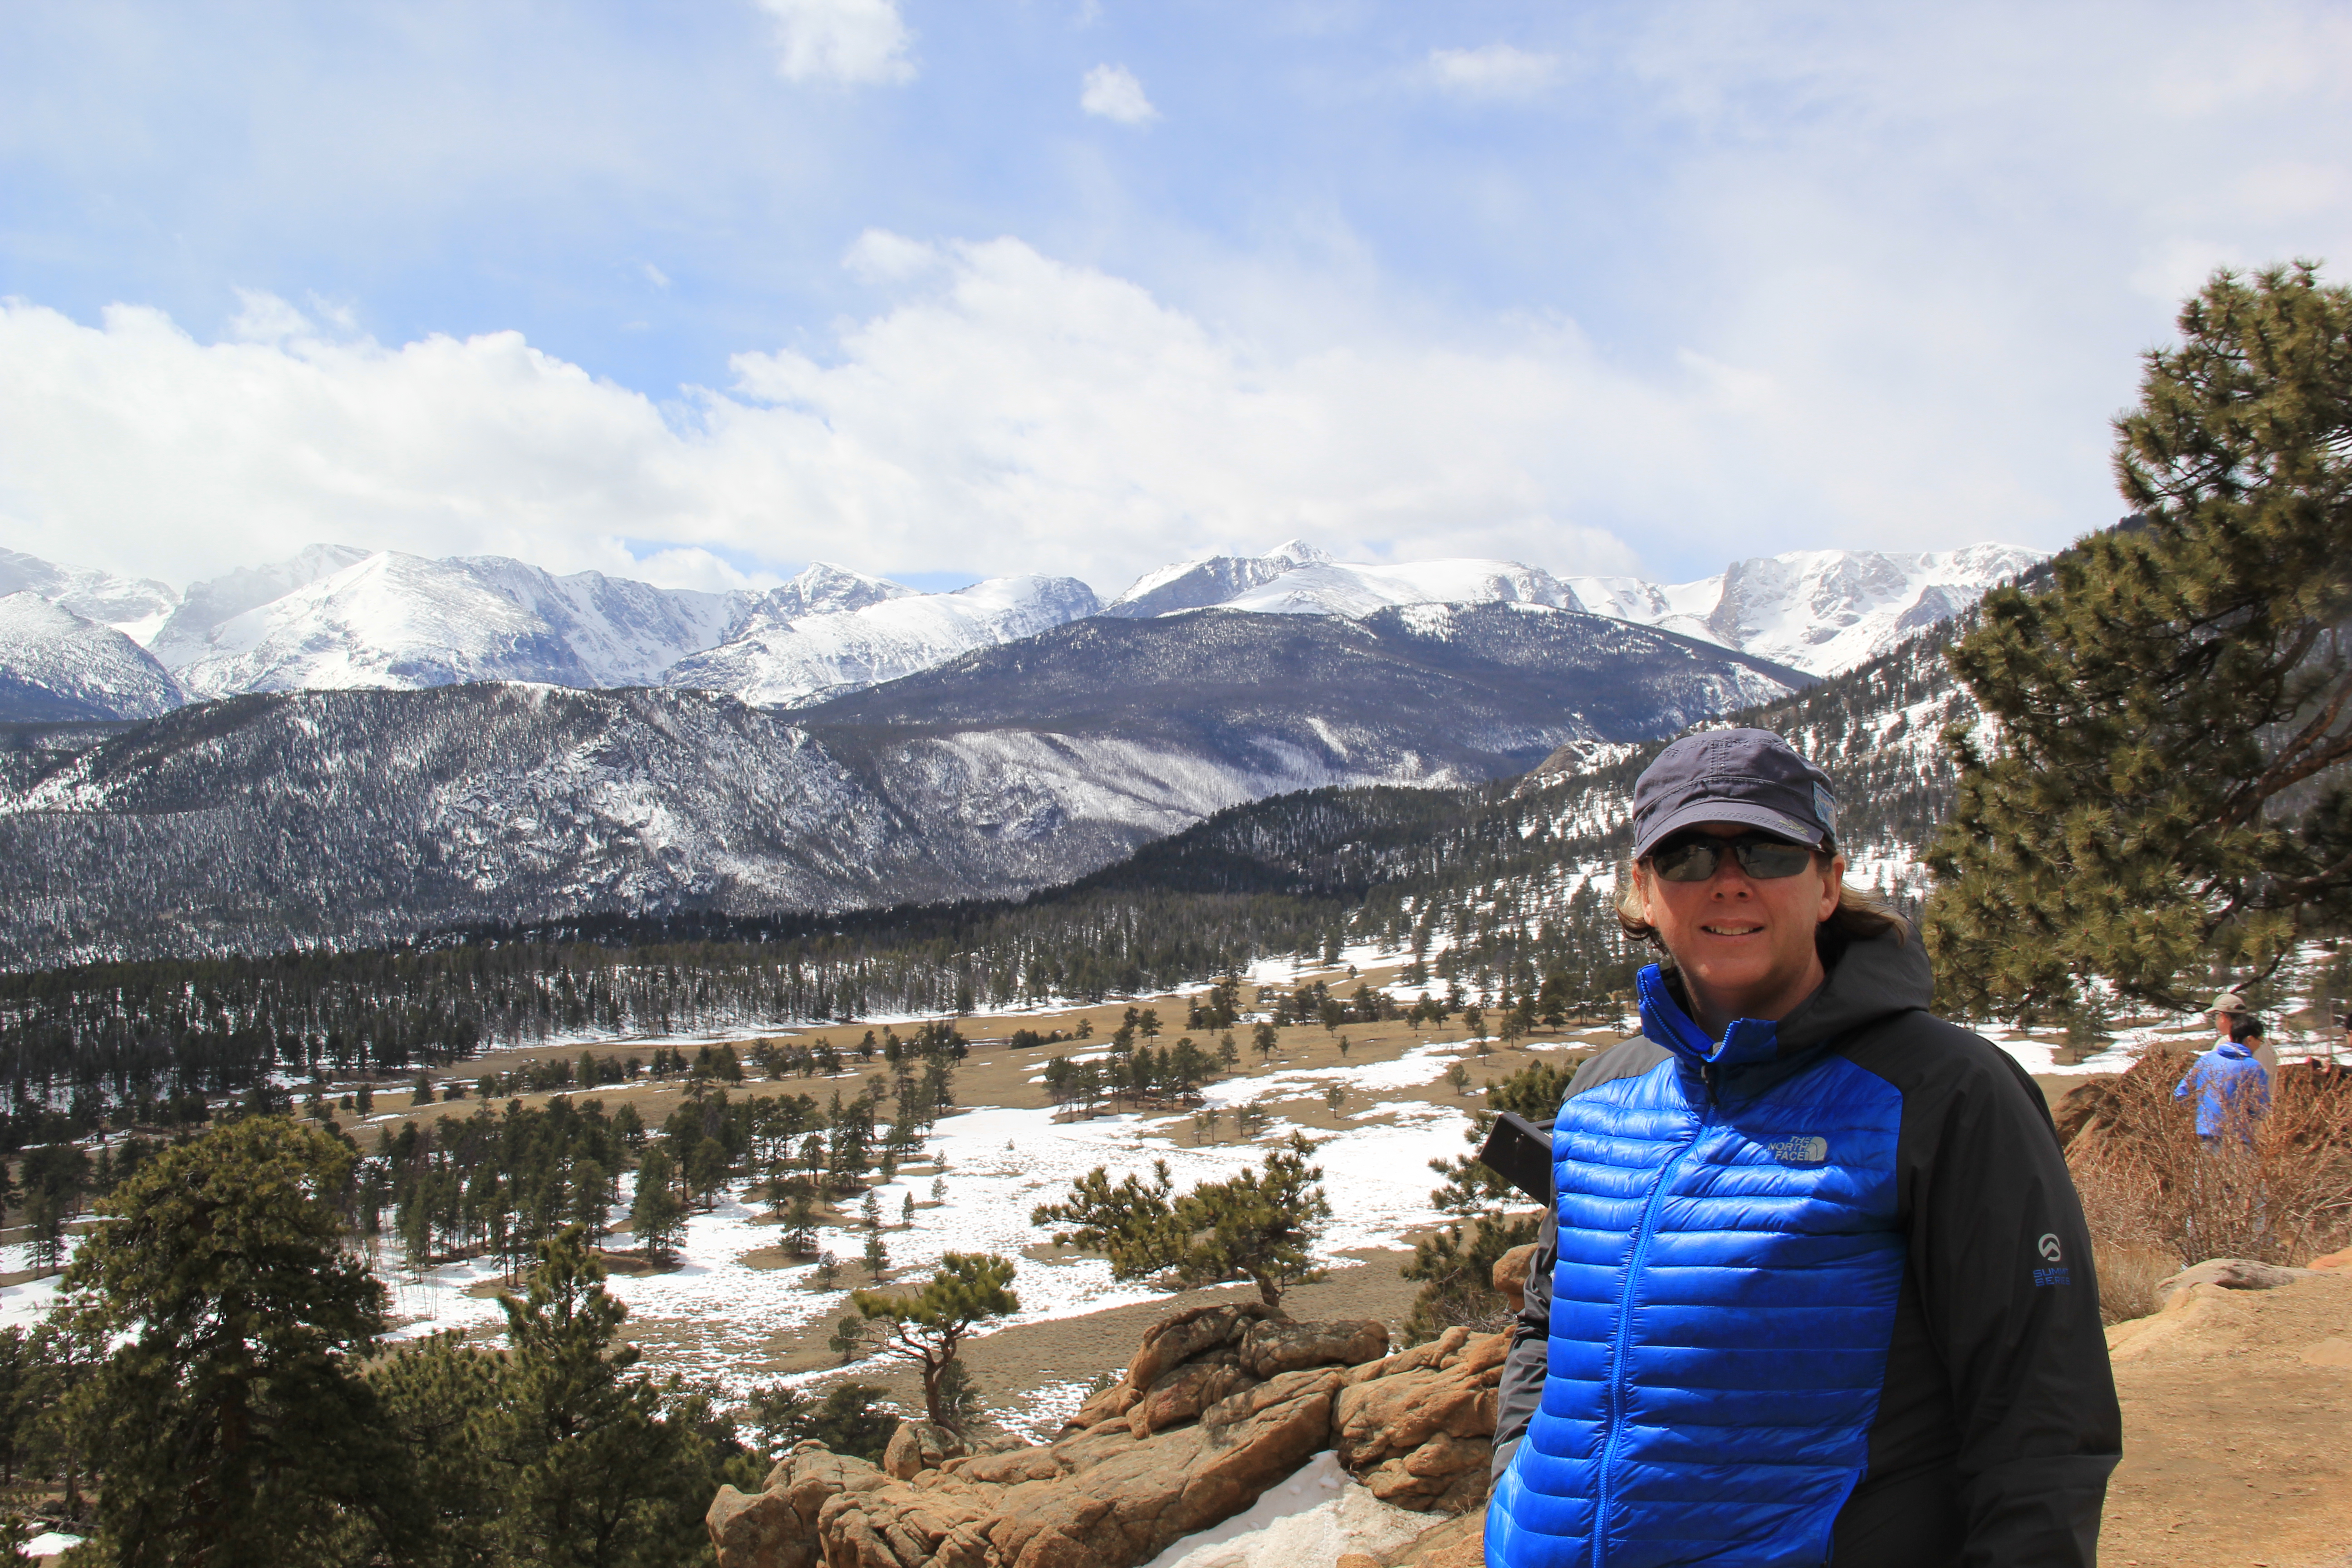
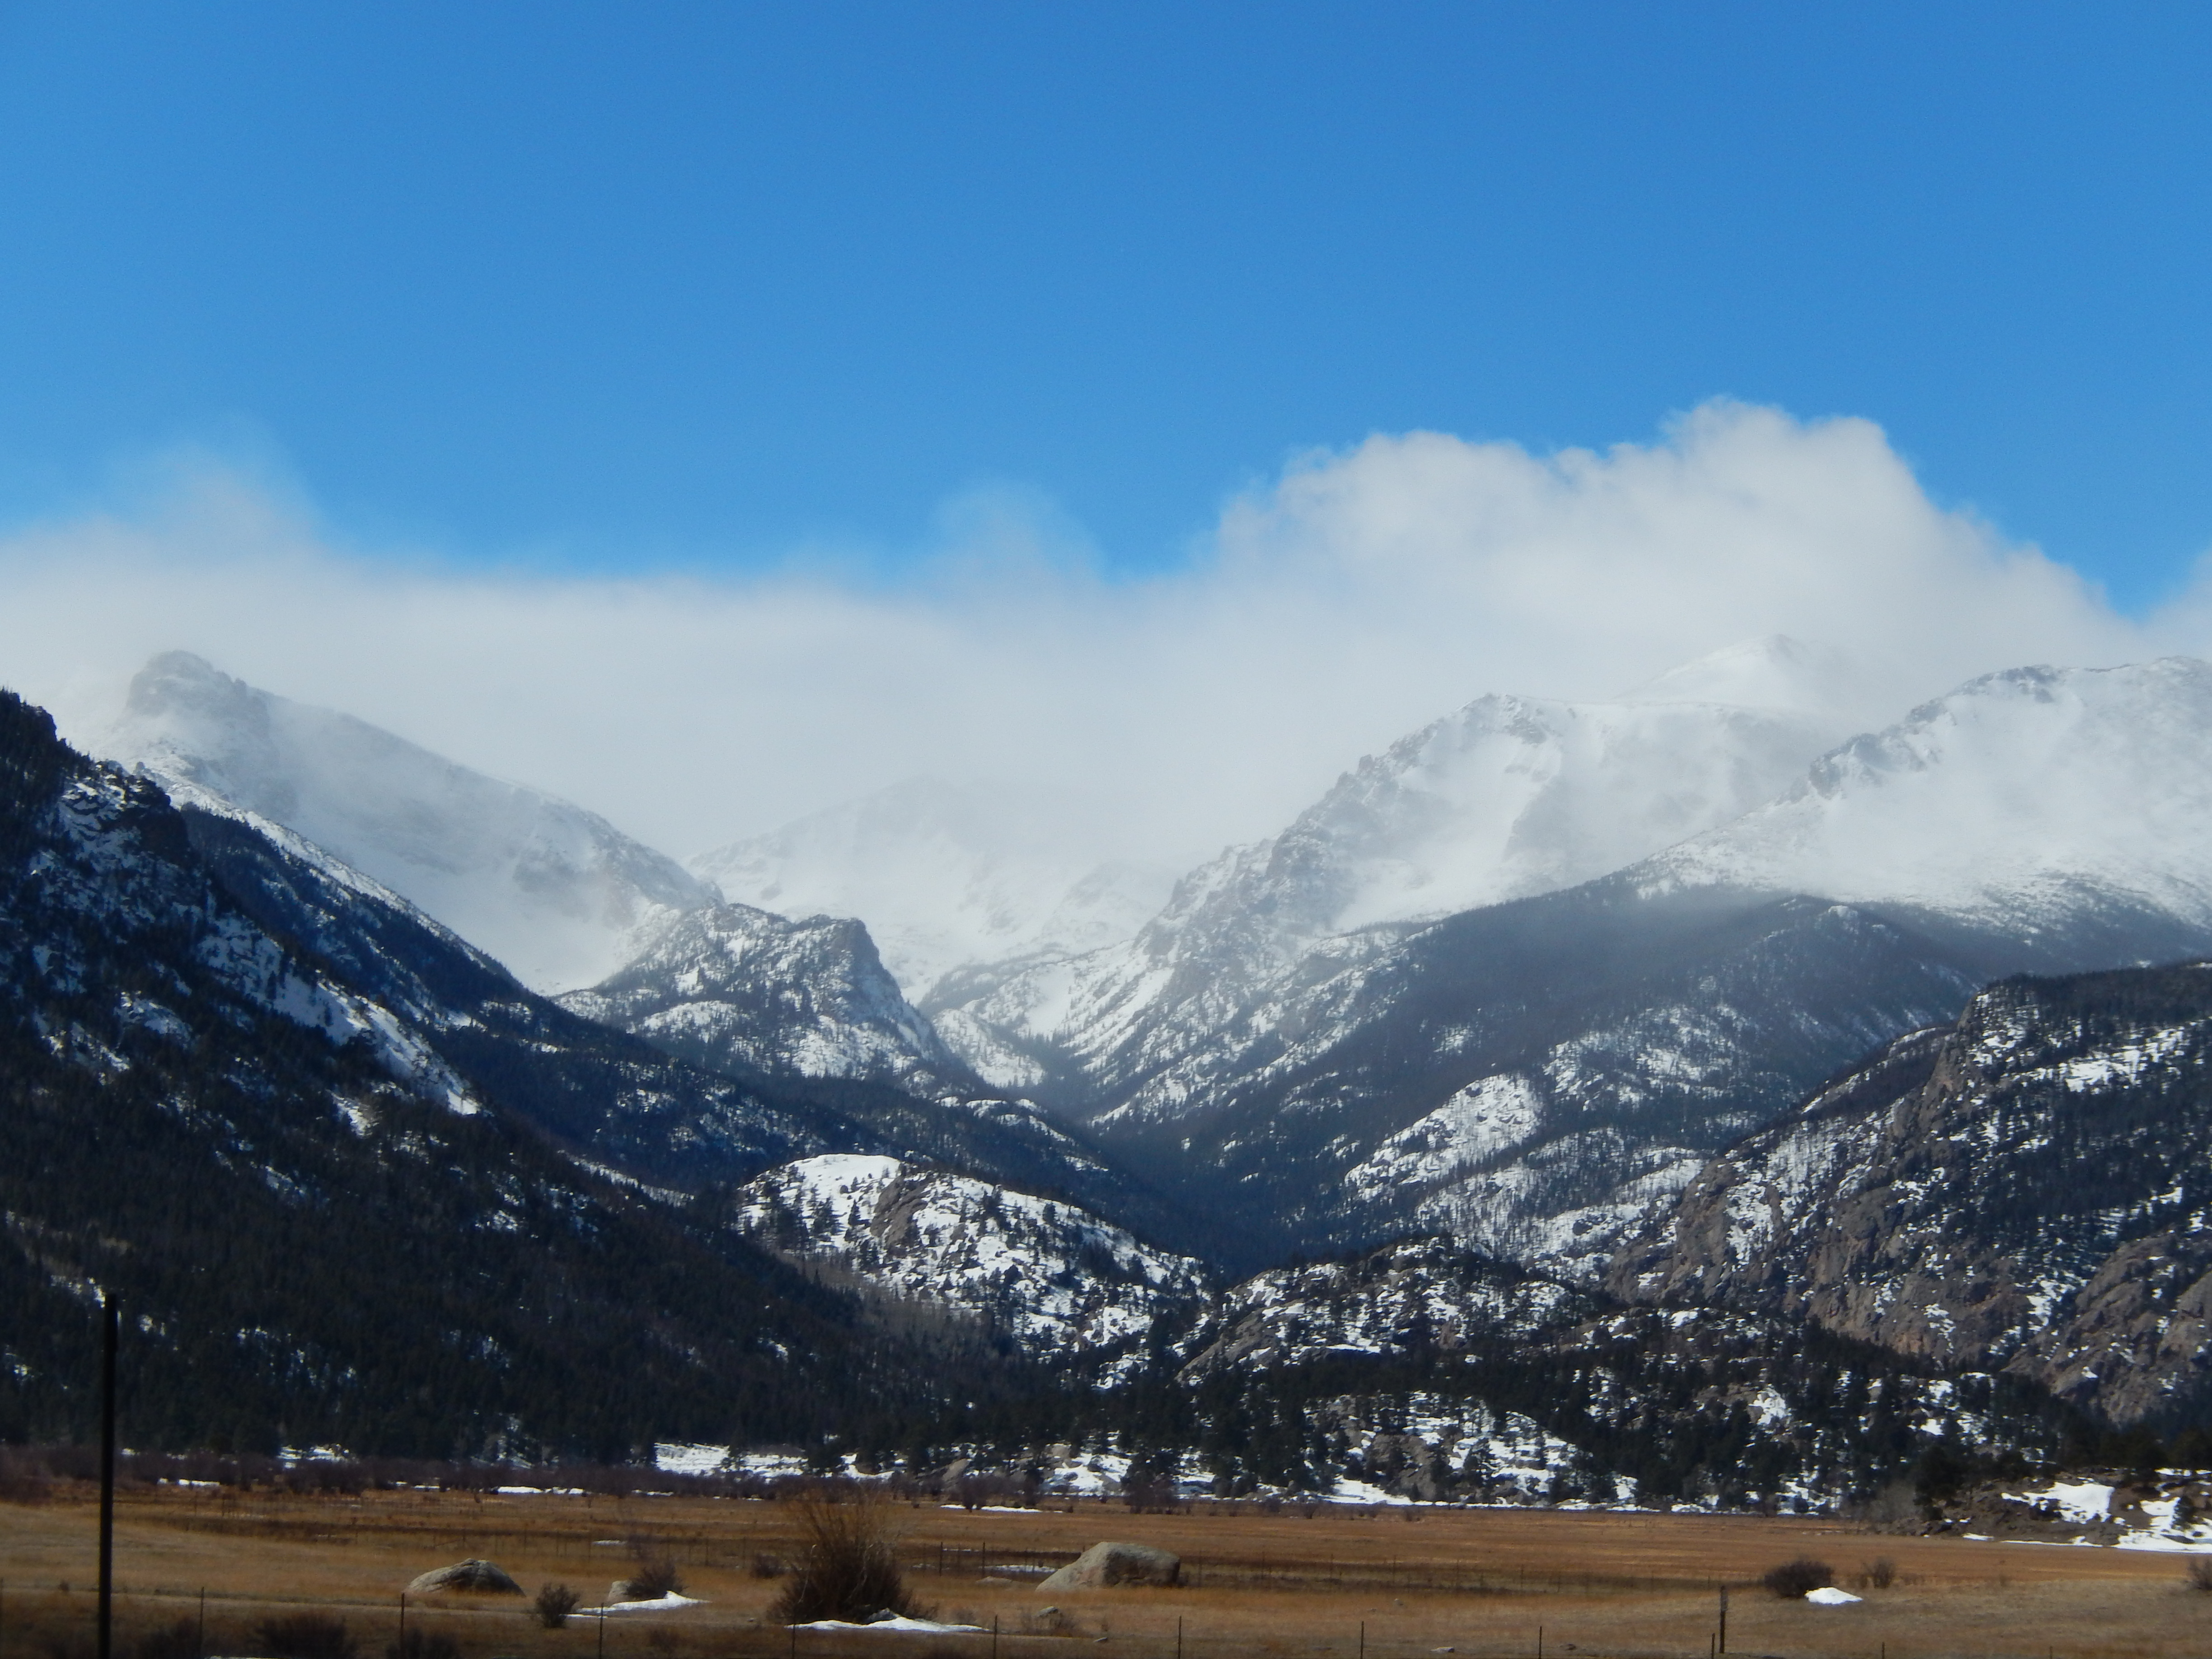
Driving into RMNP
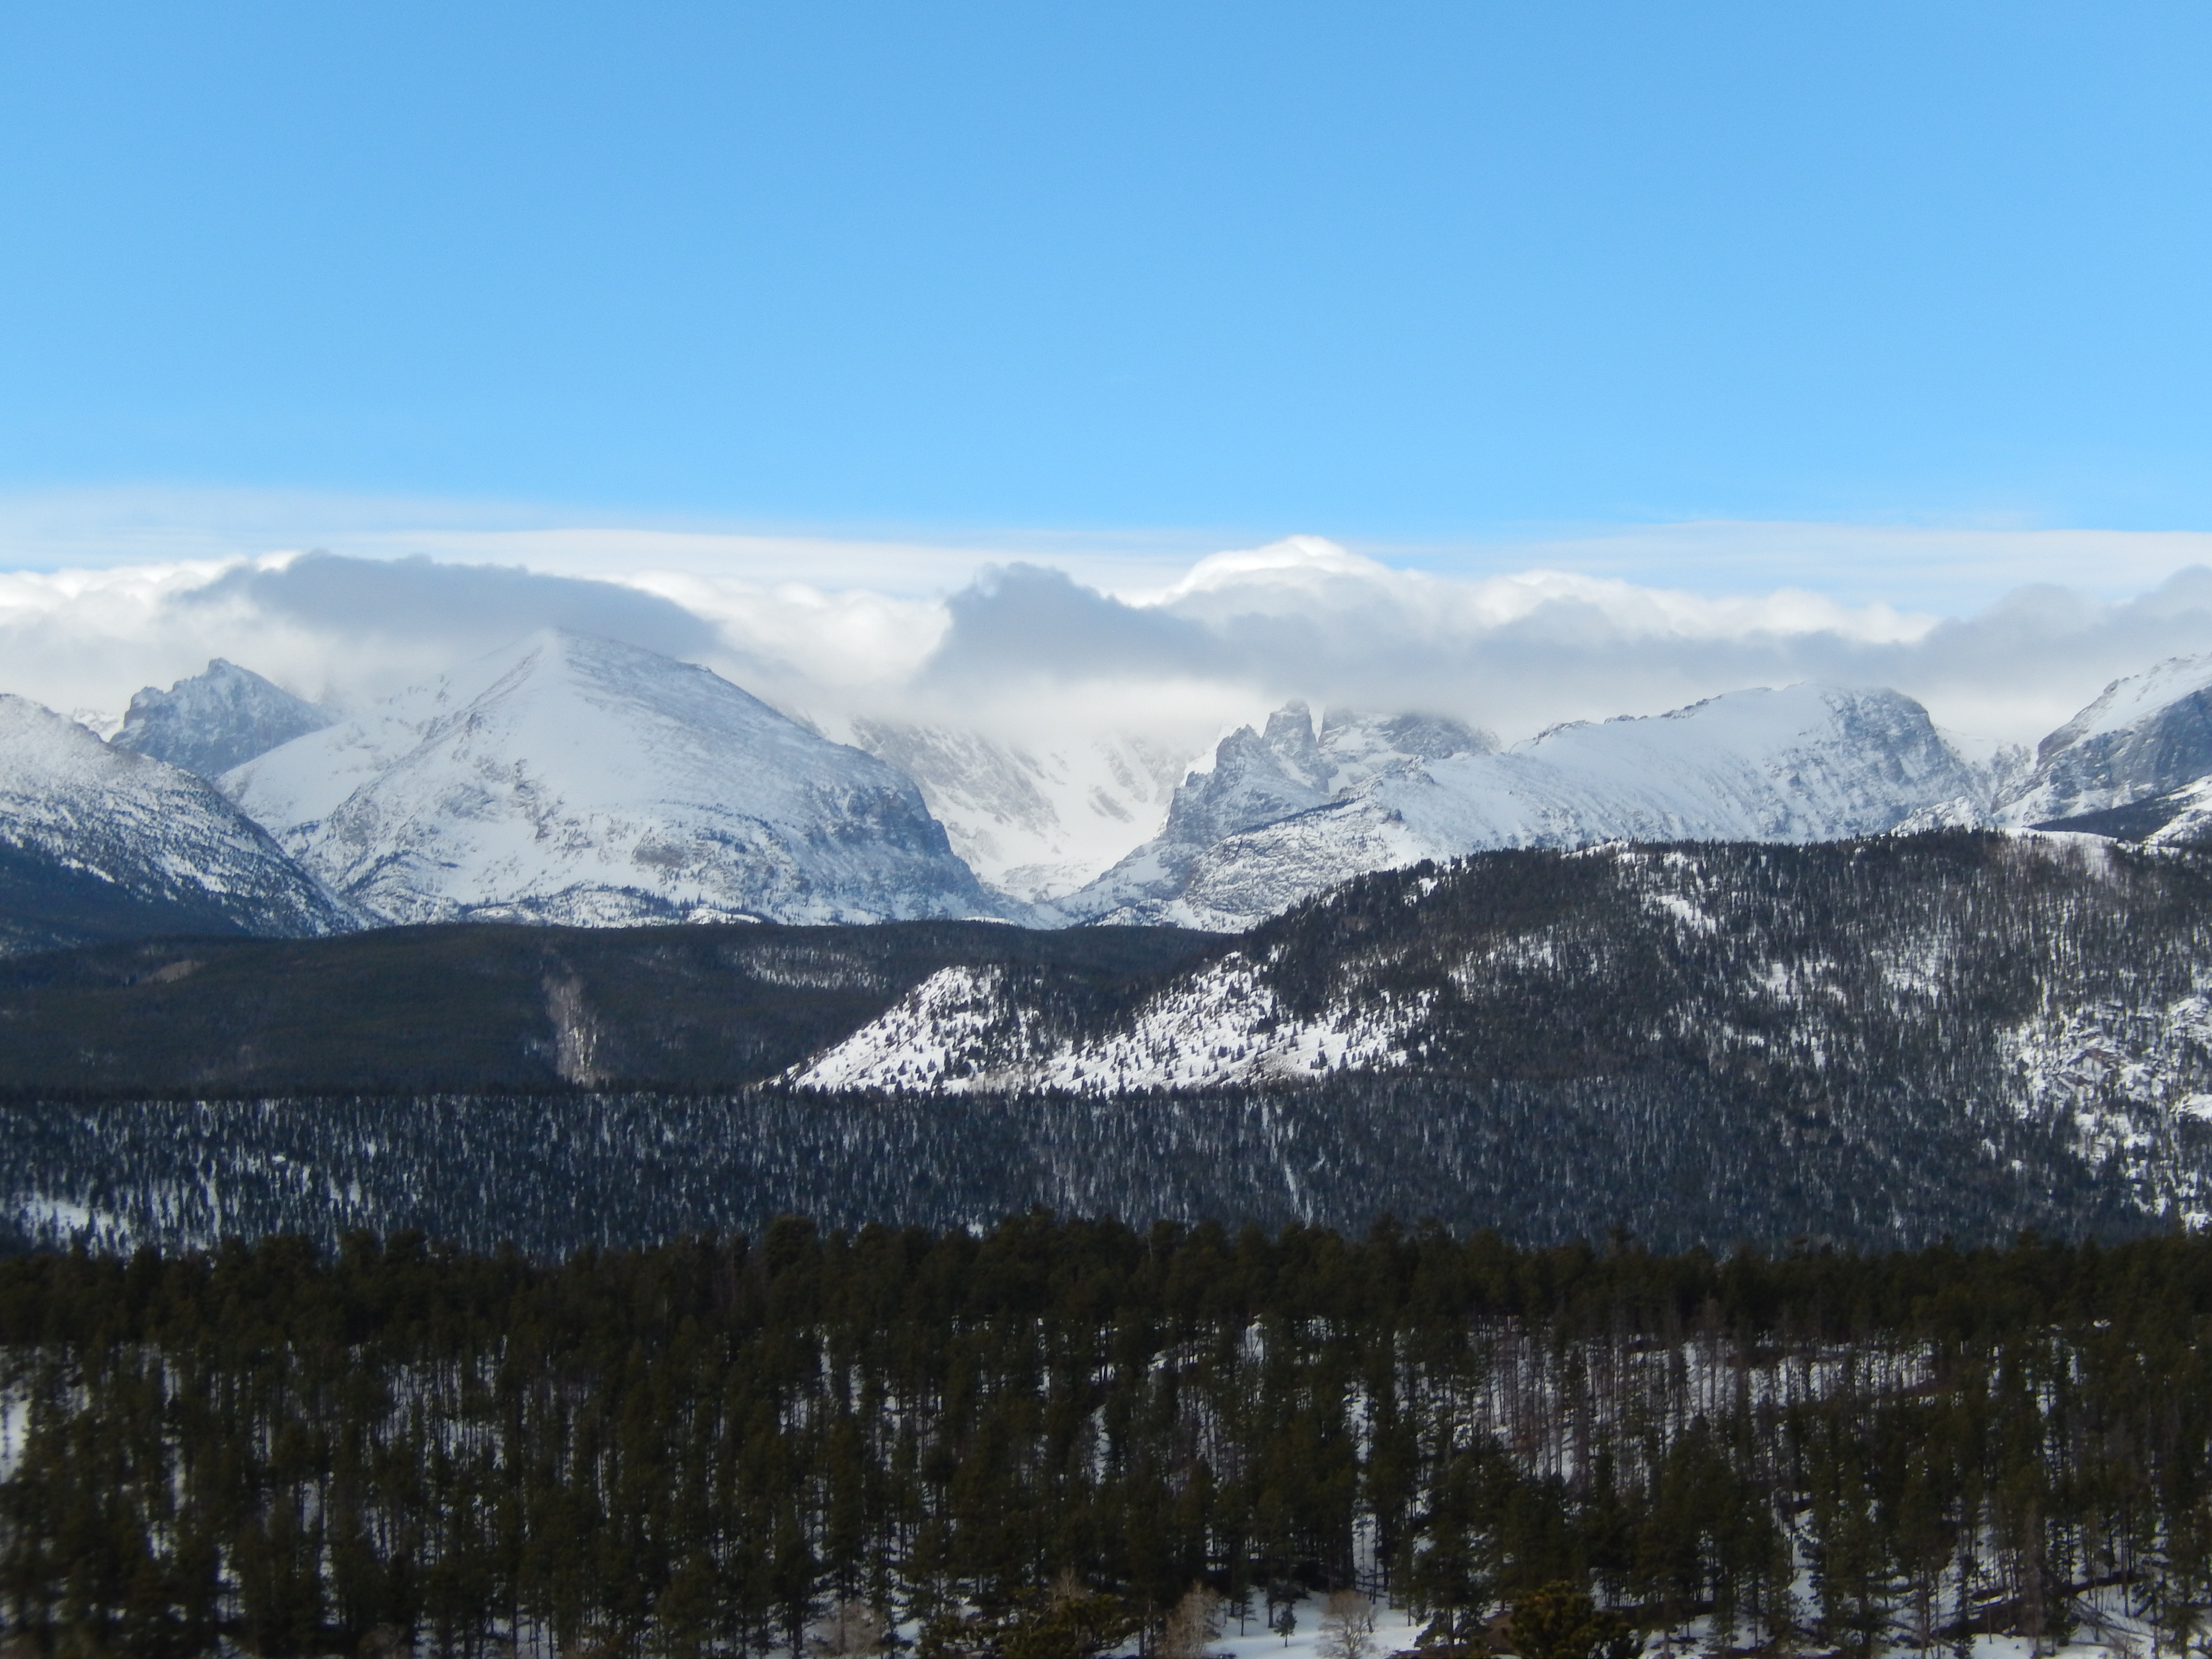
As we drove up to Rocky Mountain National Park ( after our free breakfast) I saw views I had never seen before, as I have reflected on this shock of awe it occurred to me that every time I have actually entered the park it has been cloudy, snowy or stormy. I think if had seen the views I saw last Saturday I would have been in RMNP more frequently before now. I have to be honest here, I didn’t want to leave….like EVER.
It took us almost an hour to get to the Trail Ridge Road parking lot and trail( Snowshoe details here) because we kept stopping to take pictures. I figured that we could hit this trail again and see what it looks like outside of a snow storm, assuming there were views.
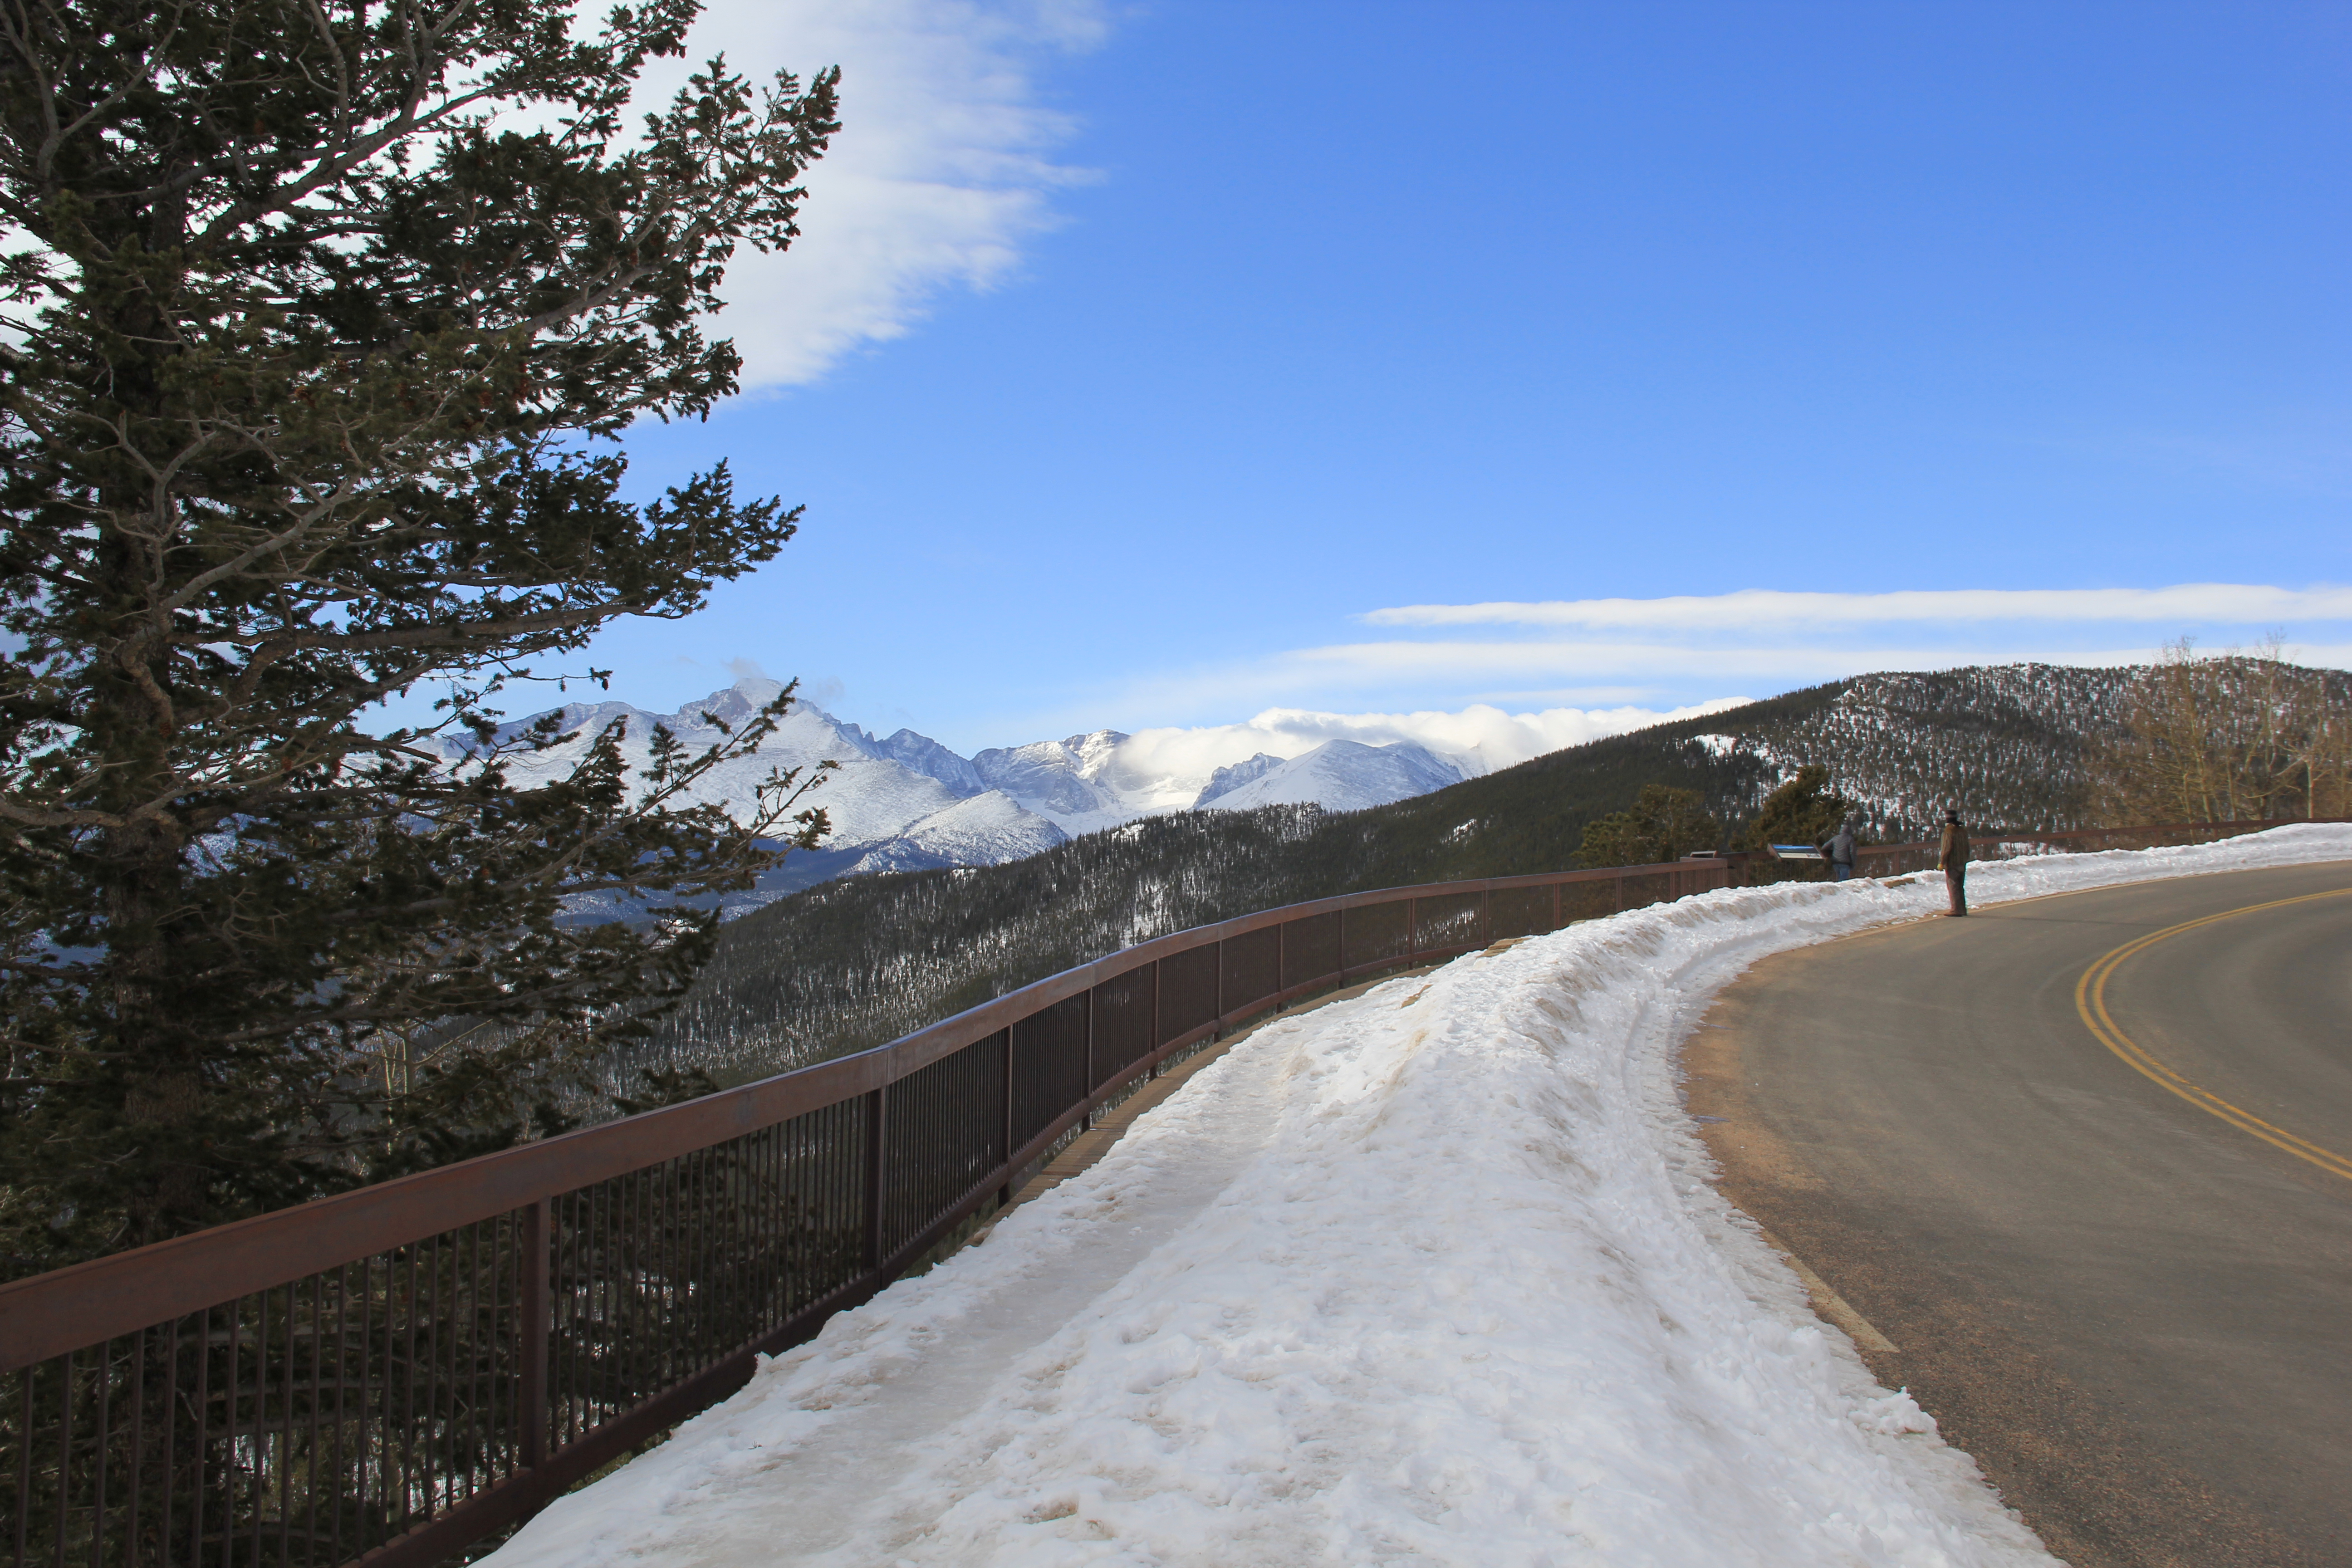
When we pulled up to the parking area, I was still not feeling so hot and I seriously chalked it up to poor sleep and the crown. So we climbed up on one side of the parking area to get this shot, I figured it was just exhaustion.
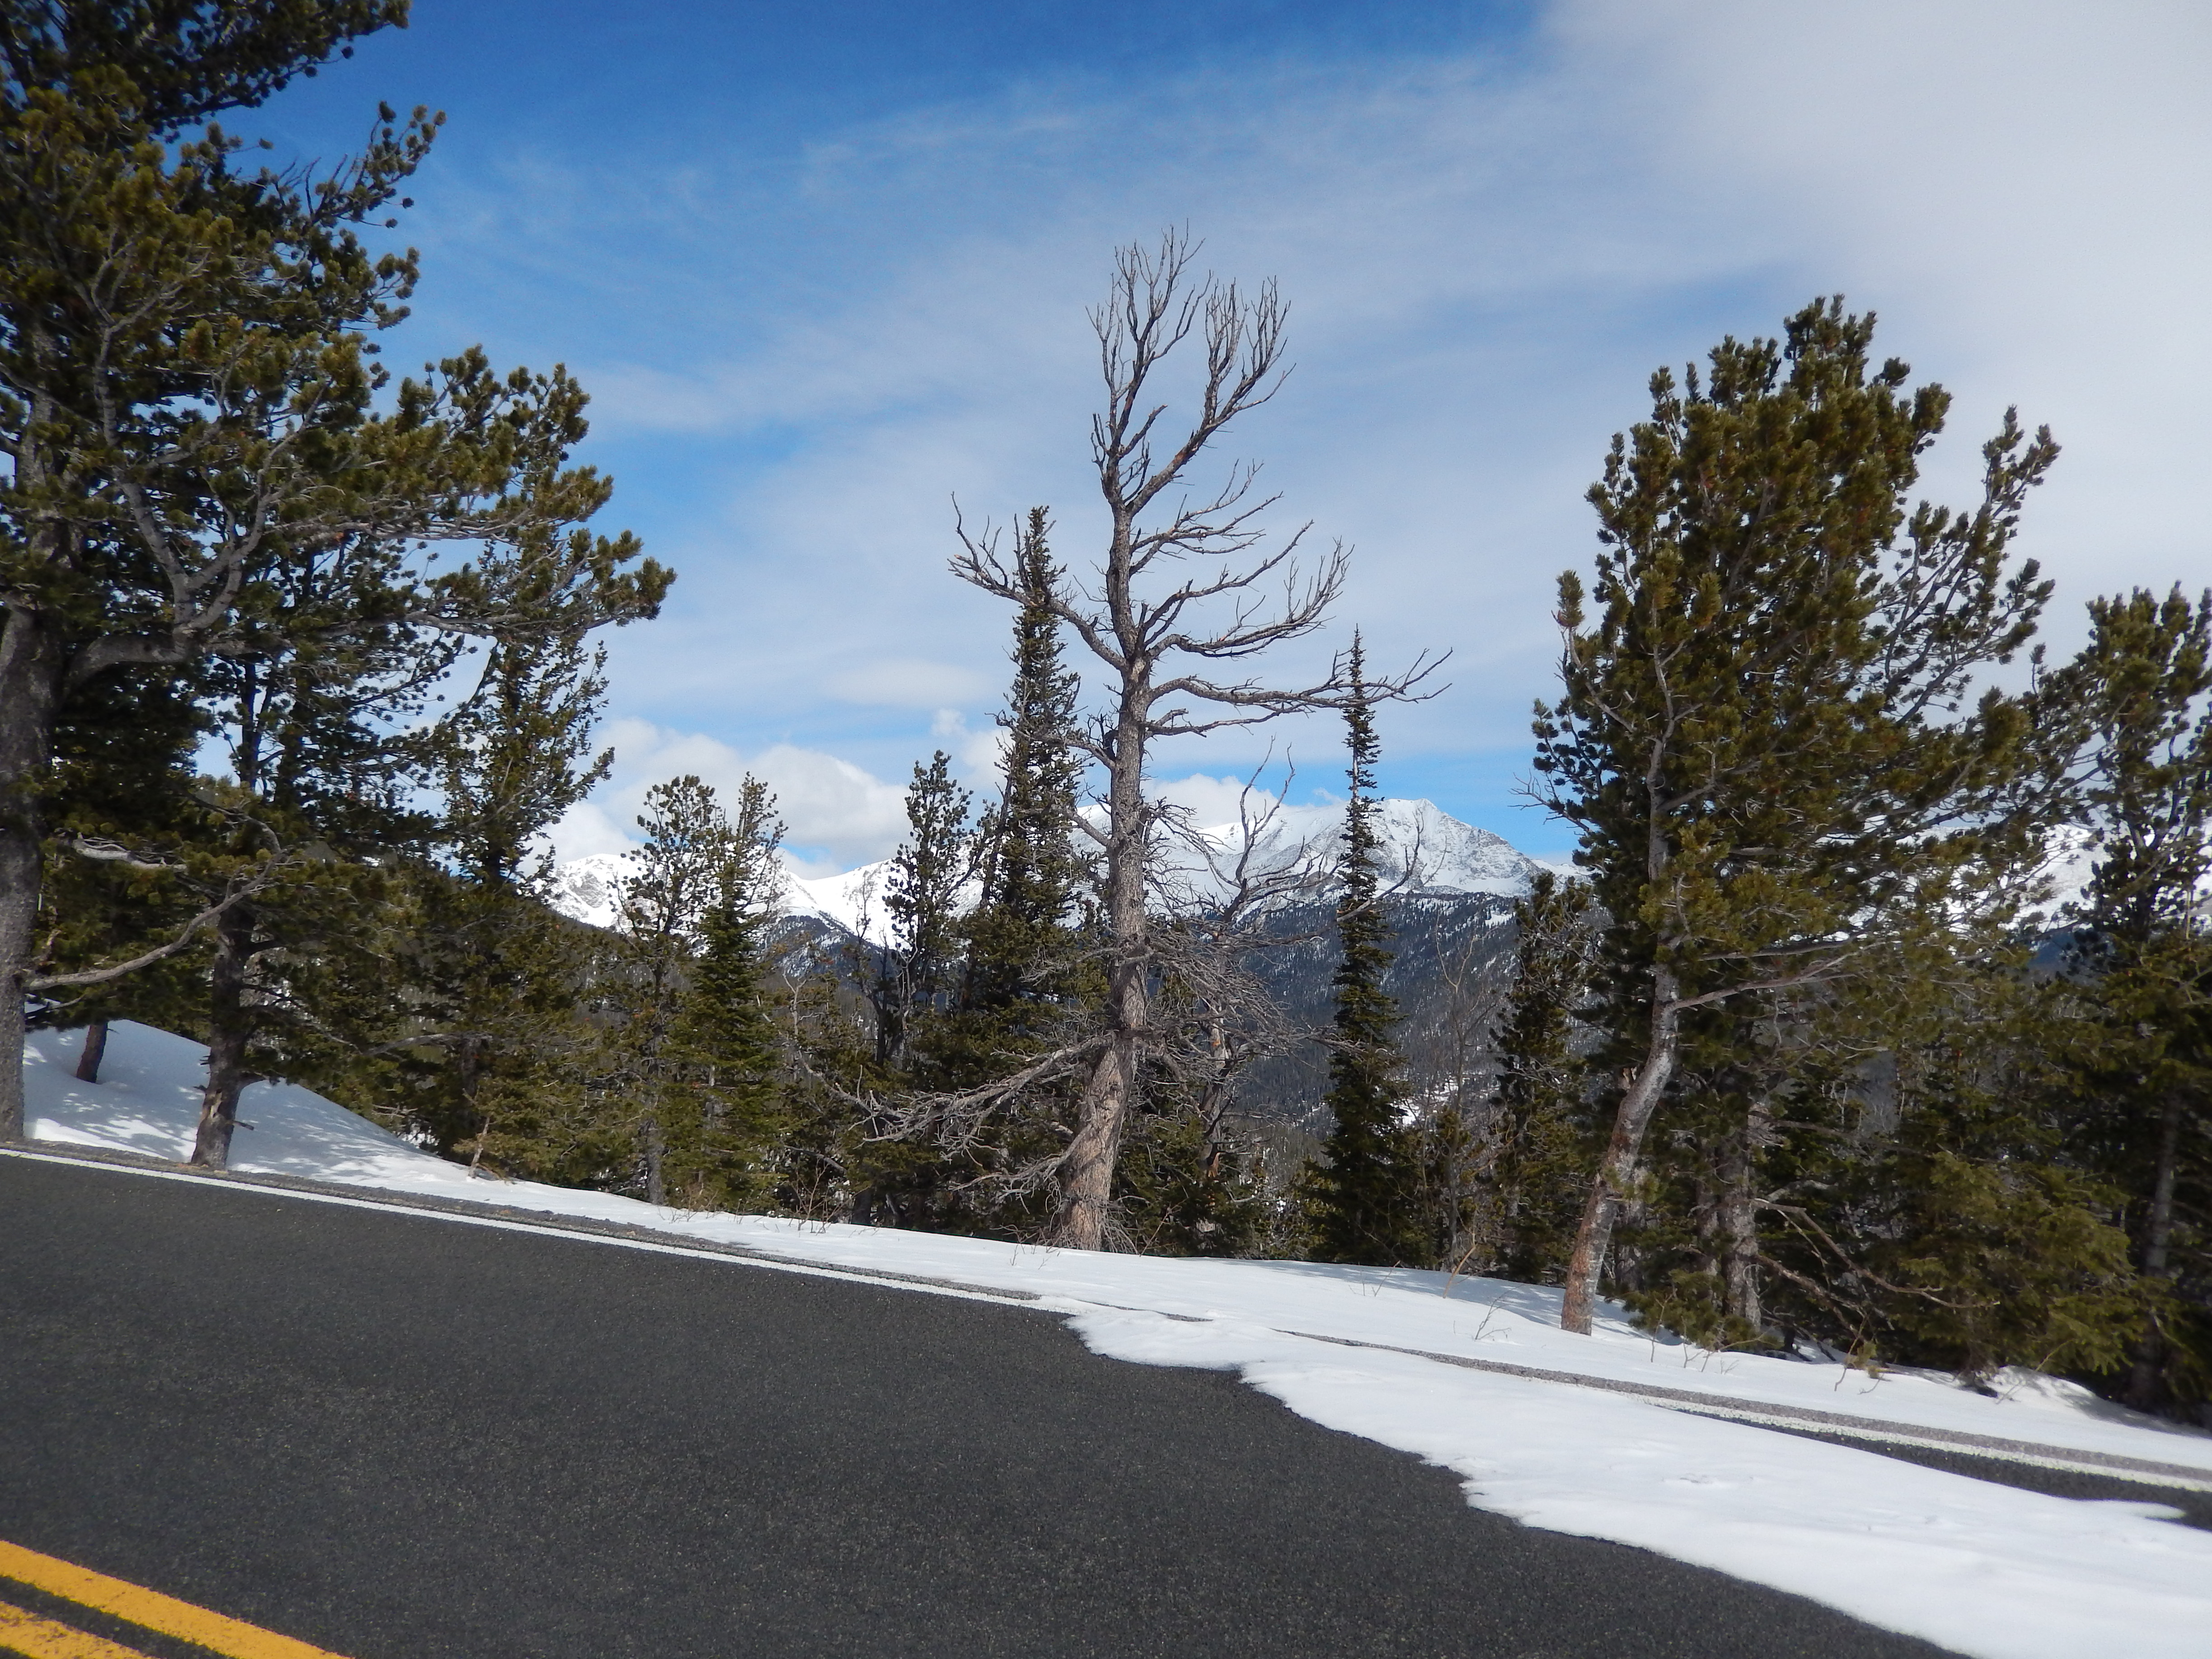
We scouted out the trail and saw it was all straight ice and decided that we didn’t need to bring our snowshoes, but if I was honest with myself I knew I couldn’t carry the snowshoes anyway. We started hiking up the road and the views were amazing!
rounding the first corner up the roadhow the Road/trail lookedViews before the Snow
It was pretty much after this turn that I checked out….. that disconnected head thing that happens when you have a head cold, well I was there. The views were crazy amazing and I was loving them but I was also out of touch….
We walked for about a mile and then all the sudden the snow was deep, and us with no snowshoes… the good or bad of it was, I was completely oblivious and just kept following Aaron. He was following other footprints so I didn’t care much about our direction and then the other foot prints were gone … I still didn’t care much I just had my head down thinking-> put one foot in front of the other.
hmmmmmm snow
As we moved forward, I was fighting with myself the whole way thinking WTF this is cake why am I struggling> get over the stupid tooth thing already ….. while Aaron was moving forward on 2-5 feet of snow with no input from me. He did awesome, as he always does, but about a quarter to half mile into the snow the tracks we and been following turned around while we kept going.
Looking Back
It was both cool and foggy as we went forward, I completely figured out the snowshoe trail I could not see the last time. The hard route from Hidden Valley to Trail Ridge Road > Can you see it?
Hidden Valley to trail ridge road
As we were moving through this last little bit I realized I was totally sick…. its not the tooth.
At one point Aaron turned around and said what do you think, I just stared at him and said whatever…. he knew >I had the sick face…. so he said check the time we still have a lot of awards to get. Sure enough it was 11 and we needed to turn around. It was then that I realized I was totally sick. For the record it only took me 20 minutes more to voice it….
The drive out was both beautiful and painful….. I never wanted to leave, I was so excited about our prizes AND completely sick….. We stopped at every awe point and took pictures, we went into town and celebrated our wins, we left early the next morning and I spent the next 36 hours in bed.
I had a crazy good time in Estes Park despite my illness, I loved seeing Trail Ridge Road without a storm, I loved driving through RMNP with moody weather and skies. I loved going through town and gathering our prizes…. What I didn’t love was, was being sick the whole time. Either way we got some good pictures…..
still pretending on the drive out with crazy beautiful viewsGreat view…. pretending to not be sick
Trail Length: To the base of the glacier and back it is 2 miles round trip
Trail Uses: Snowshoe, skis, snowboards, cross country skis
Degree of Difficulty: To the glacier easy to moderate
Bathroom: Yes – there is a well used port -o-potty in the parking lot
Fees: $5 a day.
Pets: Yes
Looking towards the Glacier over the frozen LakeSame view In July 2013
2 weeks ago we won an all expense paid trip to Estes Park… I am so excited and will tell you all about as soon as we get to experience it! Because of that, I decided that a break from Rocky Mountain National Park was due this past weekend. I thought it might be fun to try a more advanced snowshoe since the weather was supposed to be pretty awesome on Saturday and St. Mary’s glacier was the one I wanted to do. To be honest snowshoeing to the Glacier isn’t advanced but going up the glacier to James peak is. We had no desire to summit James Peak we just wanted to go to the base and back to enjoy the amazing views on what was supposed to be a perfect day. I had great expectations for the day….
Then I got a crown on Thursday and that 3rd shot hit a nerve, it was almost comical at how quickly my whole left side of my face swelled up, I could see my cheek like it wasn’t my cheek. What wasn’t so great was the pounding headache I had on Friday that forced me into bed all day. Saturday morning it was kinda ghosting around so we went ahead and stuck to our plan.
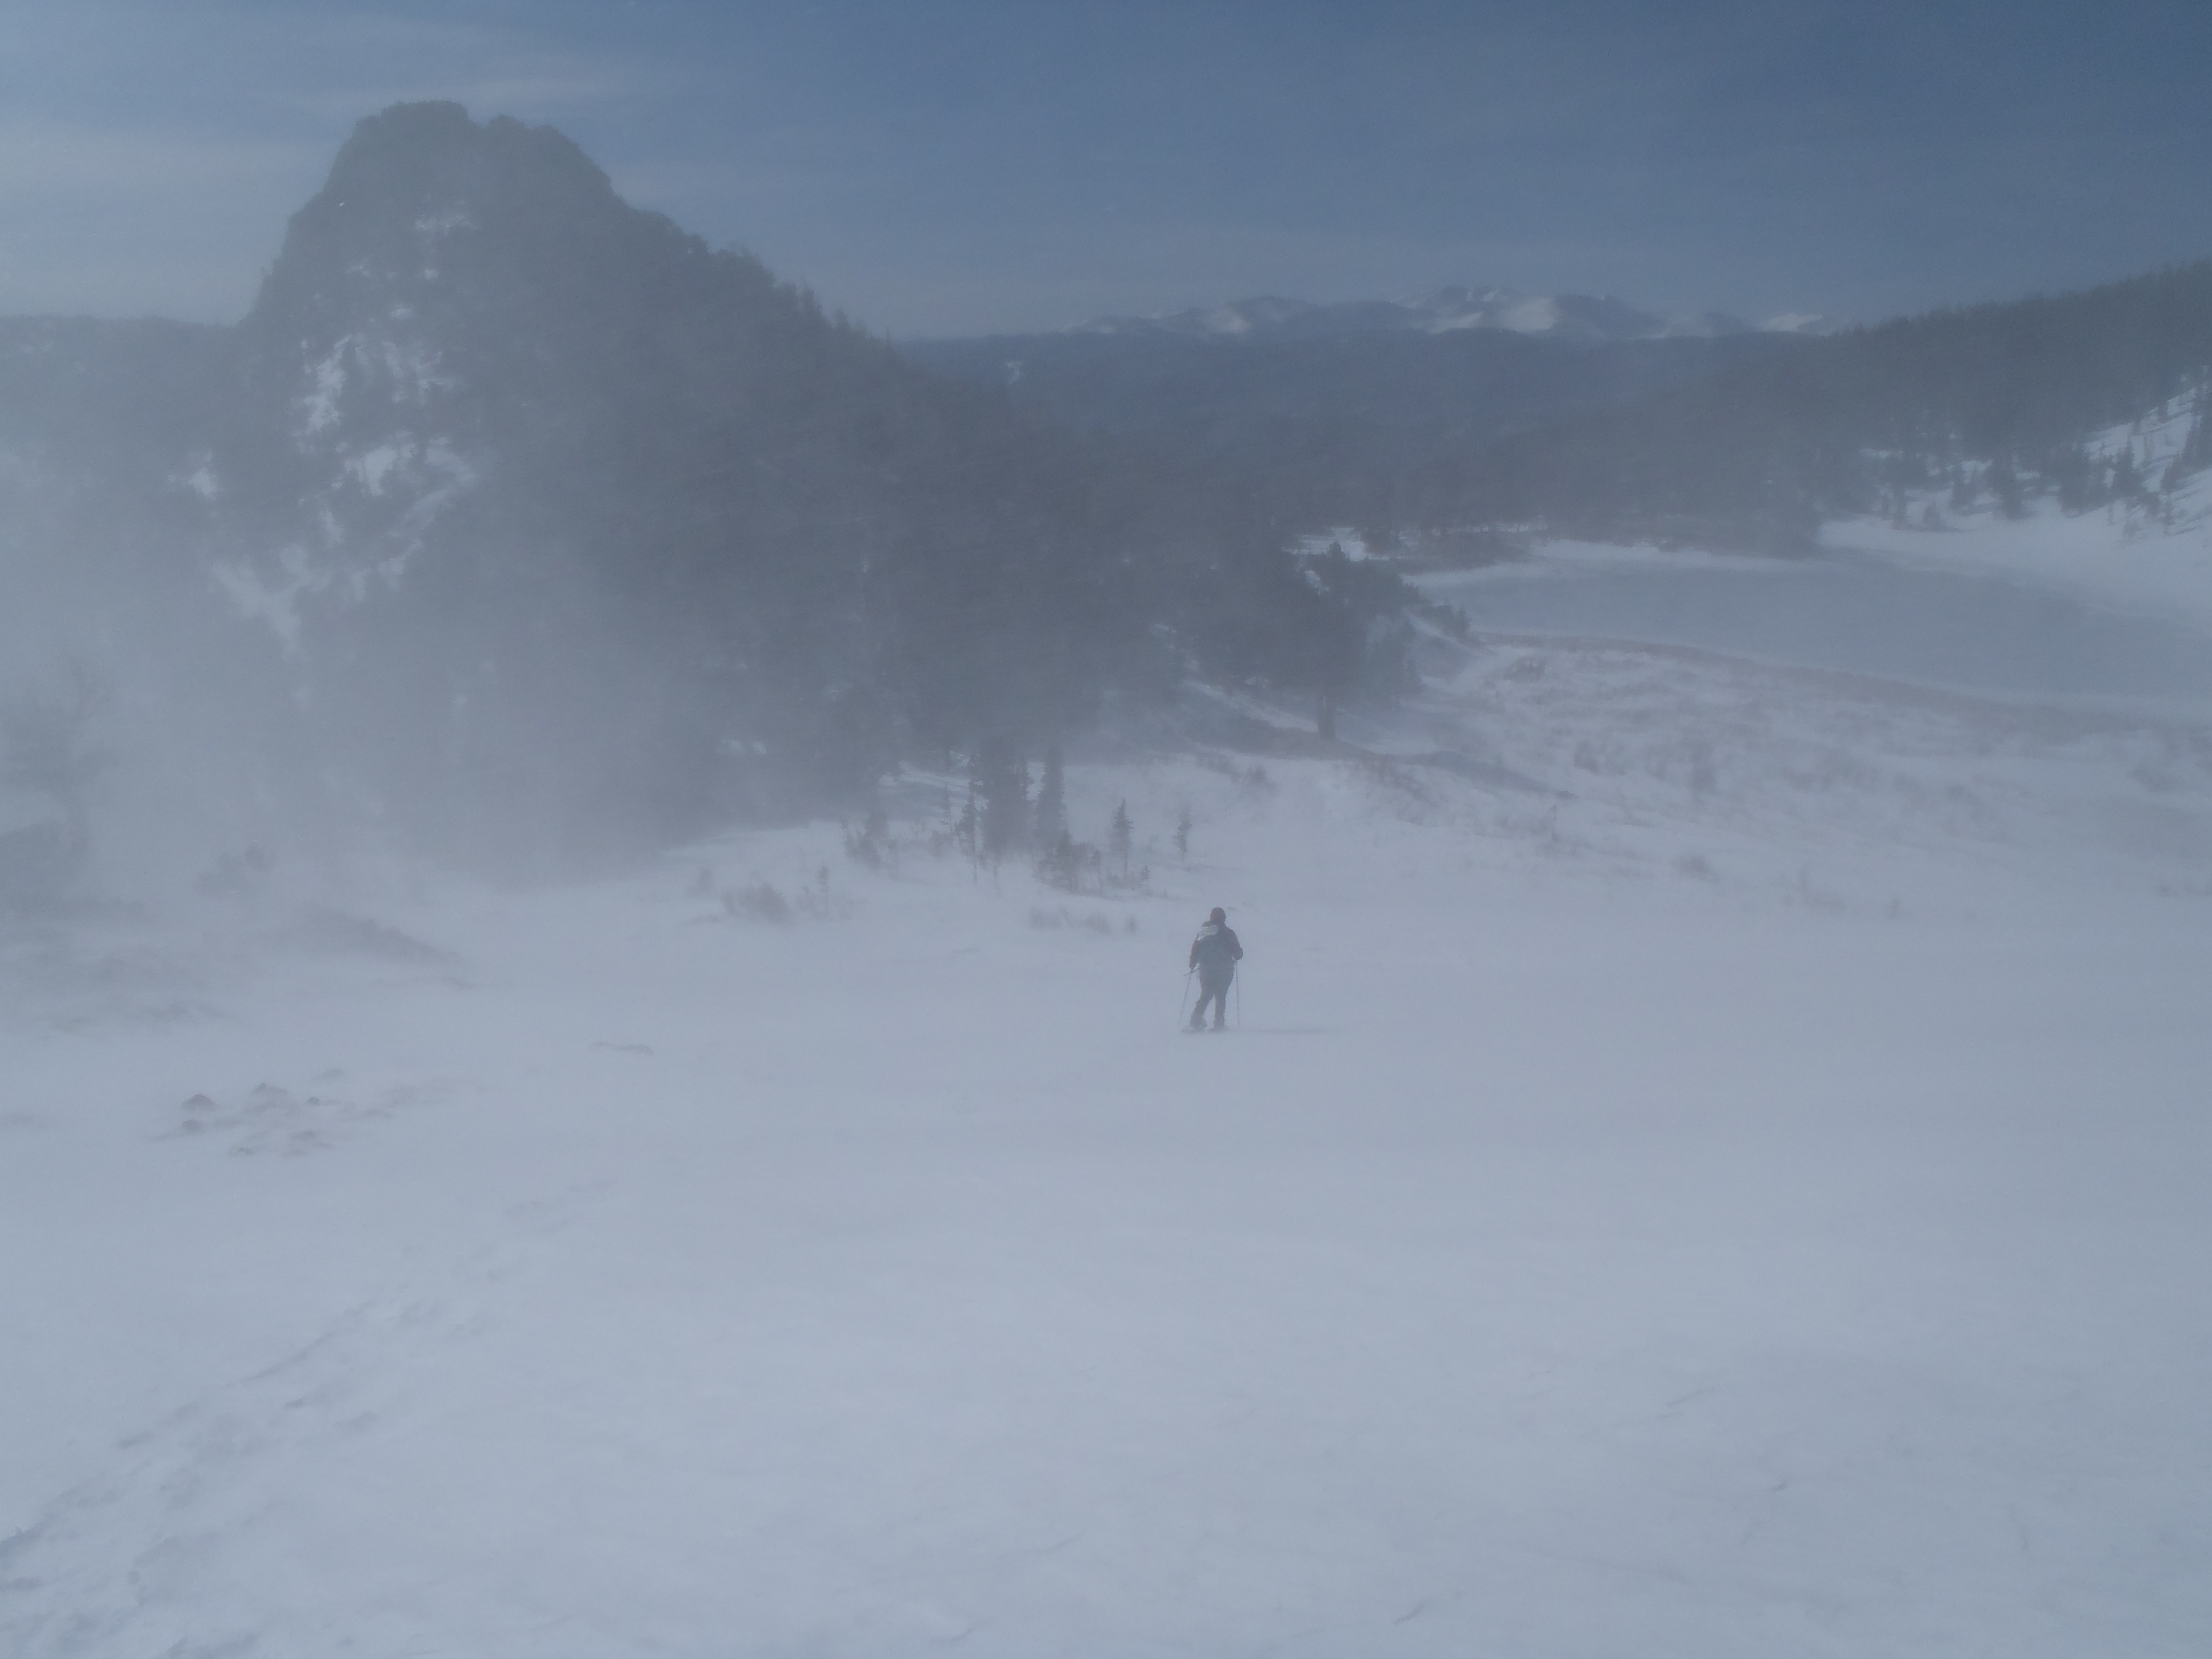
The drive was lovely, no traffic jams on I 70, dry roads and breathtakingly blue skies. When we got to the parking lot around 7:30, we were super excited and then we open the door ….well I tried to open the car door…. the wind was BAD.
Starting out
Not easily deterred, we suited up and headed up. It was a super beautiful every where we looked and what a huge contrast from the summer when it was different beauty:
Same area in Summer
But when the wind hit, we just sort of stopped and stood and waited until it finished up. We were still optimistic we could make the journey we originally planned.
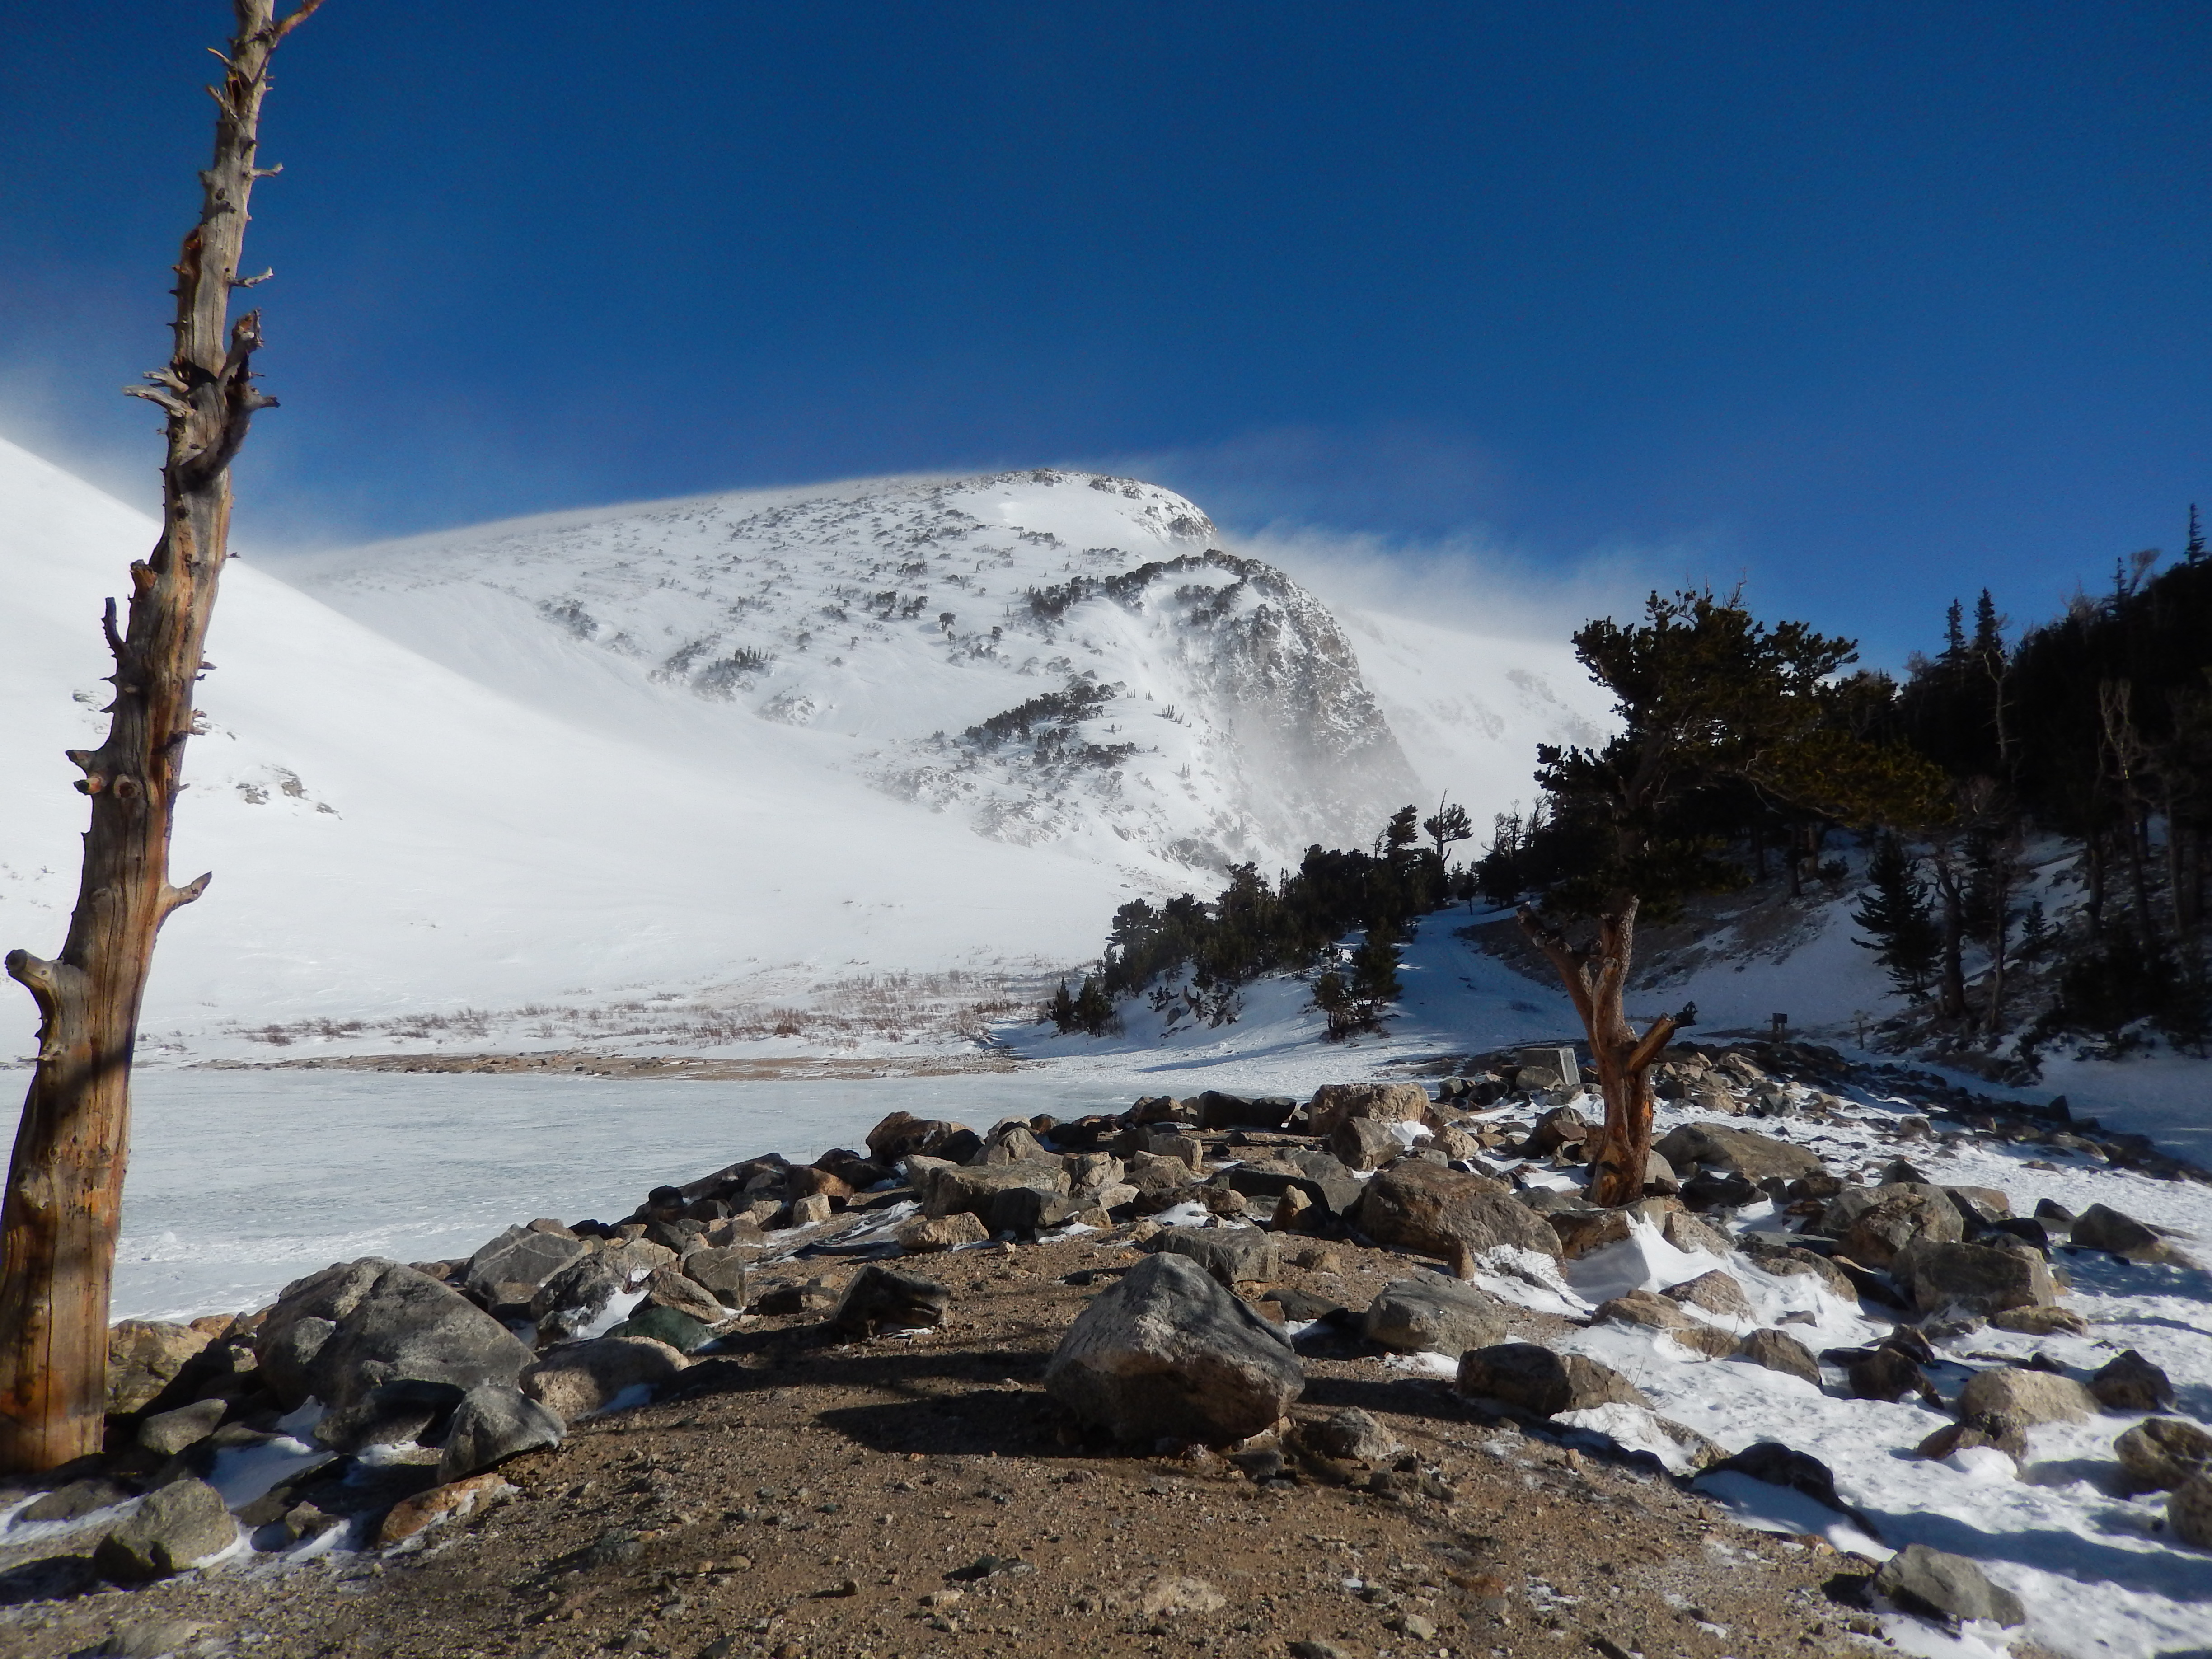
As the Glacier and its surrounding peaks came into view our optimism died, the snow blowing off and around it never stopped or slowed. We saw snow funnels on the slopes… tall ones. I had never seen one of those before. But deep down there was still HOPE and we had not yet put on our snowshoes so we took a bunch of pictures at St. Marys Lake and headed to the glacier.
We got over to the trees to put on our snowshoes and that is when I discovered you put a bizarre amount of pressure on your jaw when putting snowshoes on while wearing a backpack … My headache went back to raging once they were on.
We headed up the glacier not once, not twice but 3 times. Each time we would get in the middle of the winds and try to go a little further and then just get freaked out and turn around. Again if I had more Avalanche training I might have approached it differently but we could not see anything in the windy snow and we could not even look at the mountain ridges to see what the cornices looked like or see what was coming at us from in front or even where we had just come from.
getting close to the wind tunnelAs close to the heaviest wind I could get with my cameraLooking Back the way we came in the wind tunnel
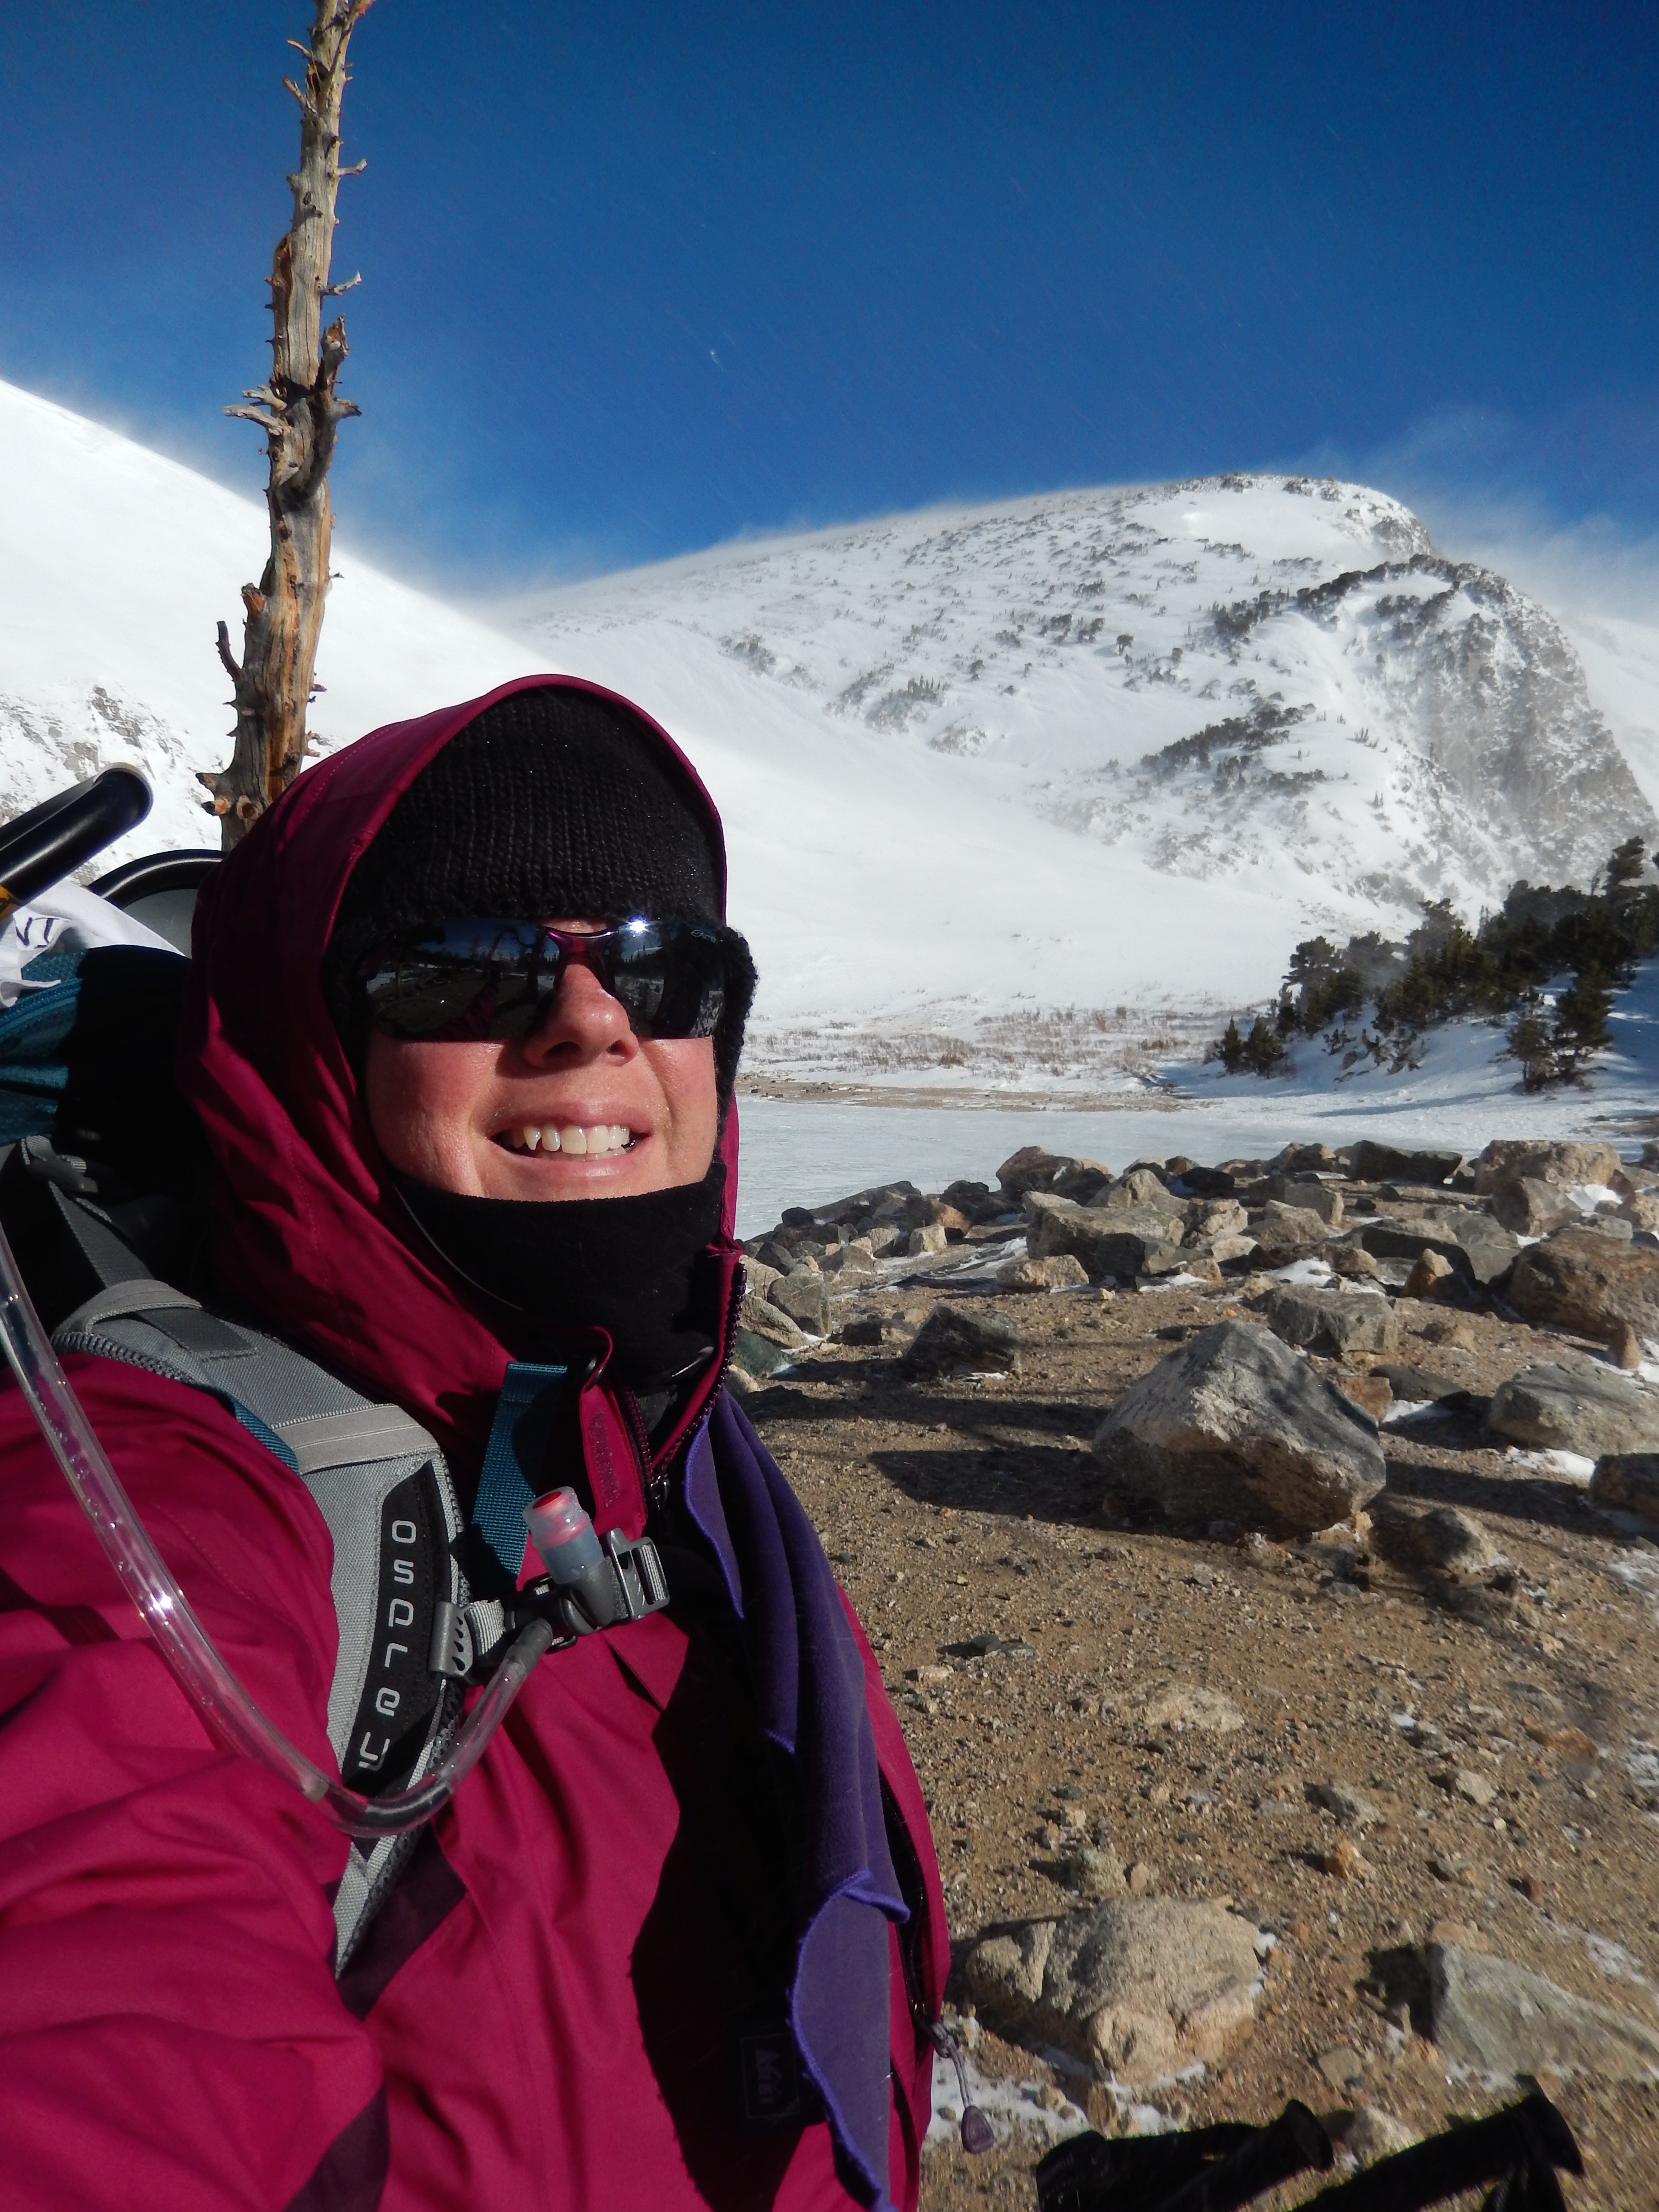
We were out of our comfort zone on a beautiful Bluebird sky but windy day. My head was pounding worse with each attempt and after the 3rd one, I called it. We headed back down and home where I crawled into bed after taking some Alieve.
Me Giving up
I felt so lazy later when I was feeling better, so Sunday we hit North Table Mountain ( Hike Details here) to get extra mileage and climb in for the weekend. The day was beautiful but I forgot my camera!
Directions: Take I70 west and exit at Fall River Road ( Exit #238), turn right on to Fall River Road take it up 10 miles past the town of Alice. Look for the Glacier Hike sign on your left; 100 yards past the sign is a public parking lot. $5 to park.
Highest Elevation: A little over 10,000 Ft- our watch that gives us the elevation is no longer working so this is a guestimate.
Trail Uses: Snowshoeing and Cross Country Skiing Winter only trail as it is an actual road in summer.
Trail Length: 5.5 miles Round trip but this can grow and shrink based on conditions. We did a little over 6 miles, it took 3.5 hours.
Degree of Difficulty: Easy to Moderate
Bathrooms: None at the road closure so hit one of the visitor centers just outside the park.
Pets: No pets allowed in RMNP
Fee: Yes $20 per car a day OR $40 for annual pass with unlimited RMNP access – we have the pass
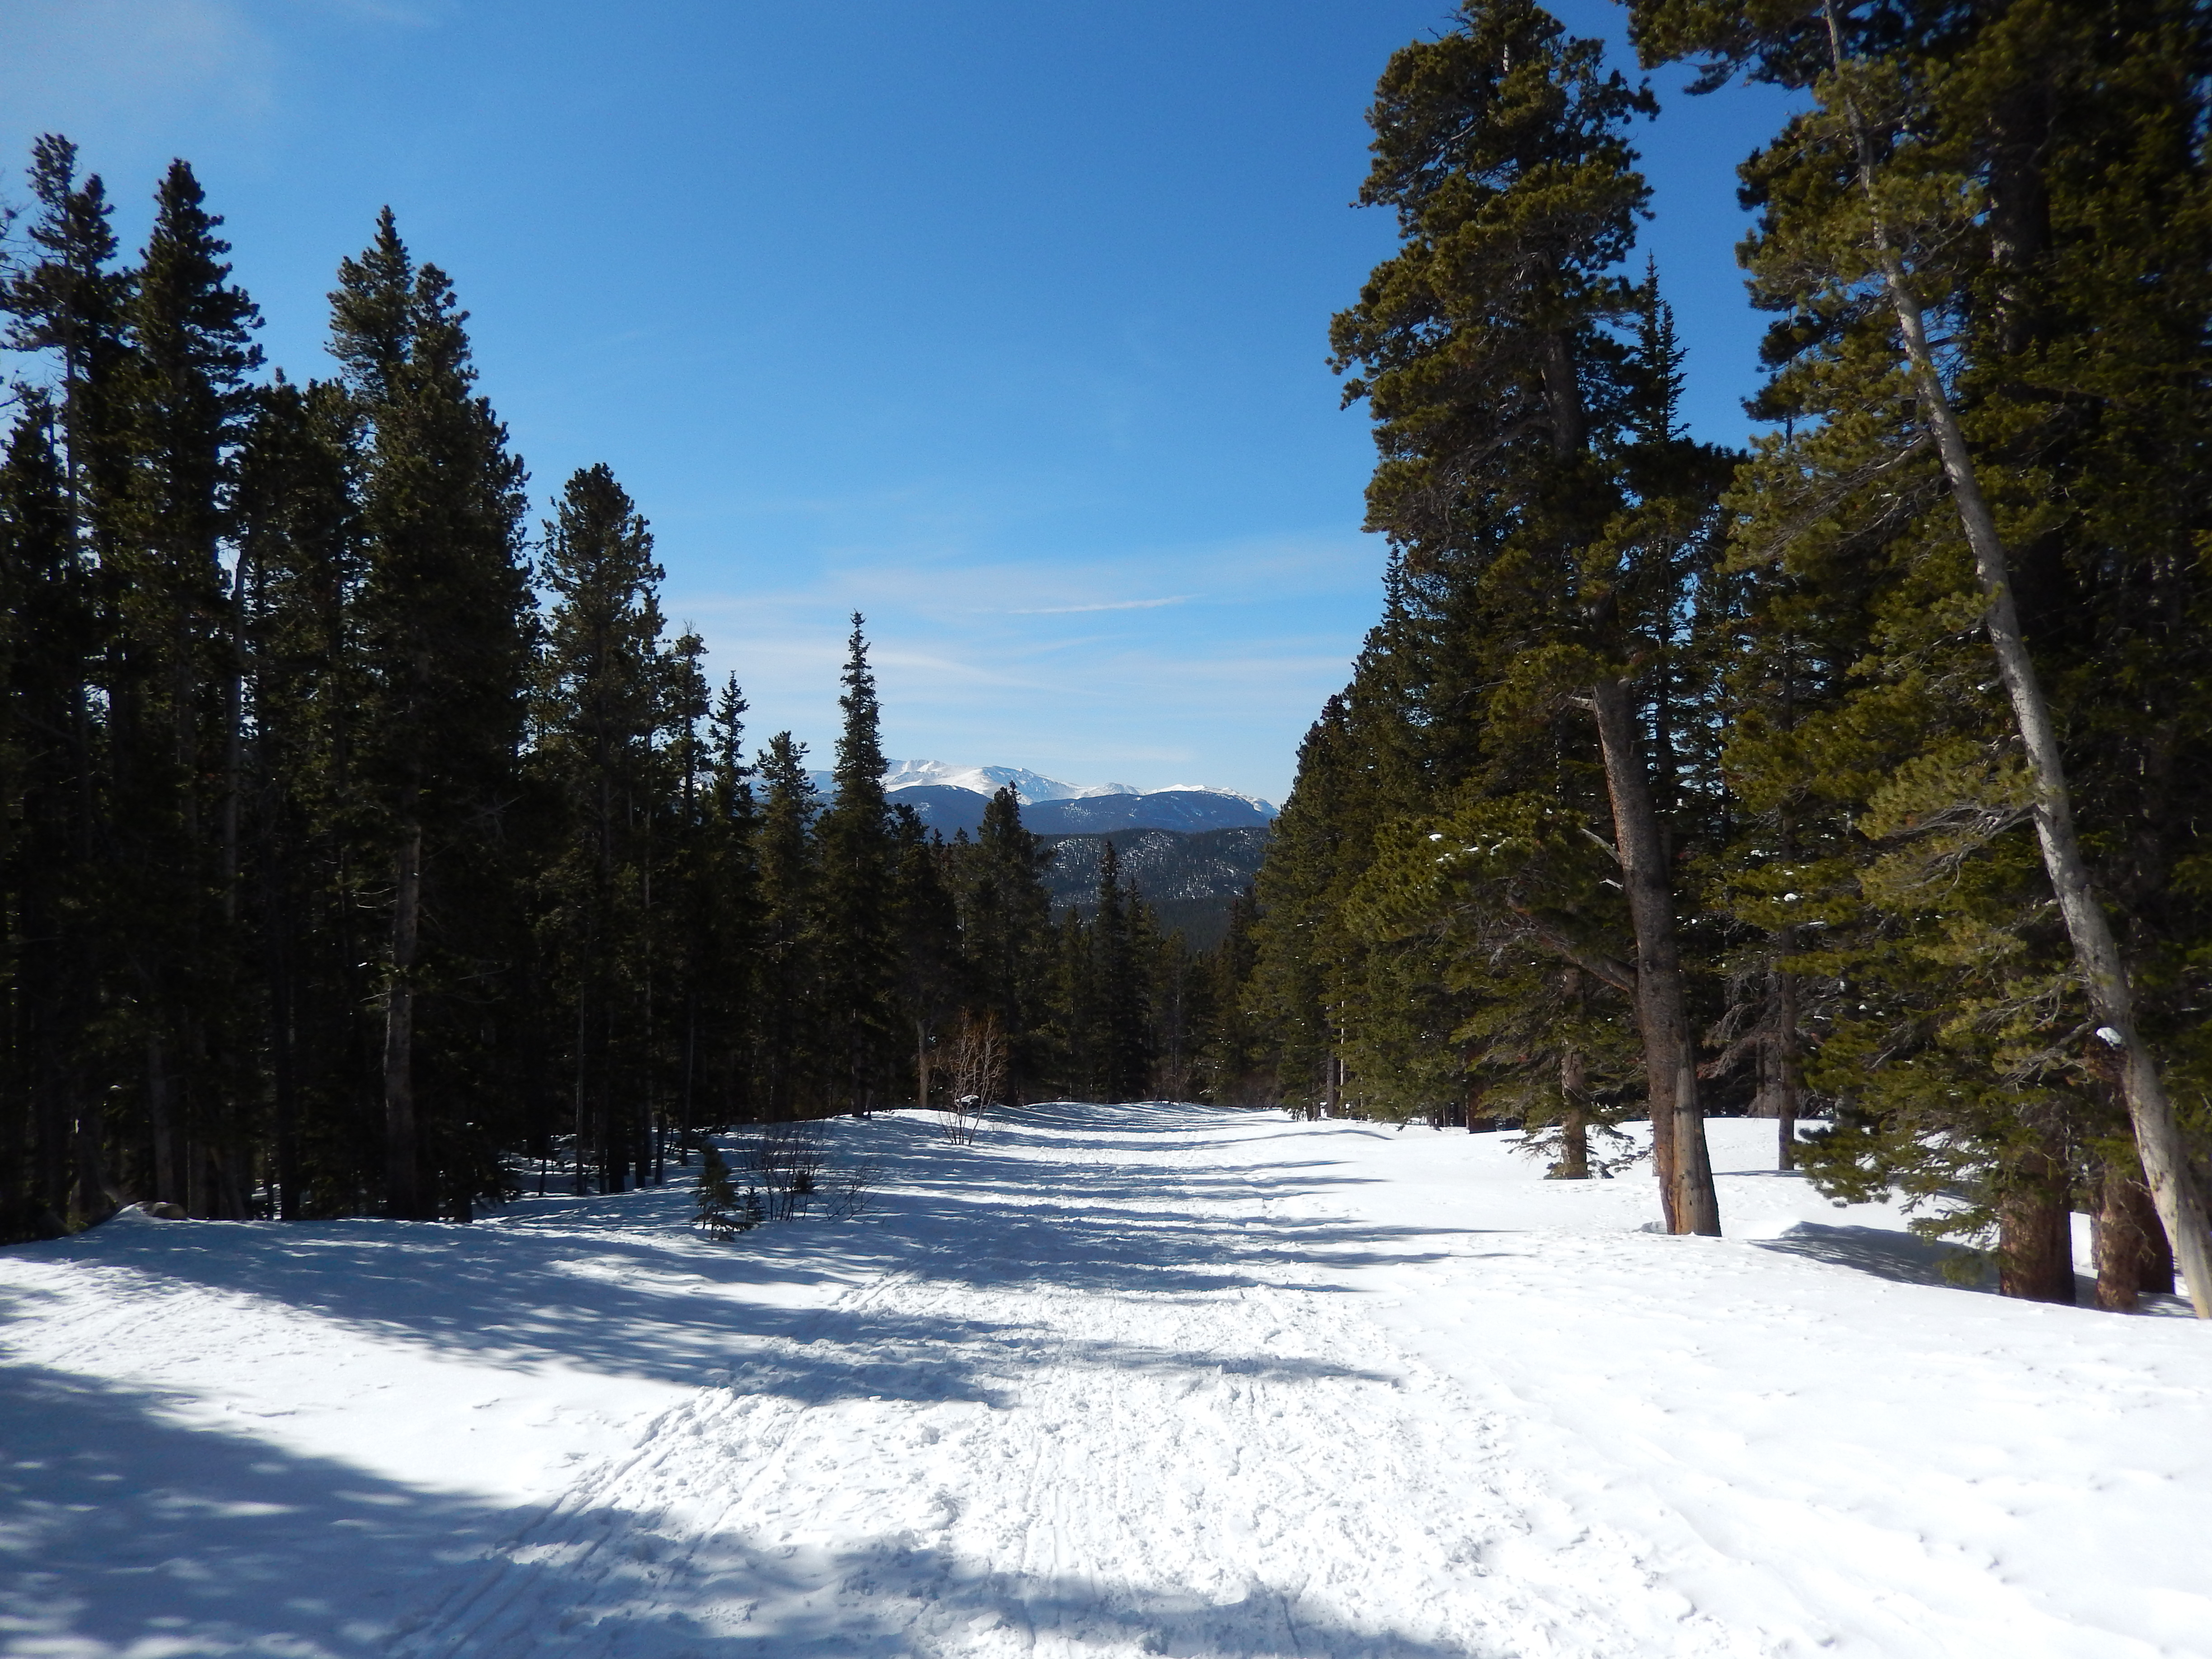
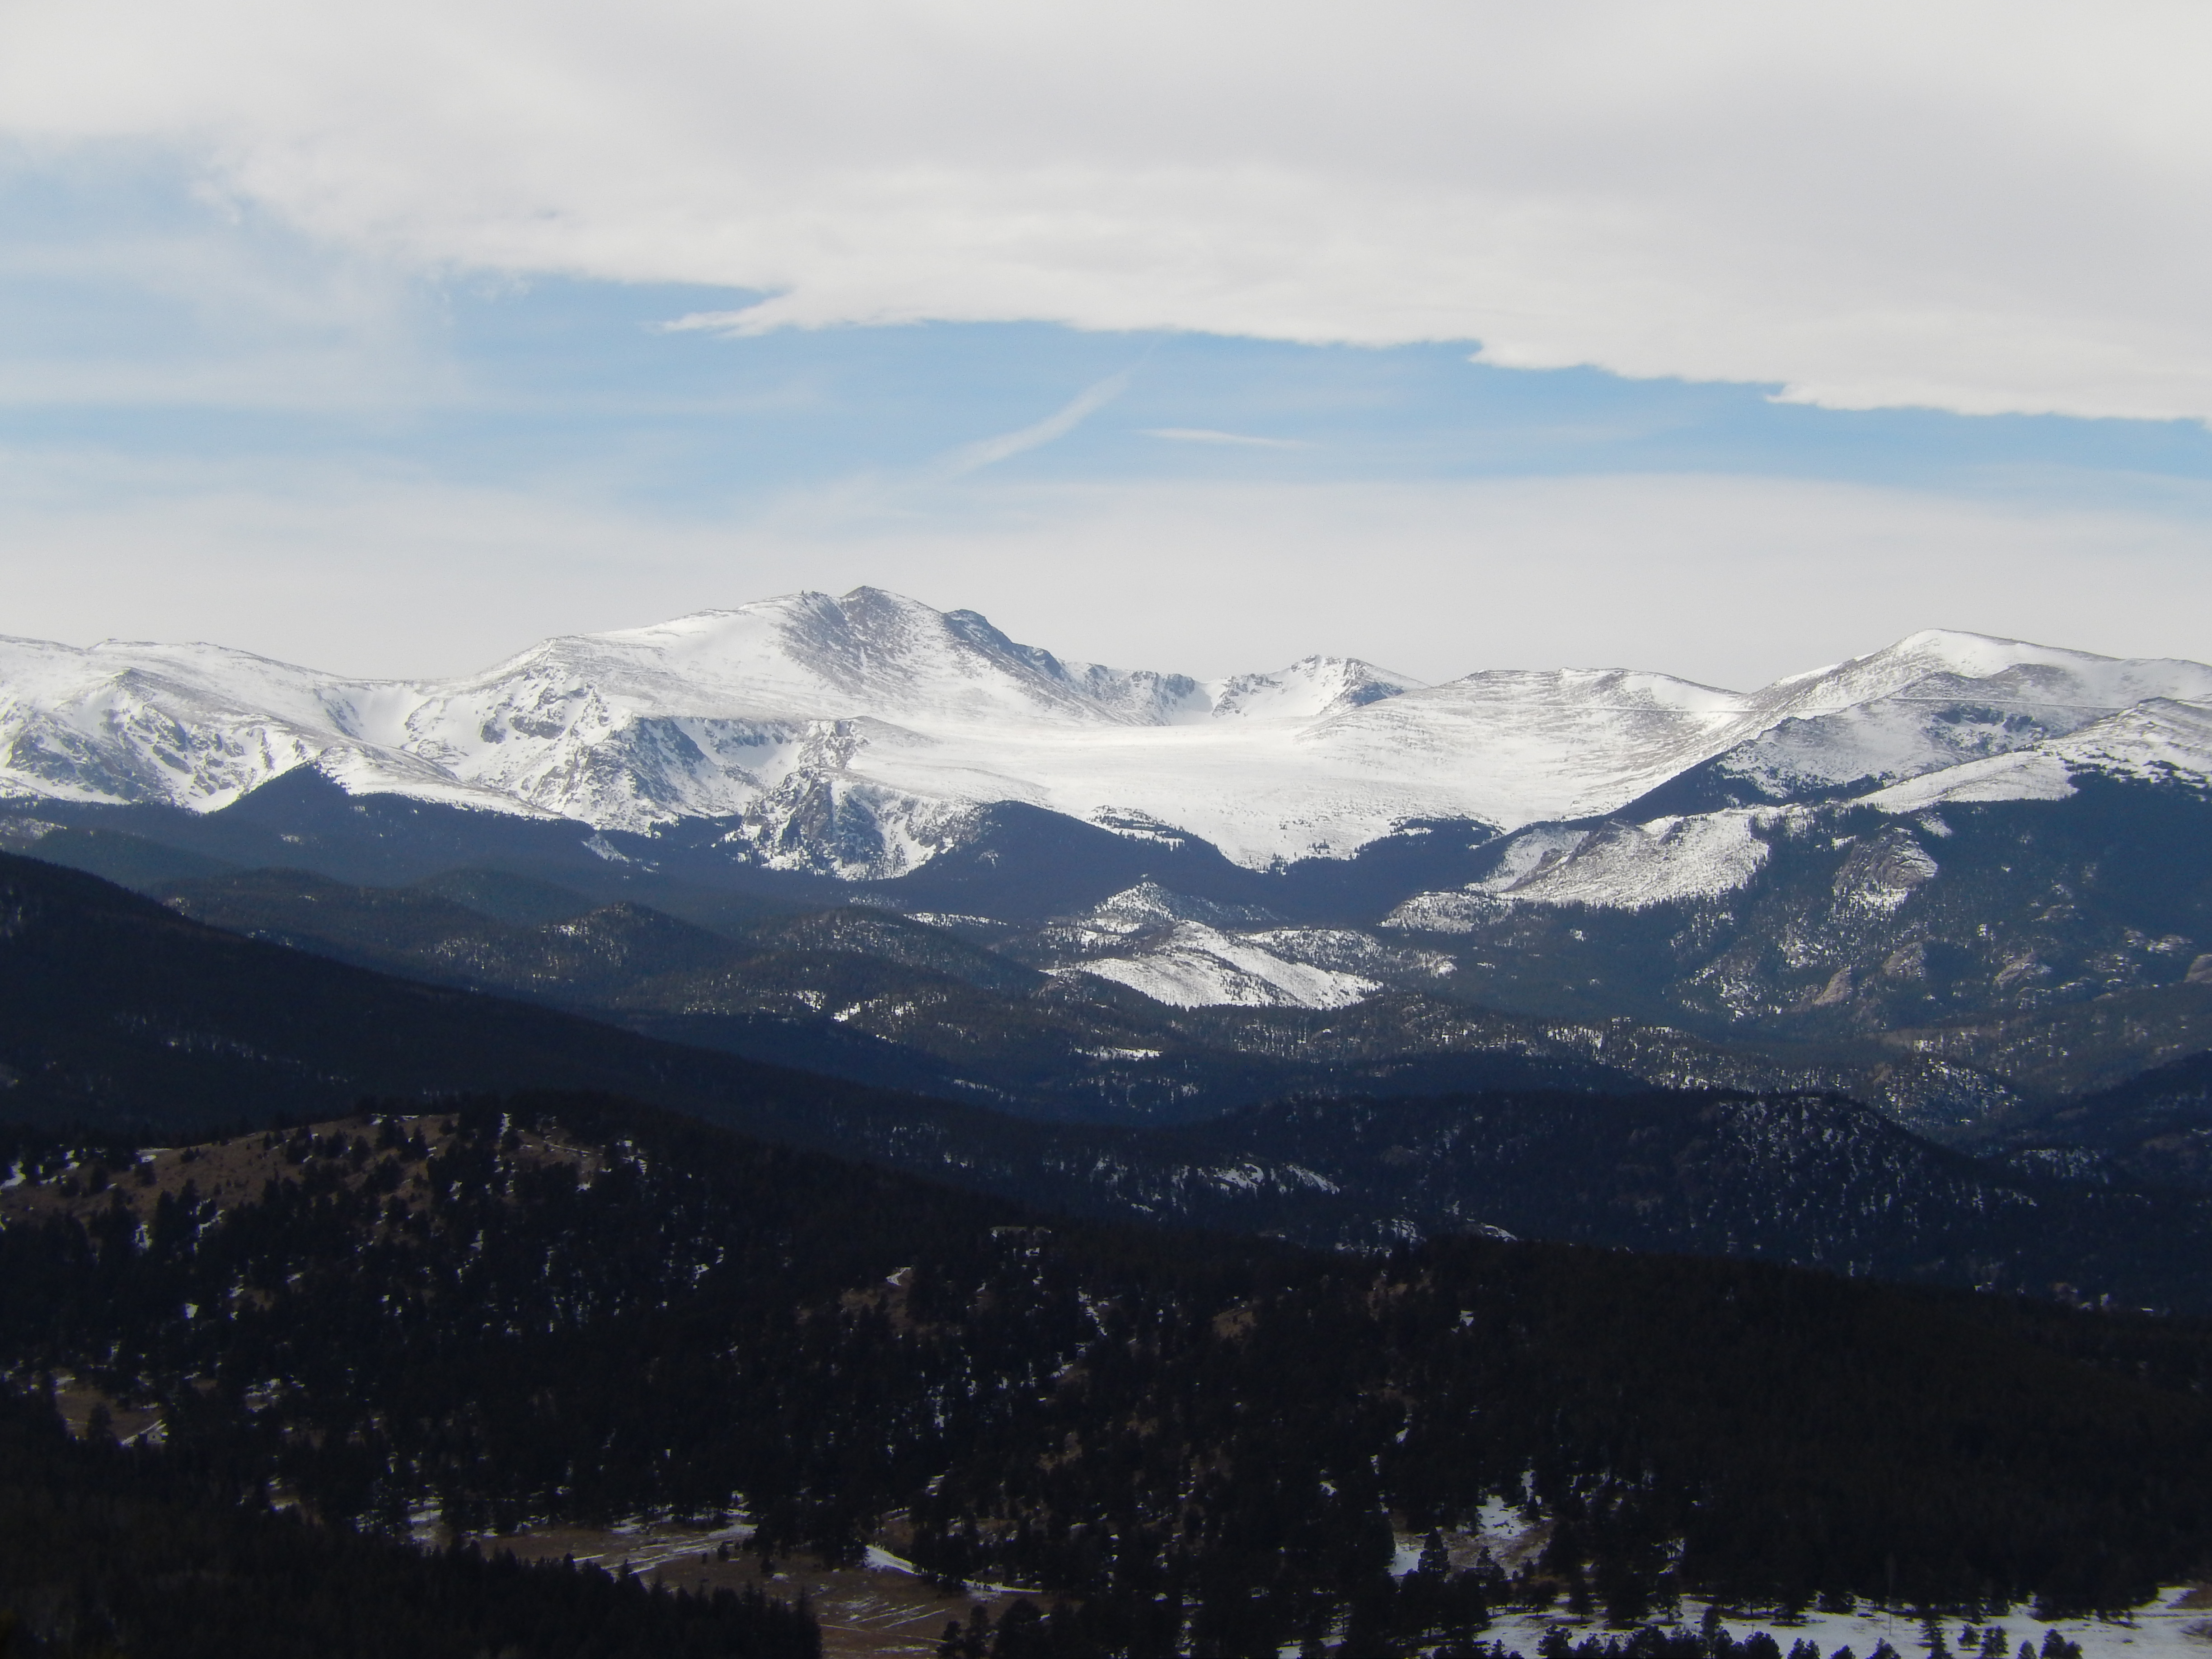
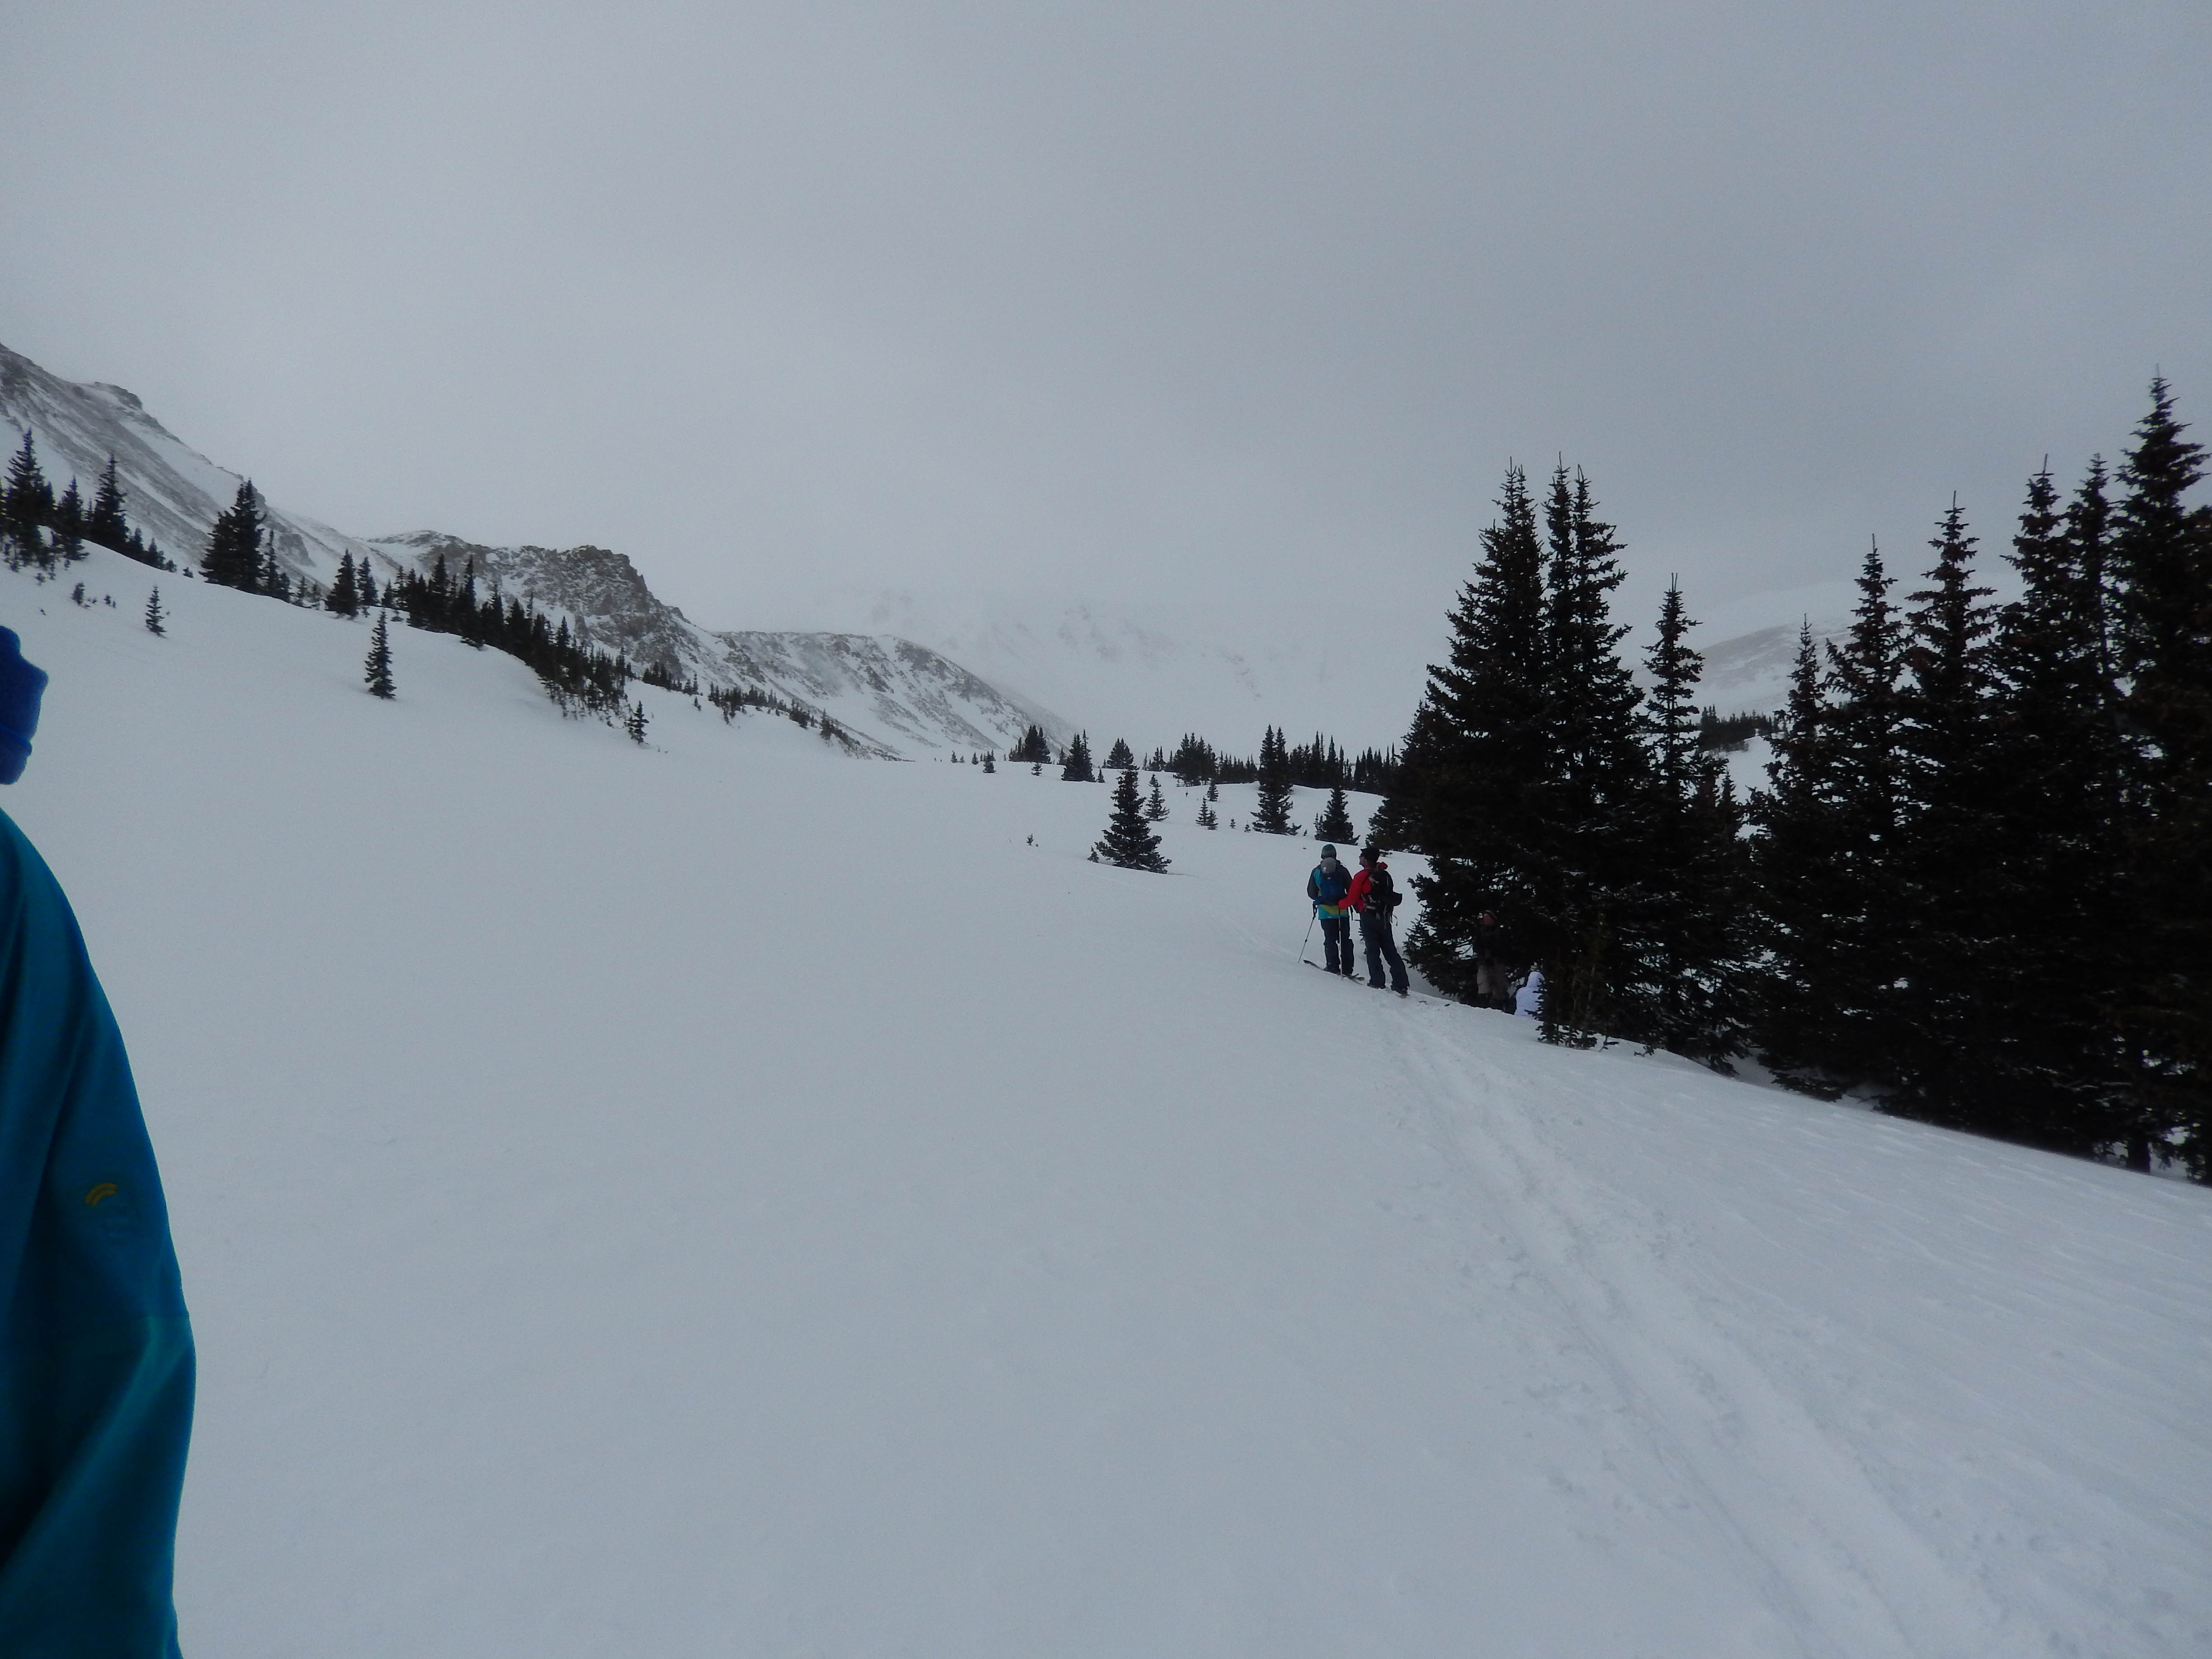
I have been trying to figure out the balance when it comes to snowshoeing, is more mileage better or steeper trails? Since last week we did a steeper trail with low mileage that felt good and maybe a little too easy. I decided this week would be better to up the mileage and keep the incline low, I was also secretly hoping we might get some magic timing again like last week and catch the amazing views that Trail Ridge Road is supposed to have. Once again the weather forecast was snowy…snowy the day before, through the night and all day Saturday and it truly was.
We were just outside of the Park when we came across 2 large groups of Elk.
The roads were not great and the snow was pretty thick at times, so it was no surprise that when we pulled into the area cleared for parking at the road closure we were the only ones there.
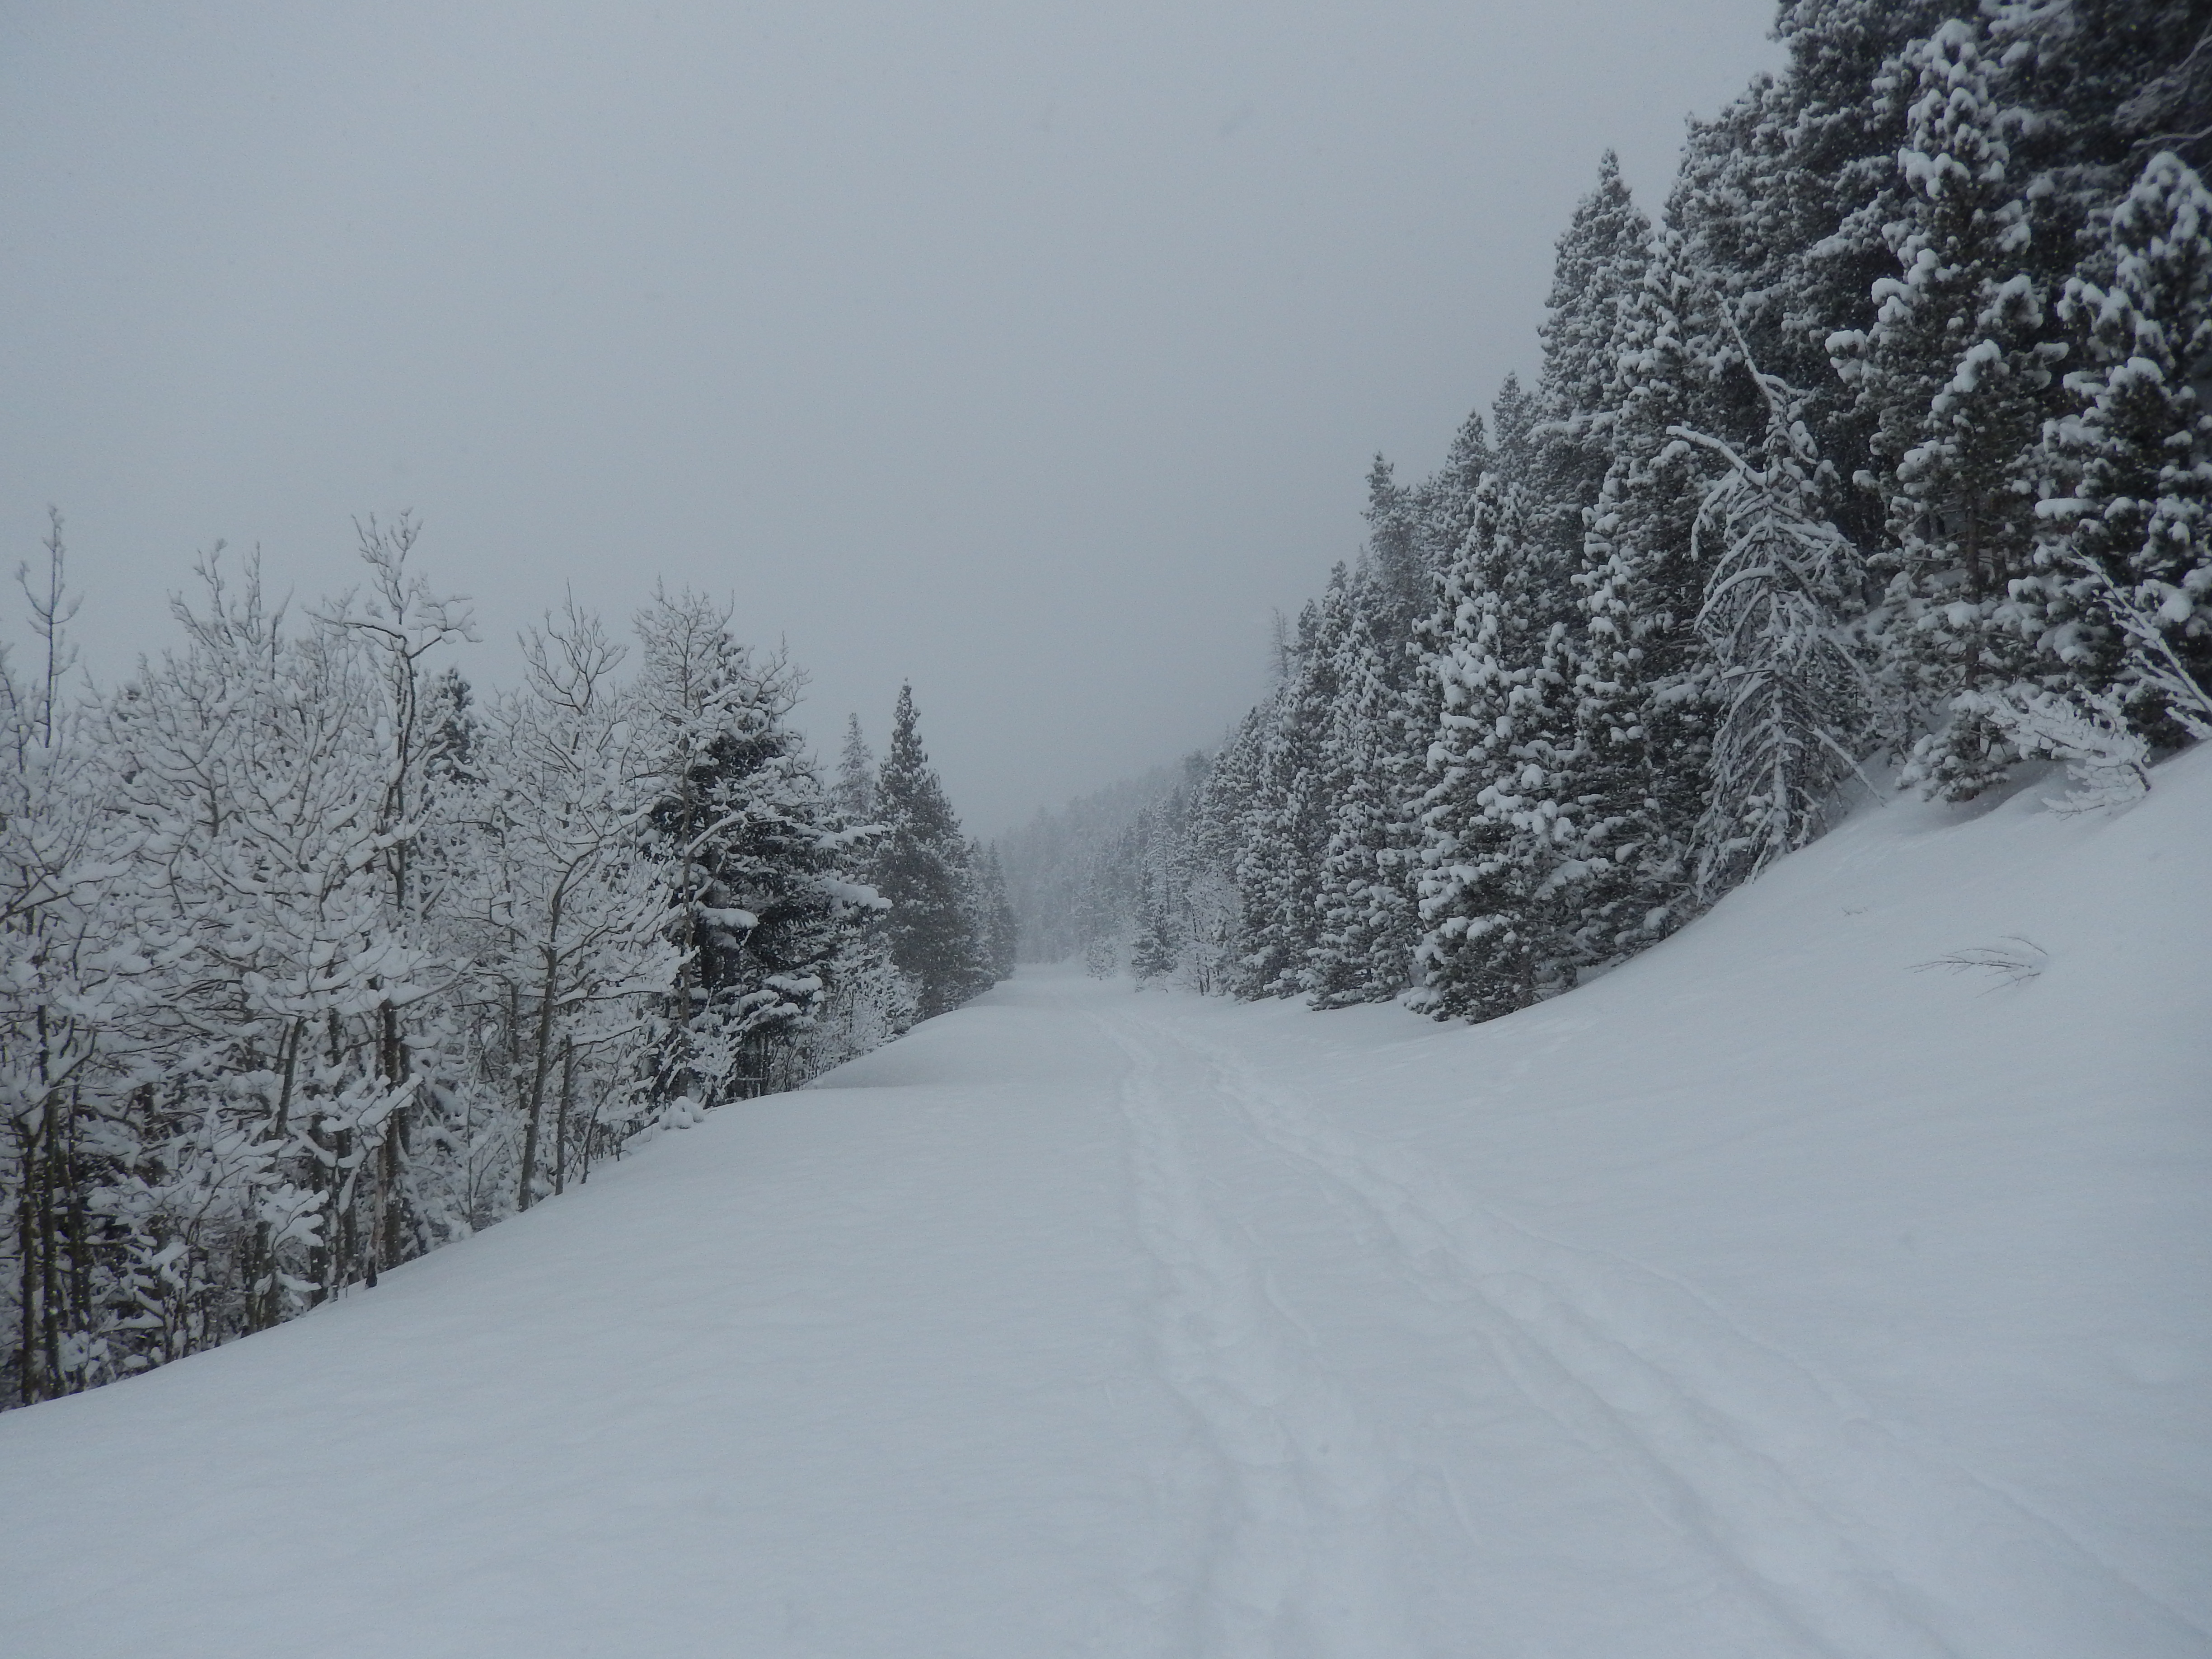
Trail Ridge road is open through the summer and is closed in the winter months until the snow is no longer an obstacle. It goes over the Continental Divide in RMNP and in the winter is used as a great way to snowshoe or cross-country ski with amazing views, wicked wind and a certain level of security in that it is impossible to get lost. Since it was pretty obvious the snow had no intention of stopping, we were confident that there would be no views. We just got our snowshoes on and started moving and at first it was decidedly….hard. Not just because we were the first people out there in a while, but likely the altitude played a factor too. Oh and maybe the fact I overdressed.
looking back after the first quarter-mile
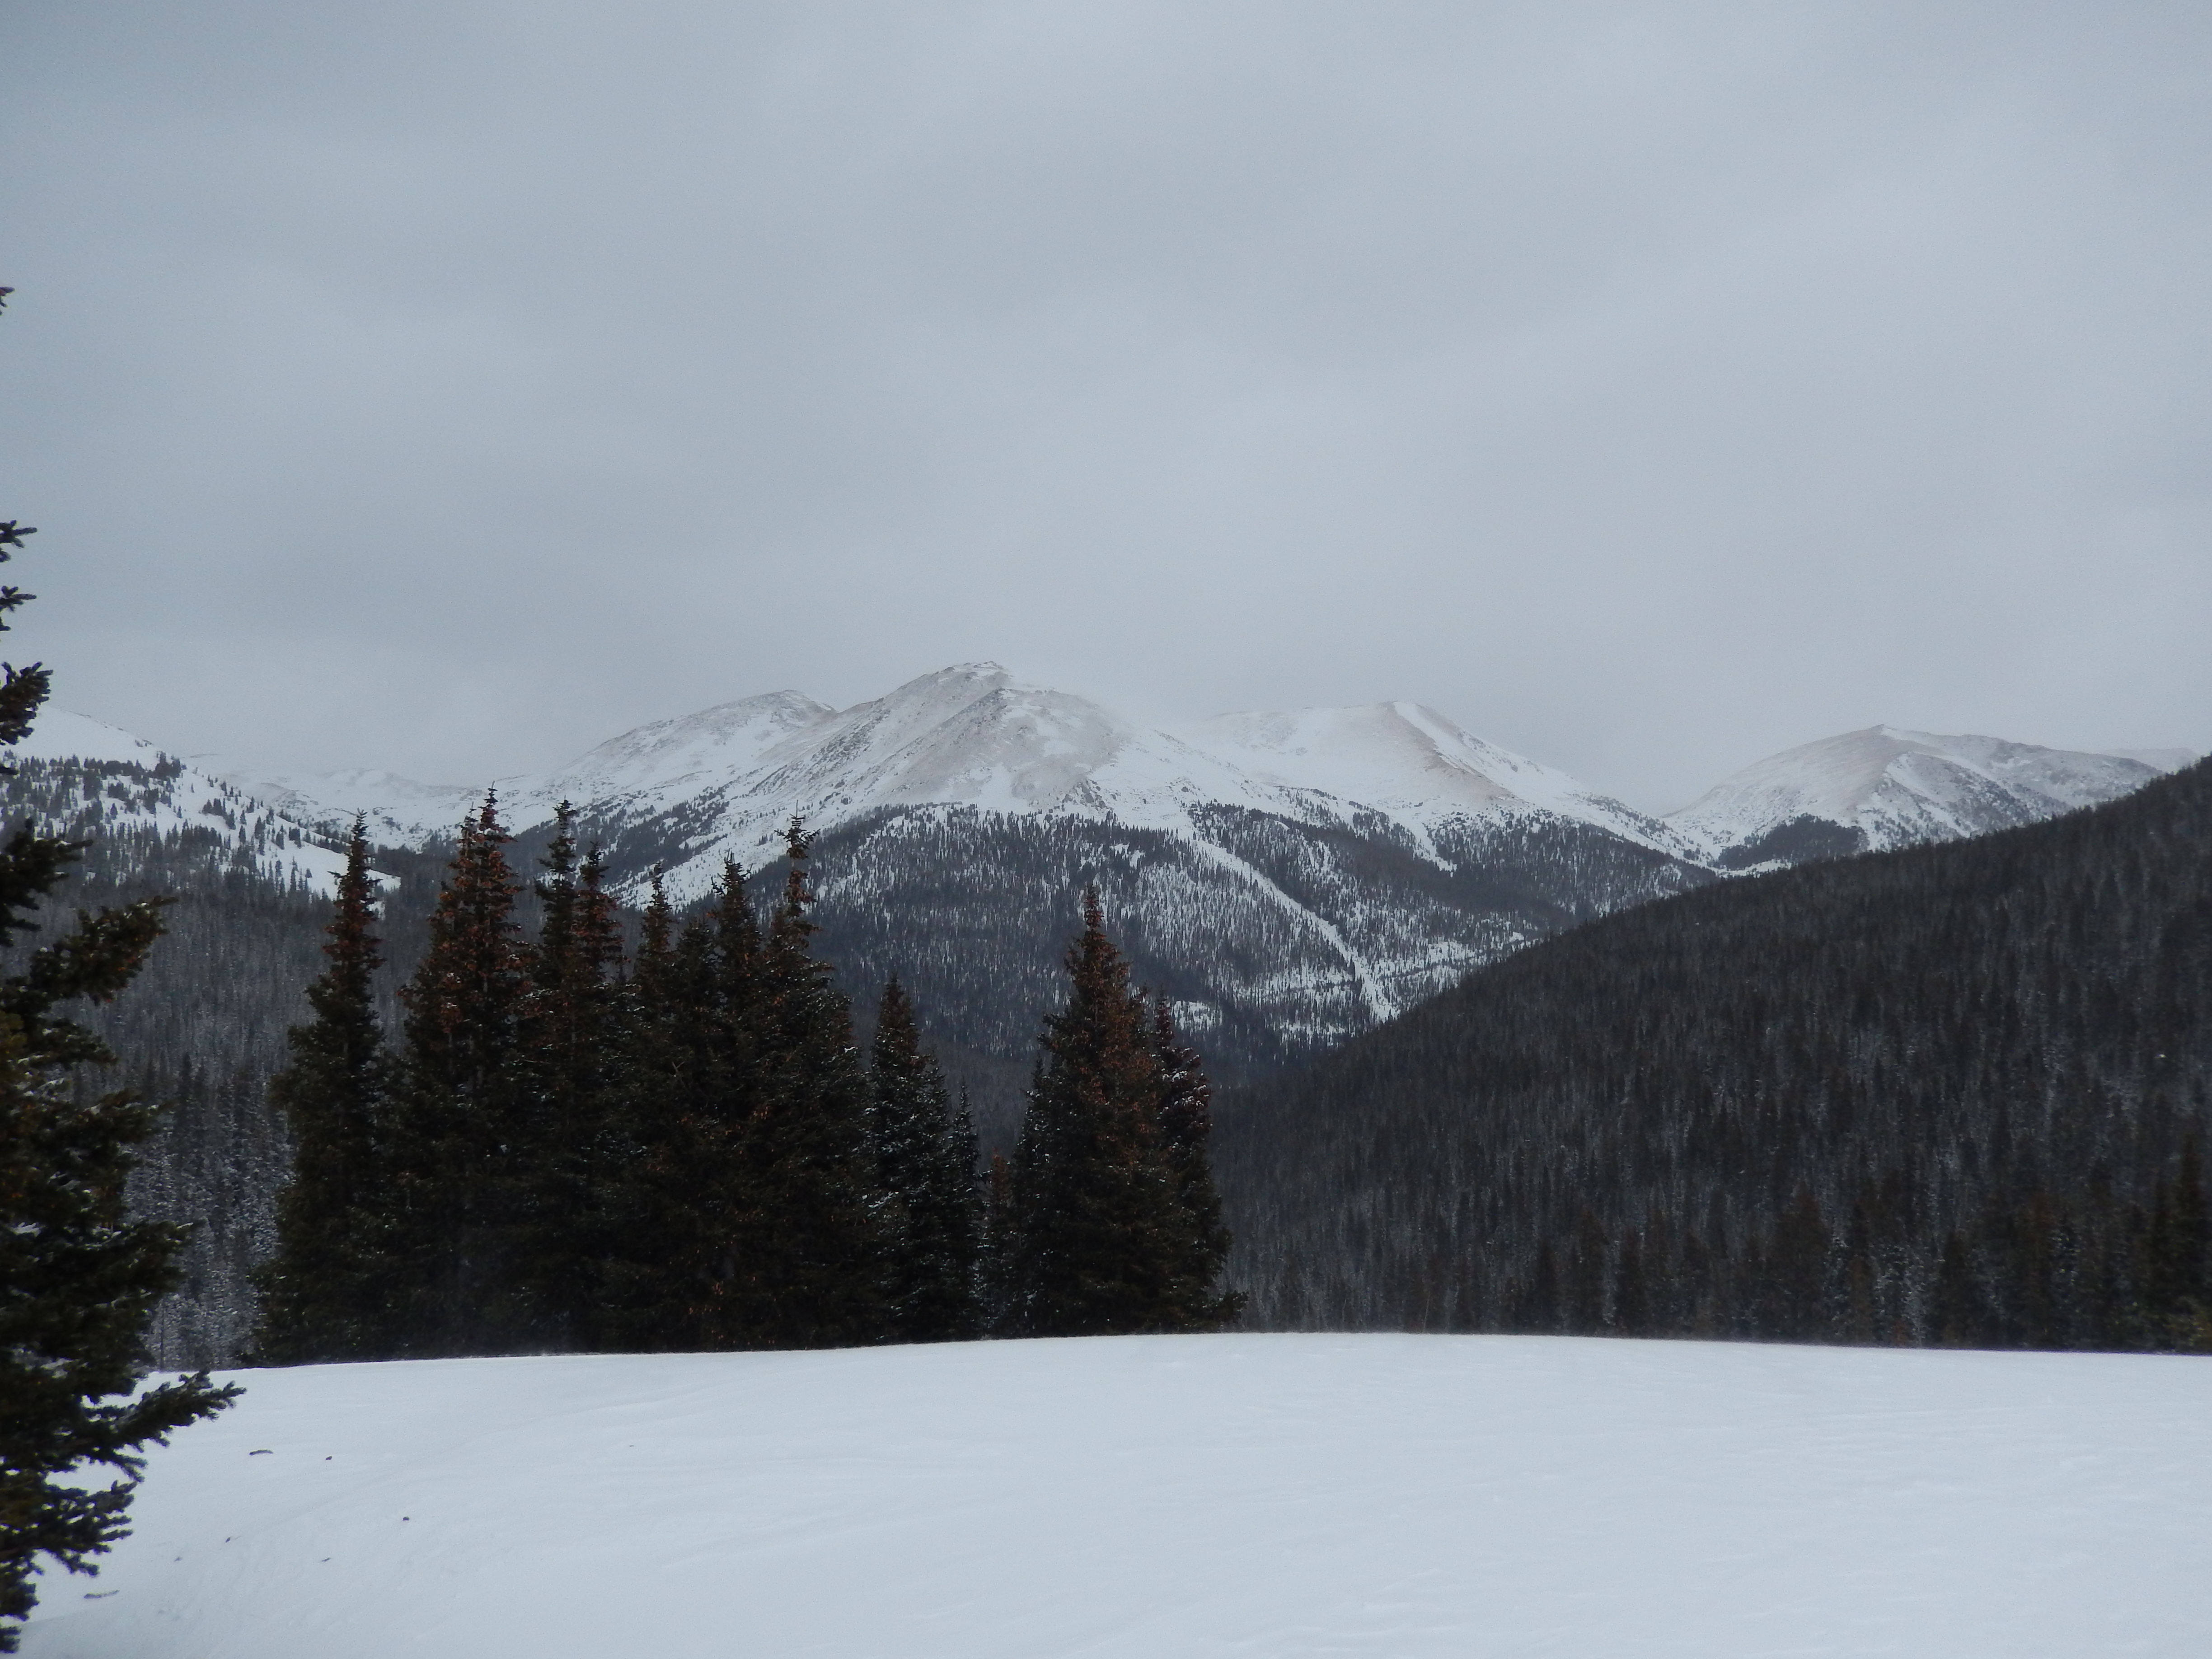
I am always amazed when I do a trail for function then get transfixed by the unexpected beauty. The snow made any views of the surrounding mountains impossible, occasionally we would catch hints of them but the snowy landscape itself was just lovely. The bonus of this particular snow storm was that the wind wasn’t all that bad so no wicked wind to make us miserable.
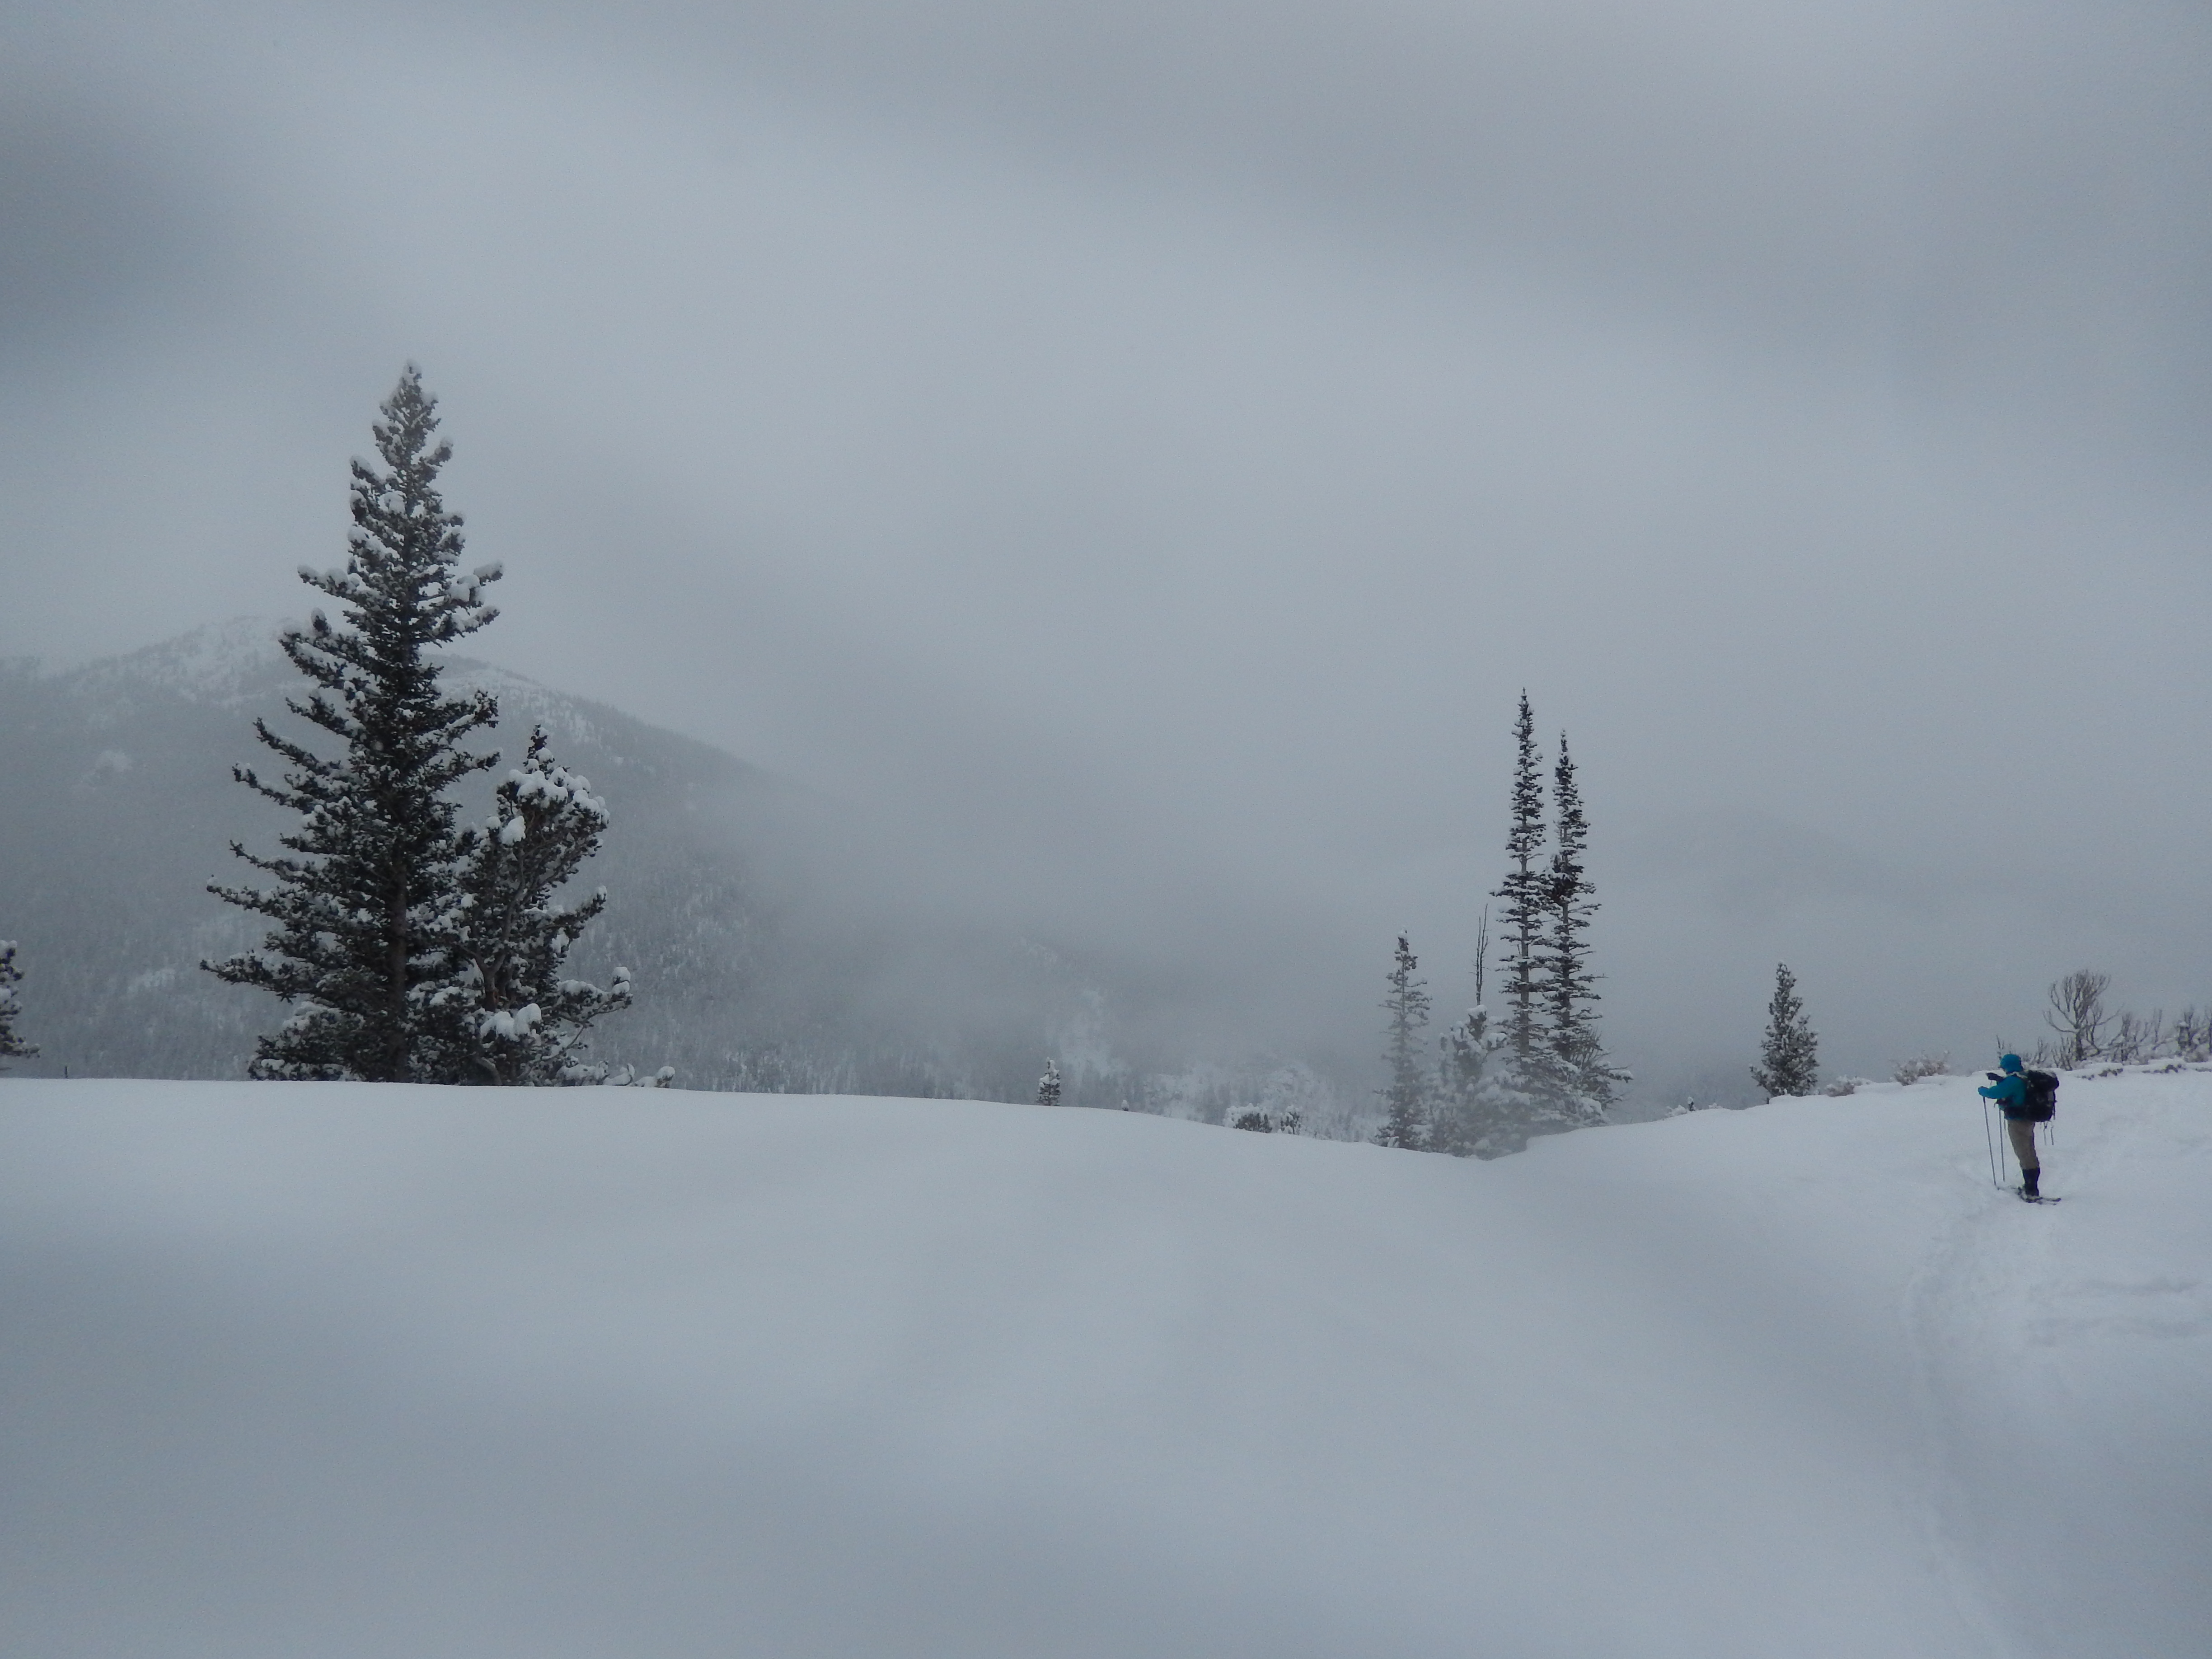
It wasn’t too long before we got to the overlook near Hidden Valley which used to be a ski resort, in fact my sister learned to ski there, but now it is all closed down and its own snowshoe/winter fun route. You can make a difficult adventure loop by starting at either Trail Ridge Road OR Hidden valley then climb/descend to the other location. I have to be honest, staring over the edge at Hidden Valley I have no idea how you do the loop. Perhaps taking the road all the way around to that main run? I didn’t get a good shot of it to even let you all hypothesize with me.
Enjoying a brief views of Hidden Valley
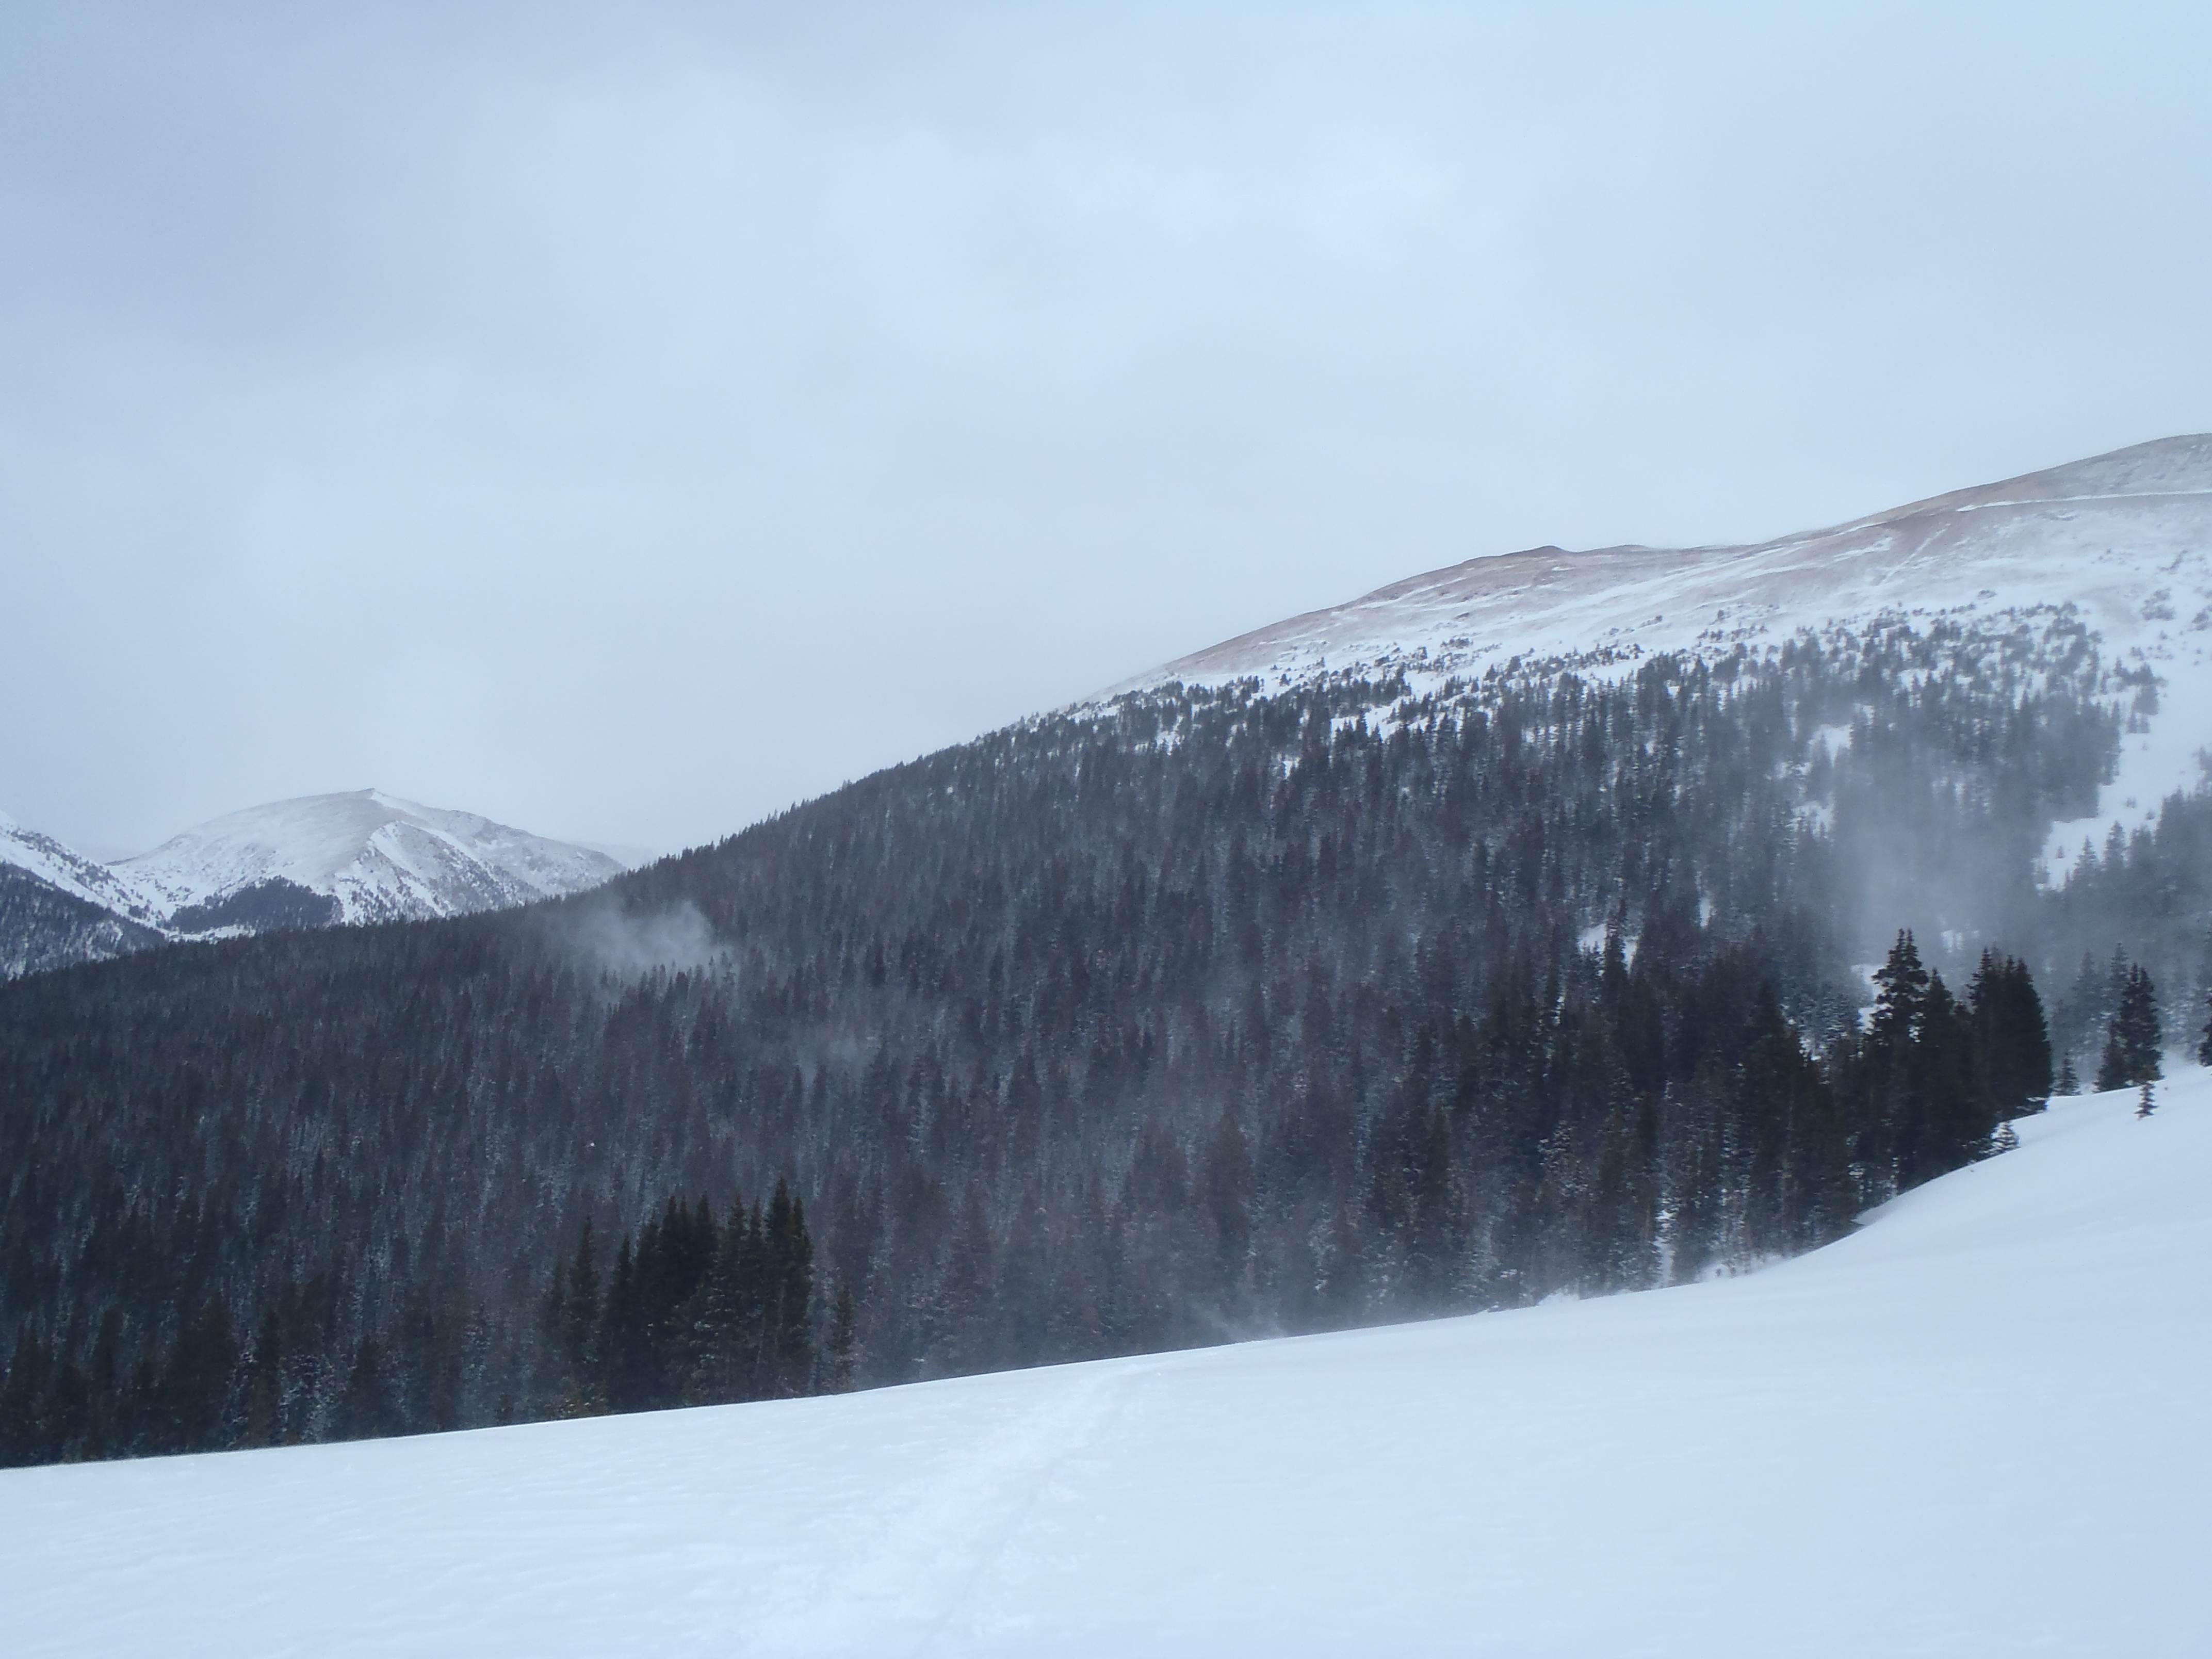
At this point on the road the snow was not very deep and we actually almost took off our snowshoes for fear of ruining the metal spikes on them. When we turned the corner up ahead it was crazy deep again, so deep we could no longer go side by side. We took turns breaking trail to help us keep some strength in reserve just in case we went further than we originally planned.
Looking up ahead to where the snow gets deep.
We went along the road for about 3 miles and had it all to ourselves the whole way. We decided to turn around when we got to this sign, for the record the snow wasn’t this bad the whole way it was a just well-timed gust of wind.
Looking back at our single trackBreaking trail
All together we got a little over 6 miles from the snowshoe and maybe 600 feet of elevation gain. Breaking trail was great exercise, after just 3 miles my legs were solidly tired, it was nice to turnaround and head back to the car. We saw some people on the way back, I think we passed maybe 6 or 7 total the whole snowshoe, all of them taking advantage of the trail we broke.
I have to be honest, I cannot wait to get back to this trail and try it again with a clear sky, the few hints of mountains we saw through out our snowshoe looked amazing! I would also like to go further than we made it last week. We didn’t get a ton of pictures because the snow was so heavy I was worried about hurting my new Nikon. After the directions will be a very few of our favorite pictures.
Directions: Taking 36/66 through Ester Park, at the 3rd light along main street there will be signs for the Beaver Meadows Visitor Center and RMNP, turn left. Once you cross into the park, stay straight then take this road for about 8 miles to the road closure sign. You will pass the Hidden Valley snow park on your right before the road gets curvy( hairpin turns) and then you will be at the road closure.
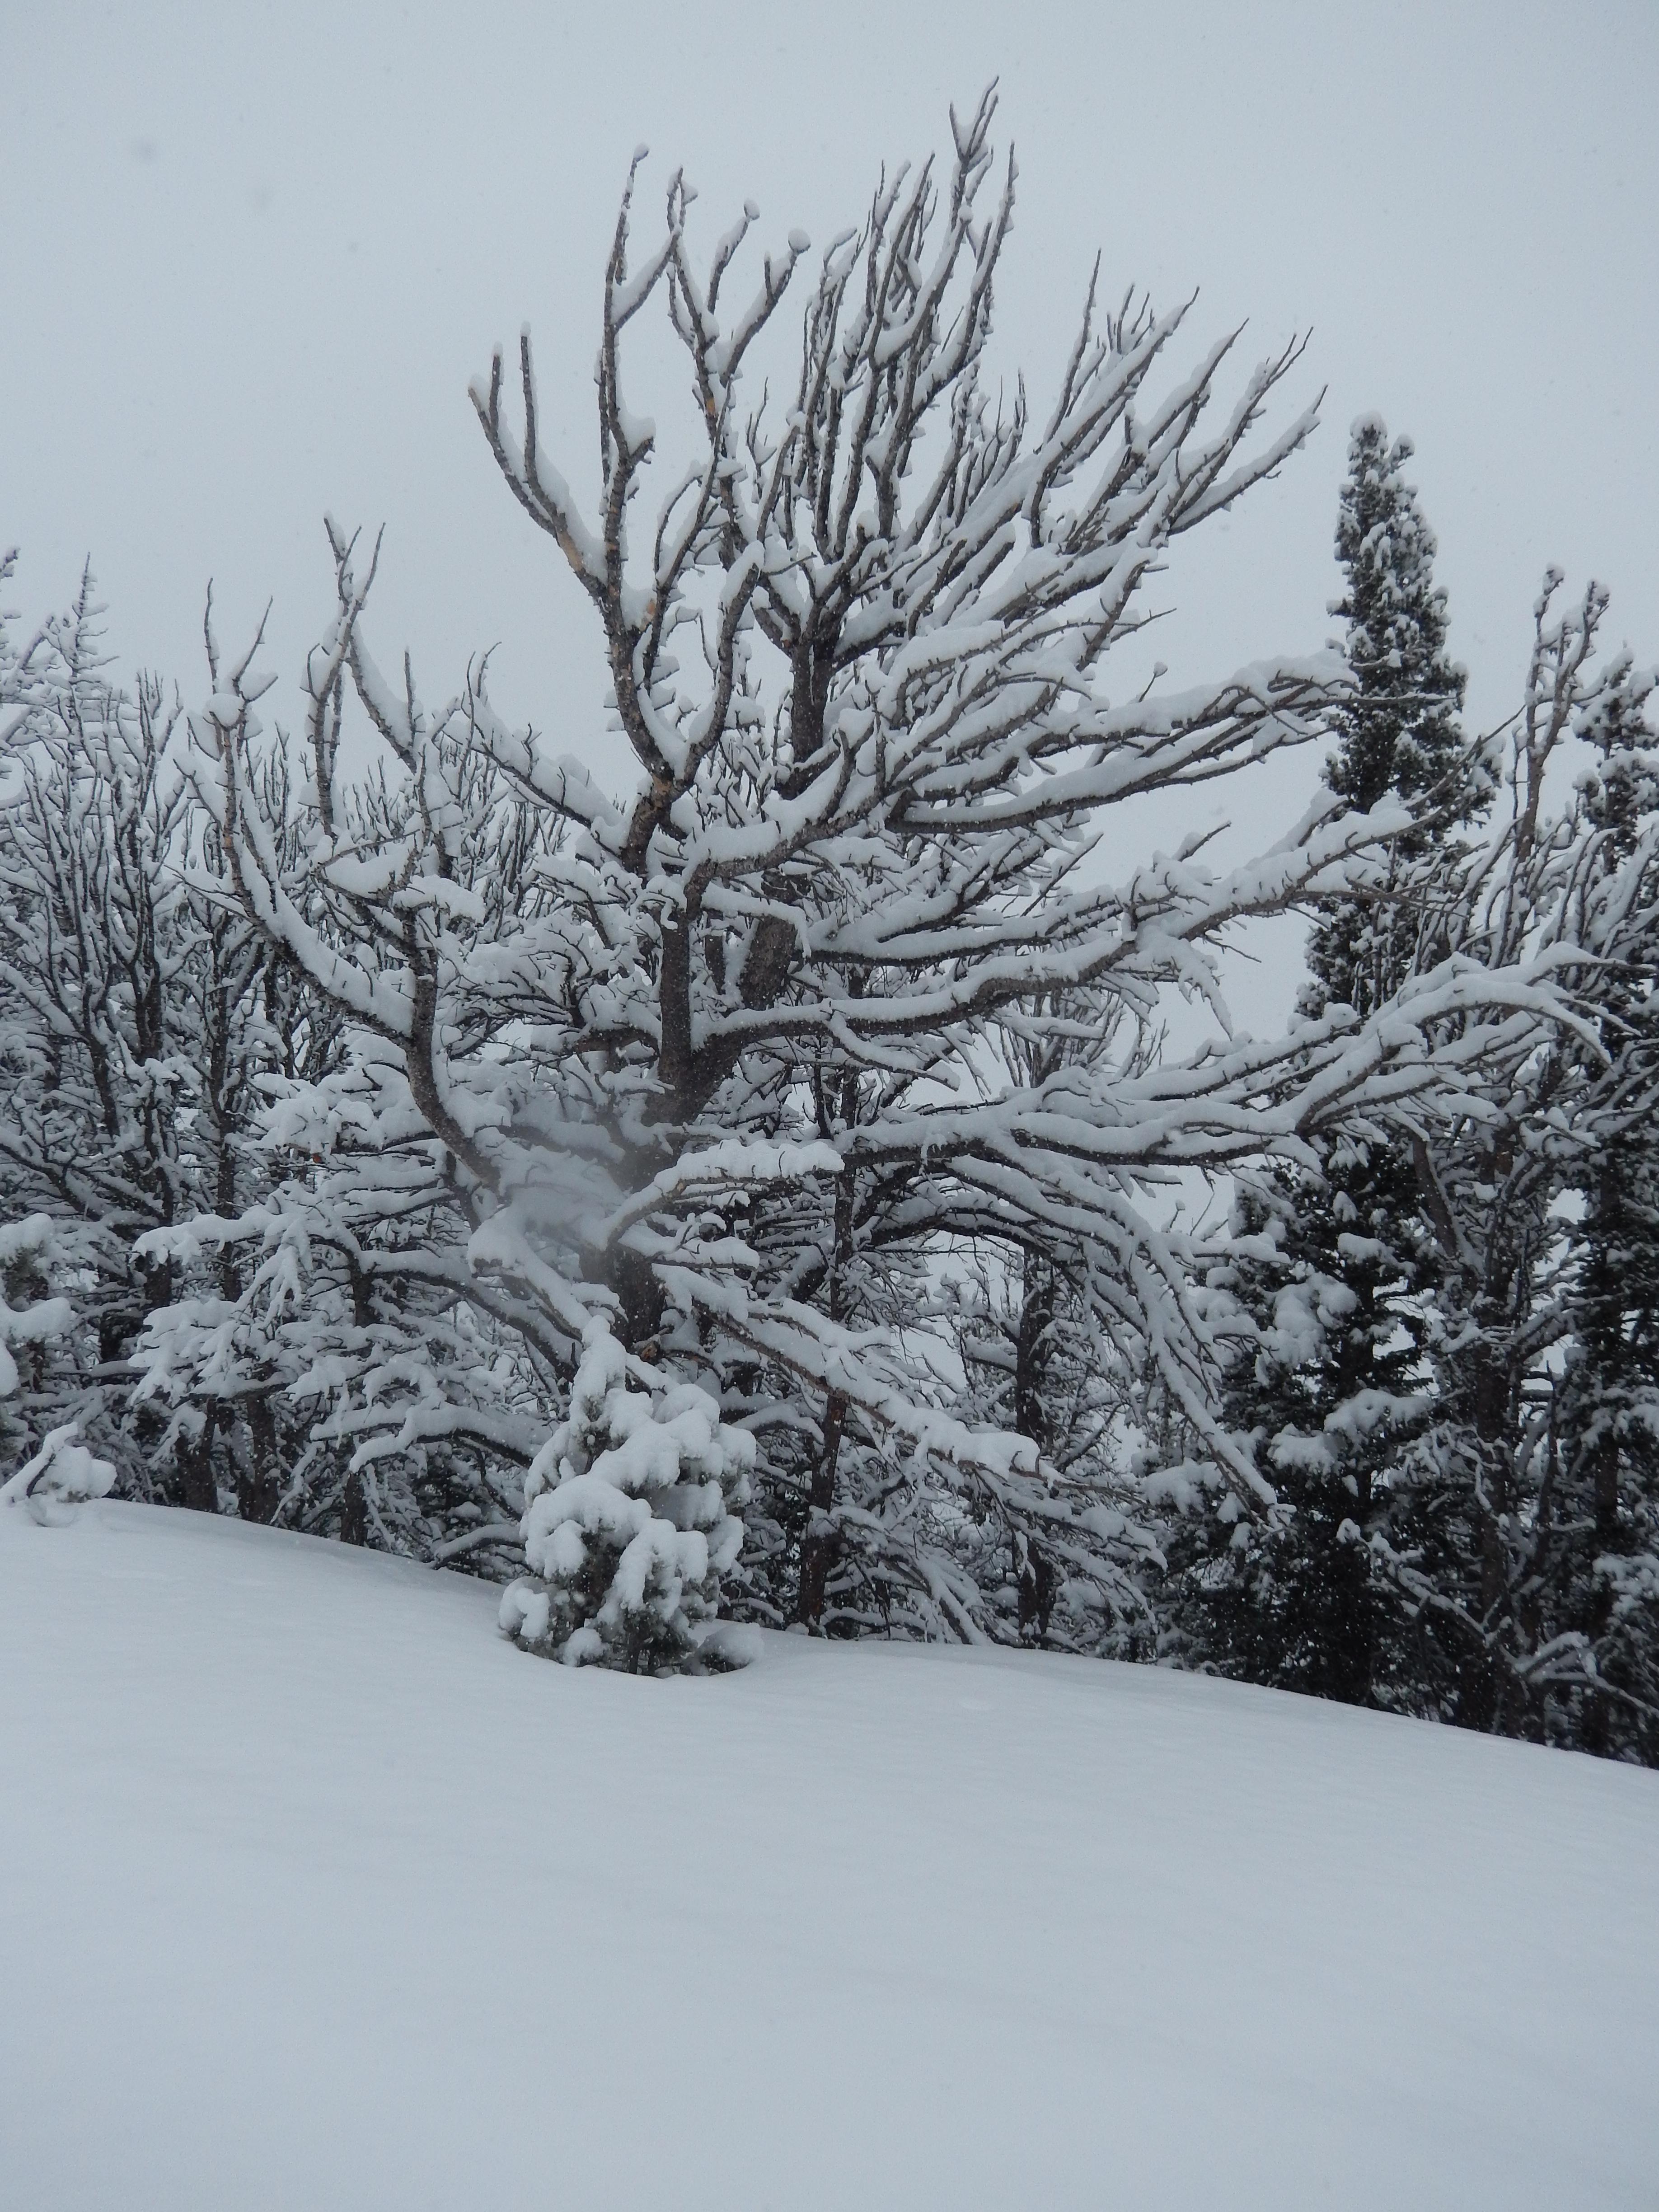
being artsyCool TreeBest View with a little moisture on the lens
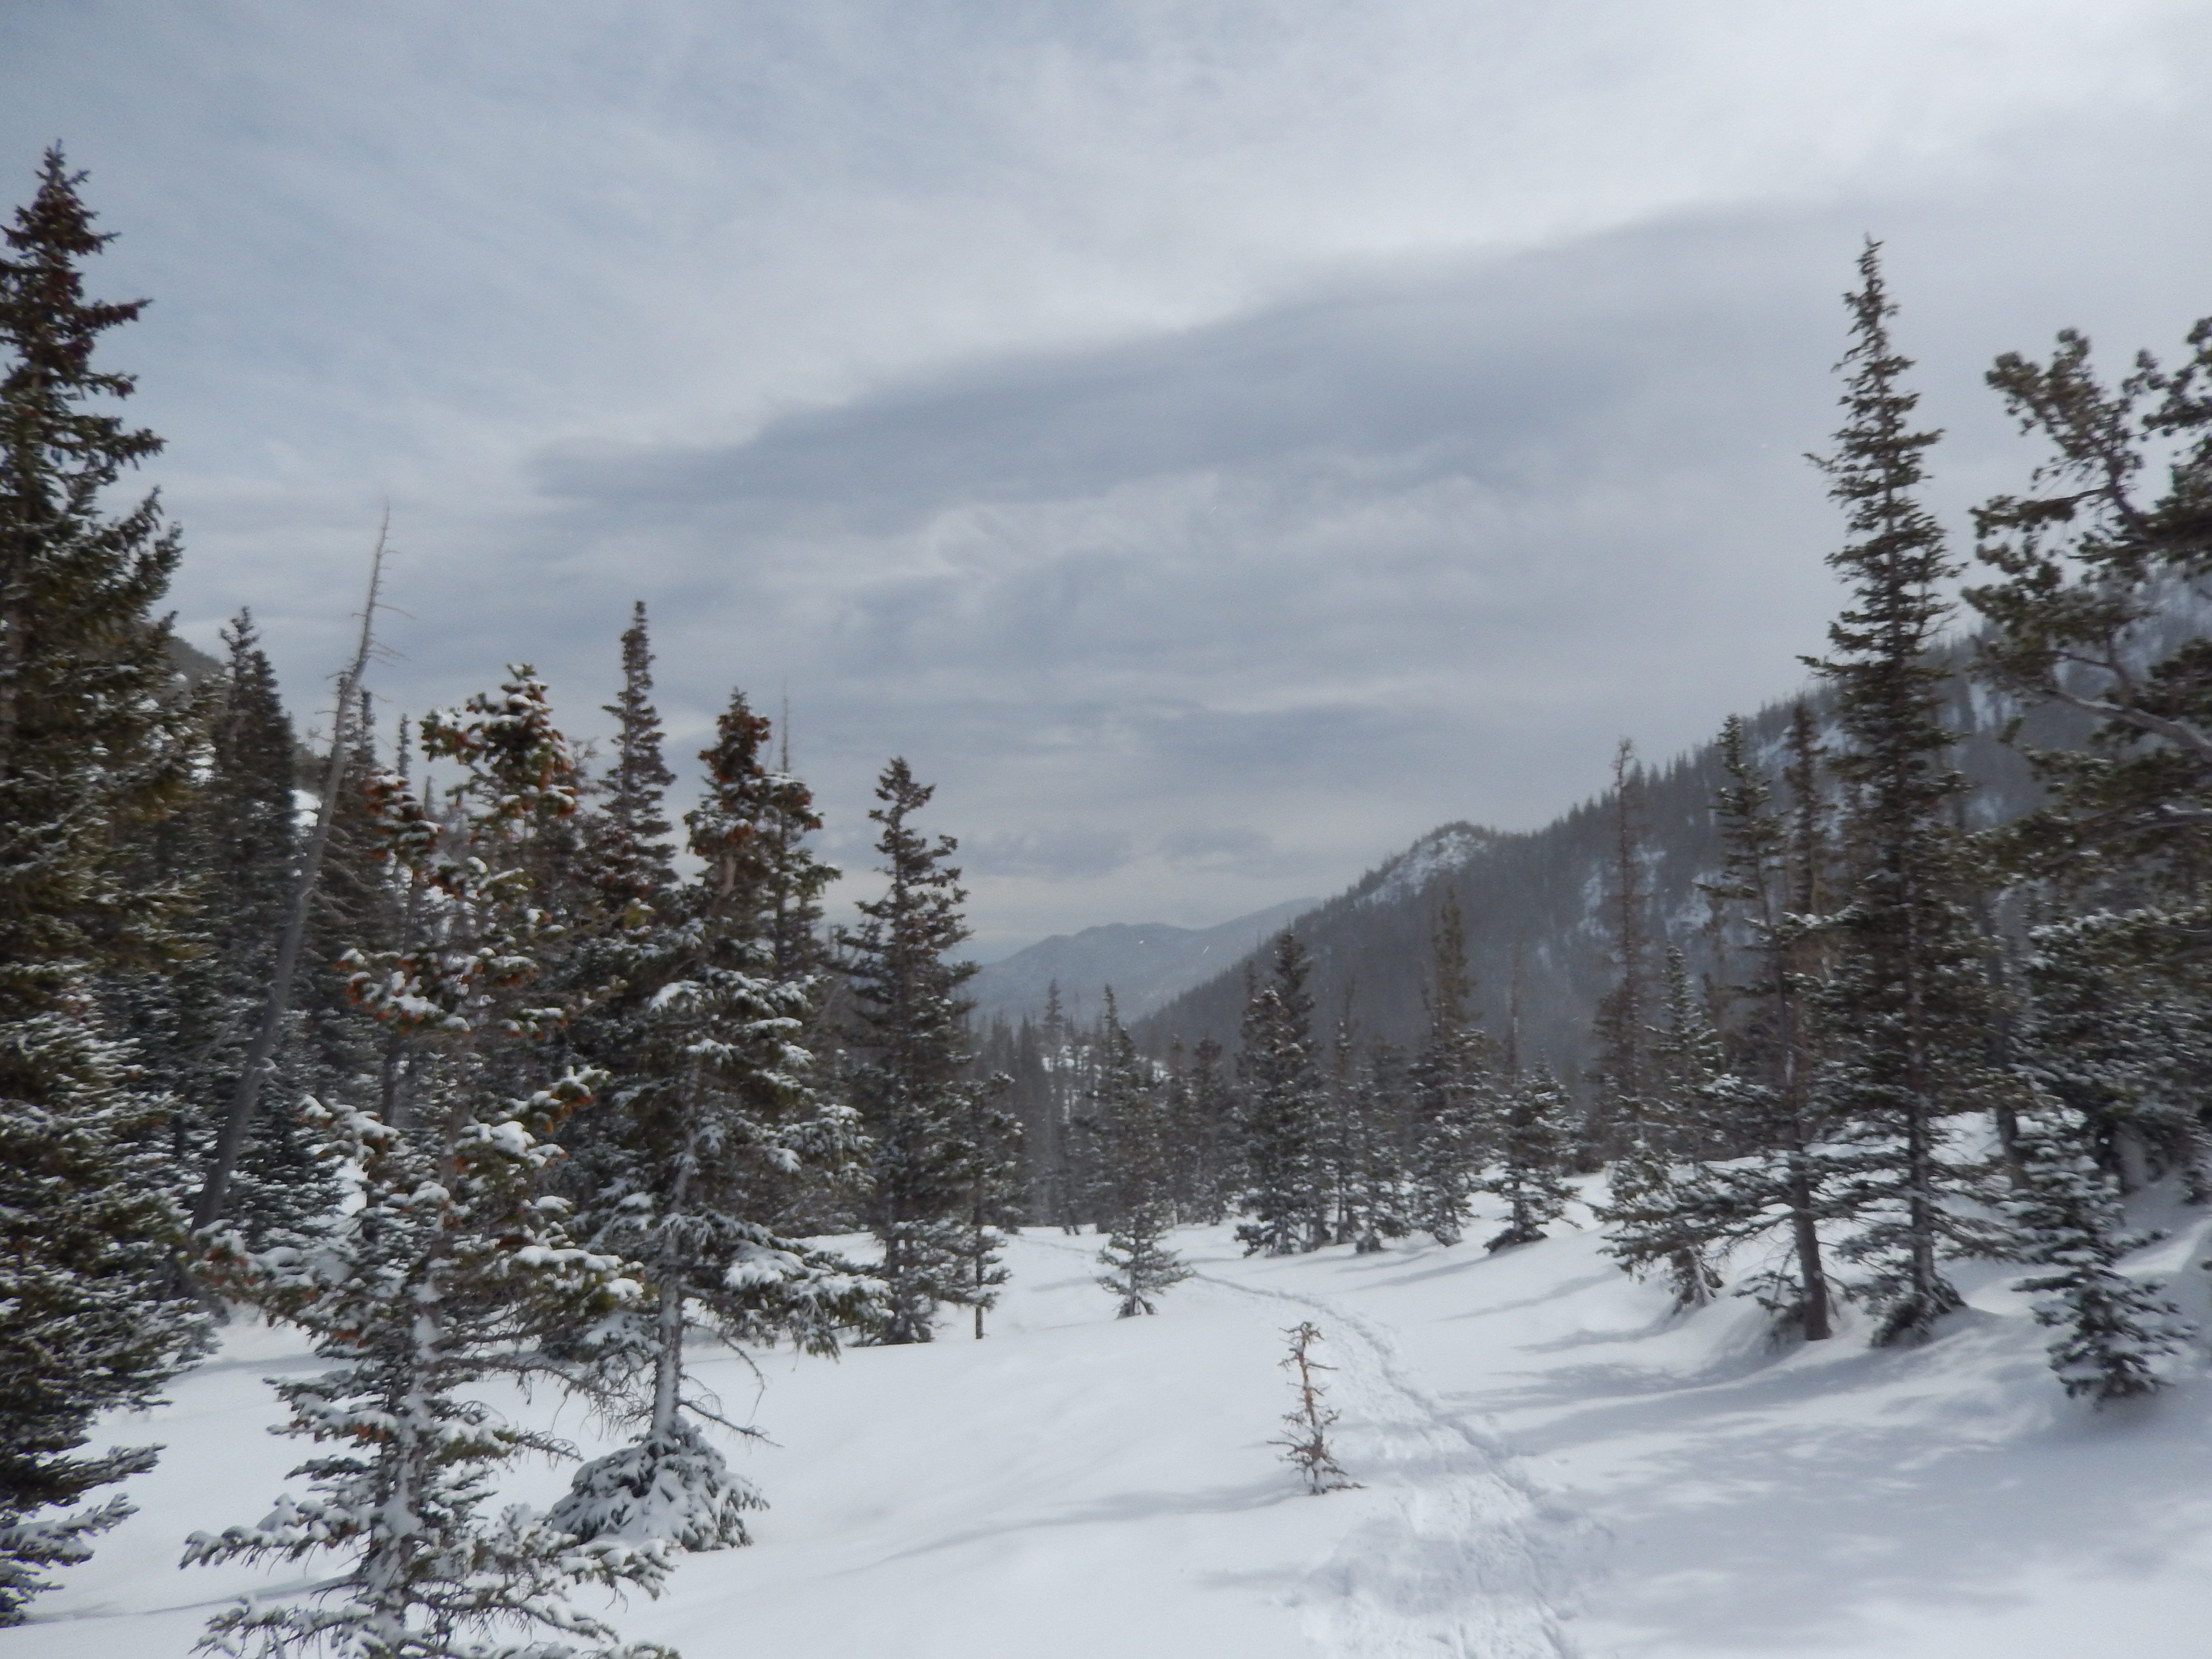
Trail Uses: hiking, snowshoe, cross-country skiing, hike in ski out…. anything with skis….
Trail Length: Officially 3.8 miles, we walked around Emerald and Nymph lakes a lot so we got around 4.5 miles for the day… it took us 3 hours although we did spend 30 minutes at Emerald lake in awe.
Degree of Difficulty: Easy to Moderate
Bathrooms: Yes in the parking lot
Pets: No- No pets allowed in Rocky Mountain National Park
Fees – Yes $20 per car a day OR $40 for annual pass with unlimited RMNP access – we have the pass
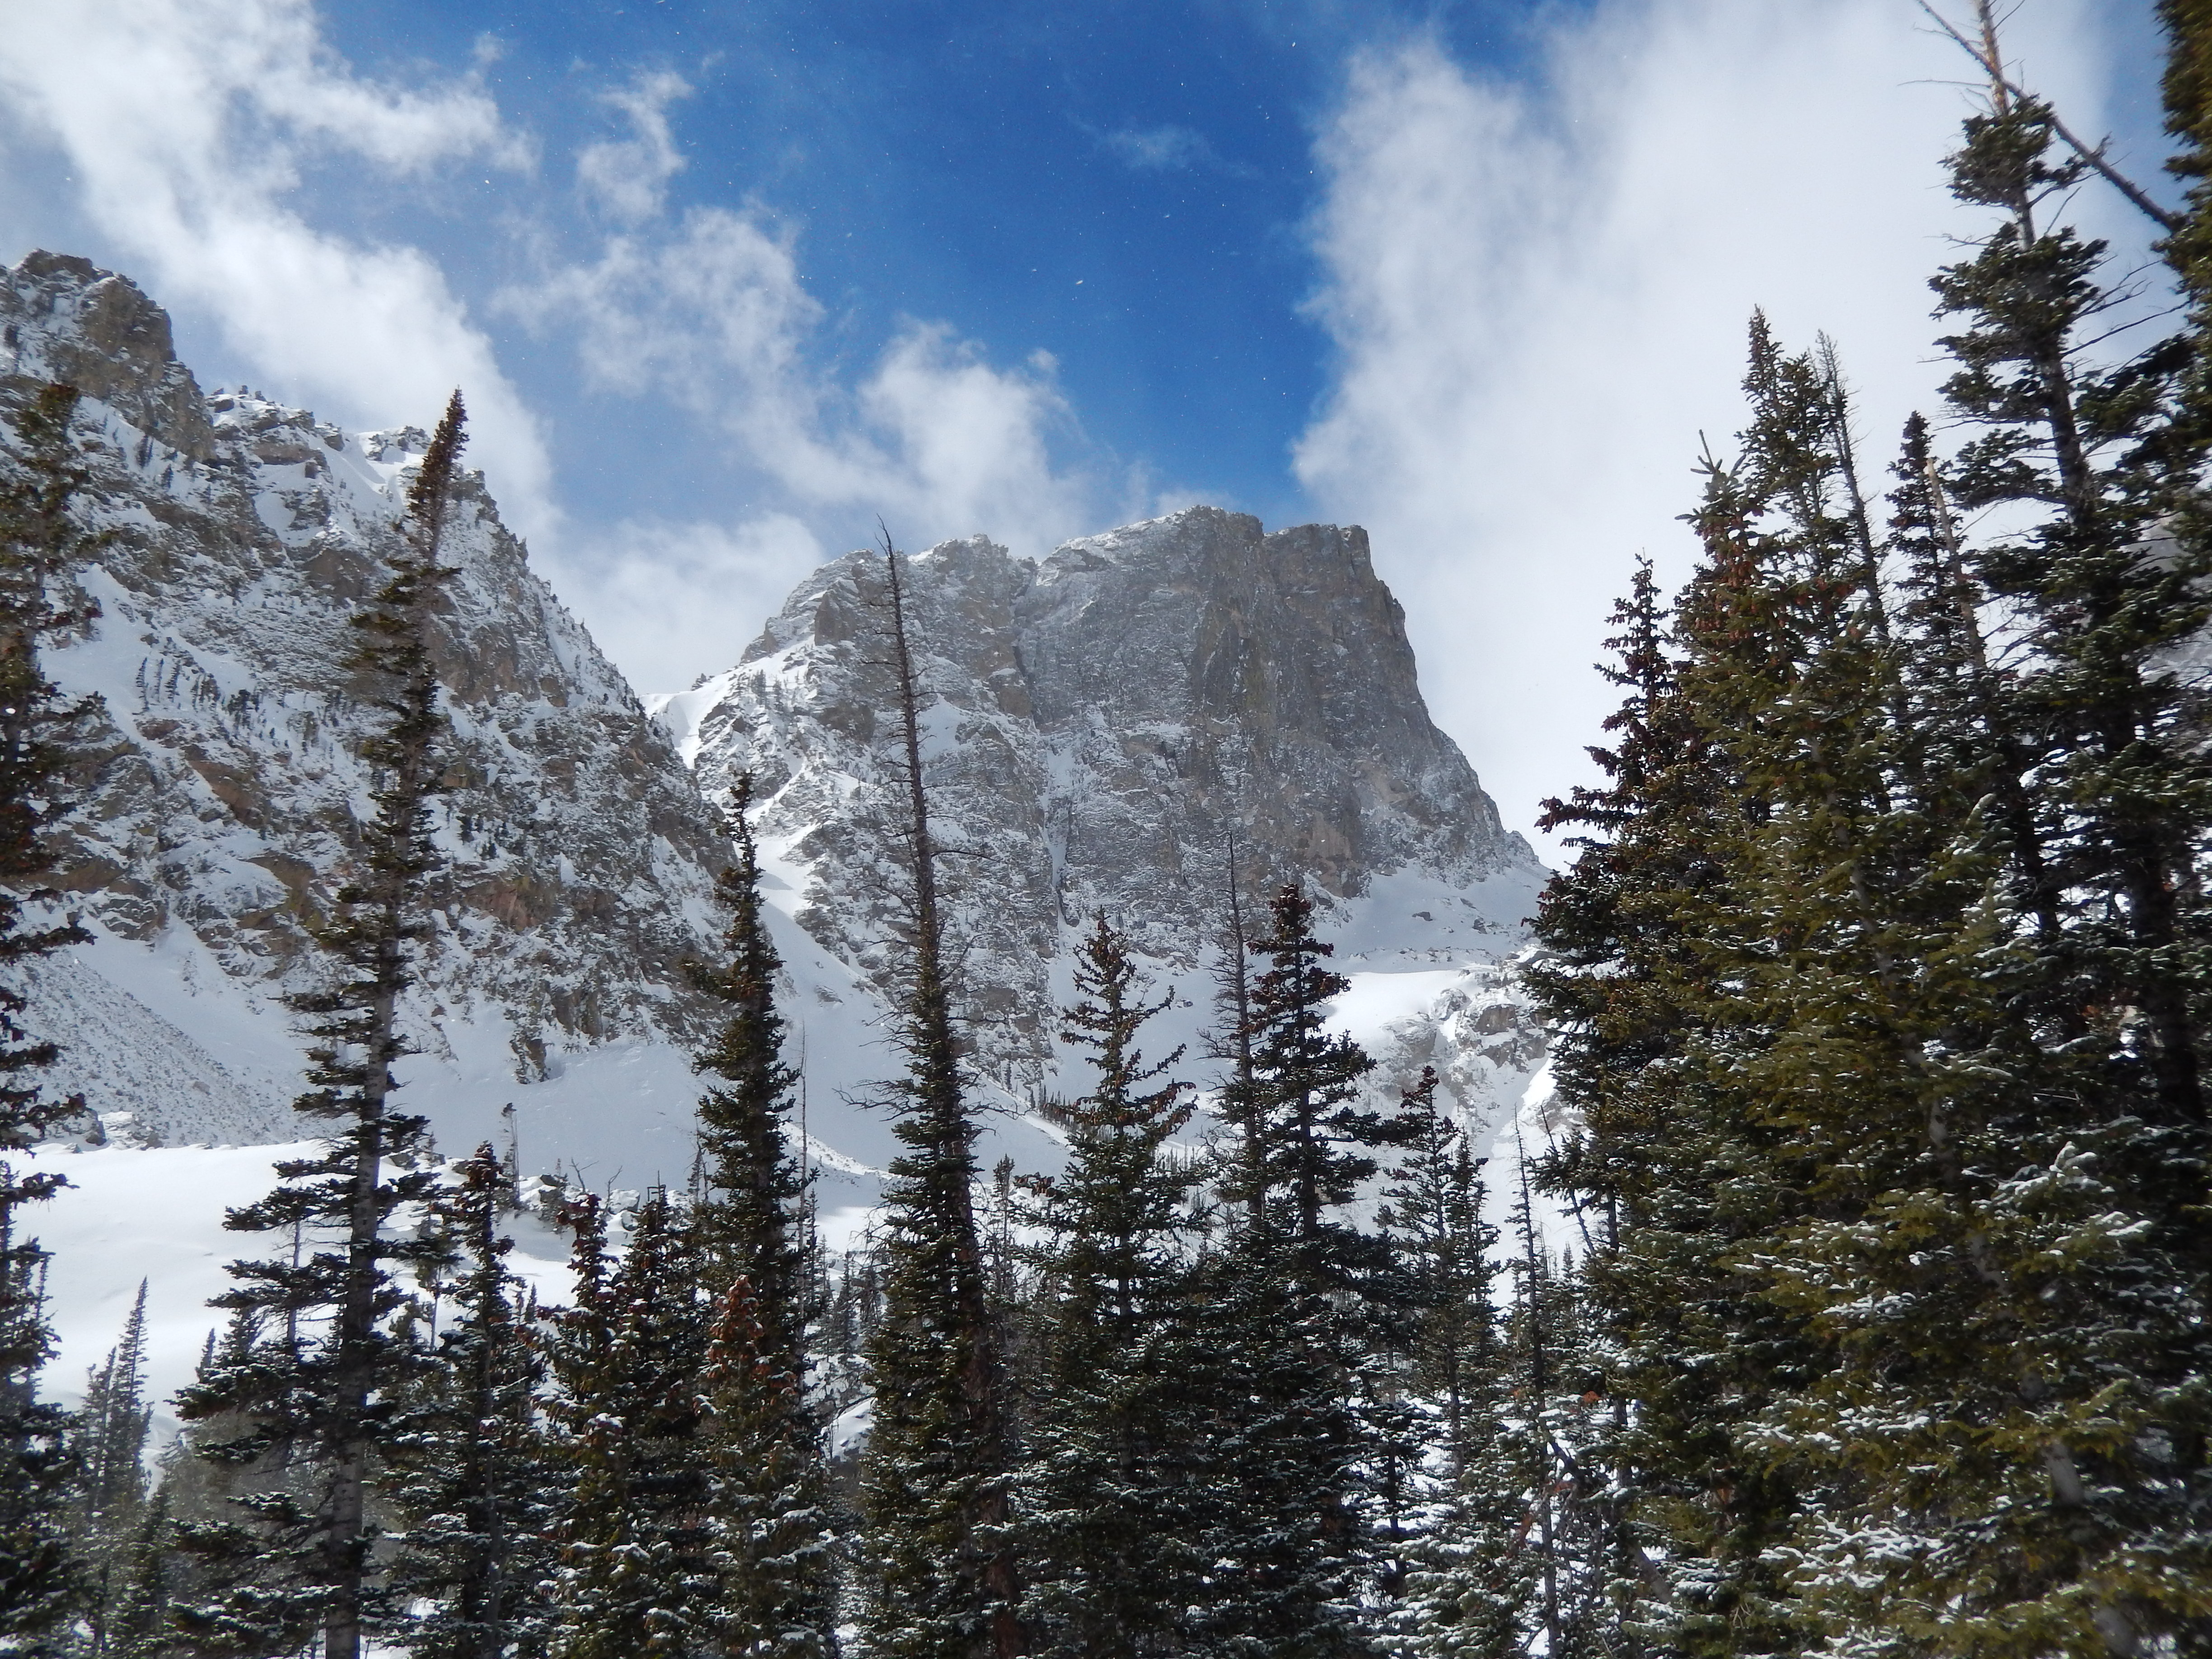
Looking back at Emerald Lake
I have to tell you that I have been getting humbled by our snowshoes and how these shorter distances kinda kick my butt. With that said I picked this easier snowshoe in Rocky Mountain National Park ( RMNP) in hopes that if I try something a little easier I won’t feel so defeated at the end. It is short and the elevation gain is minimal.
As we were driving into the park, we were lucky enough to catch these Elk battling it out.
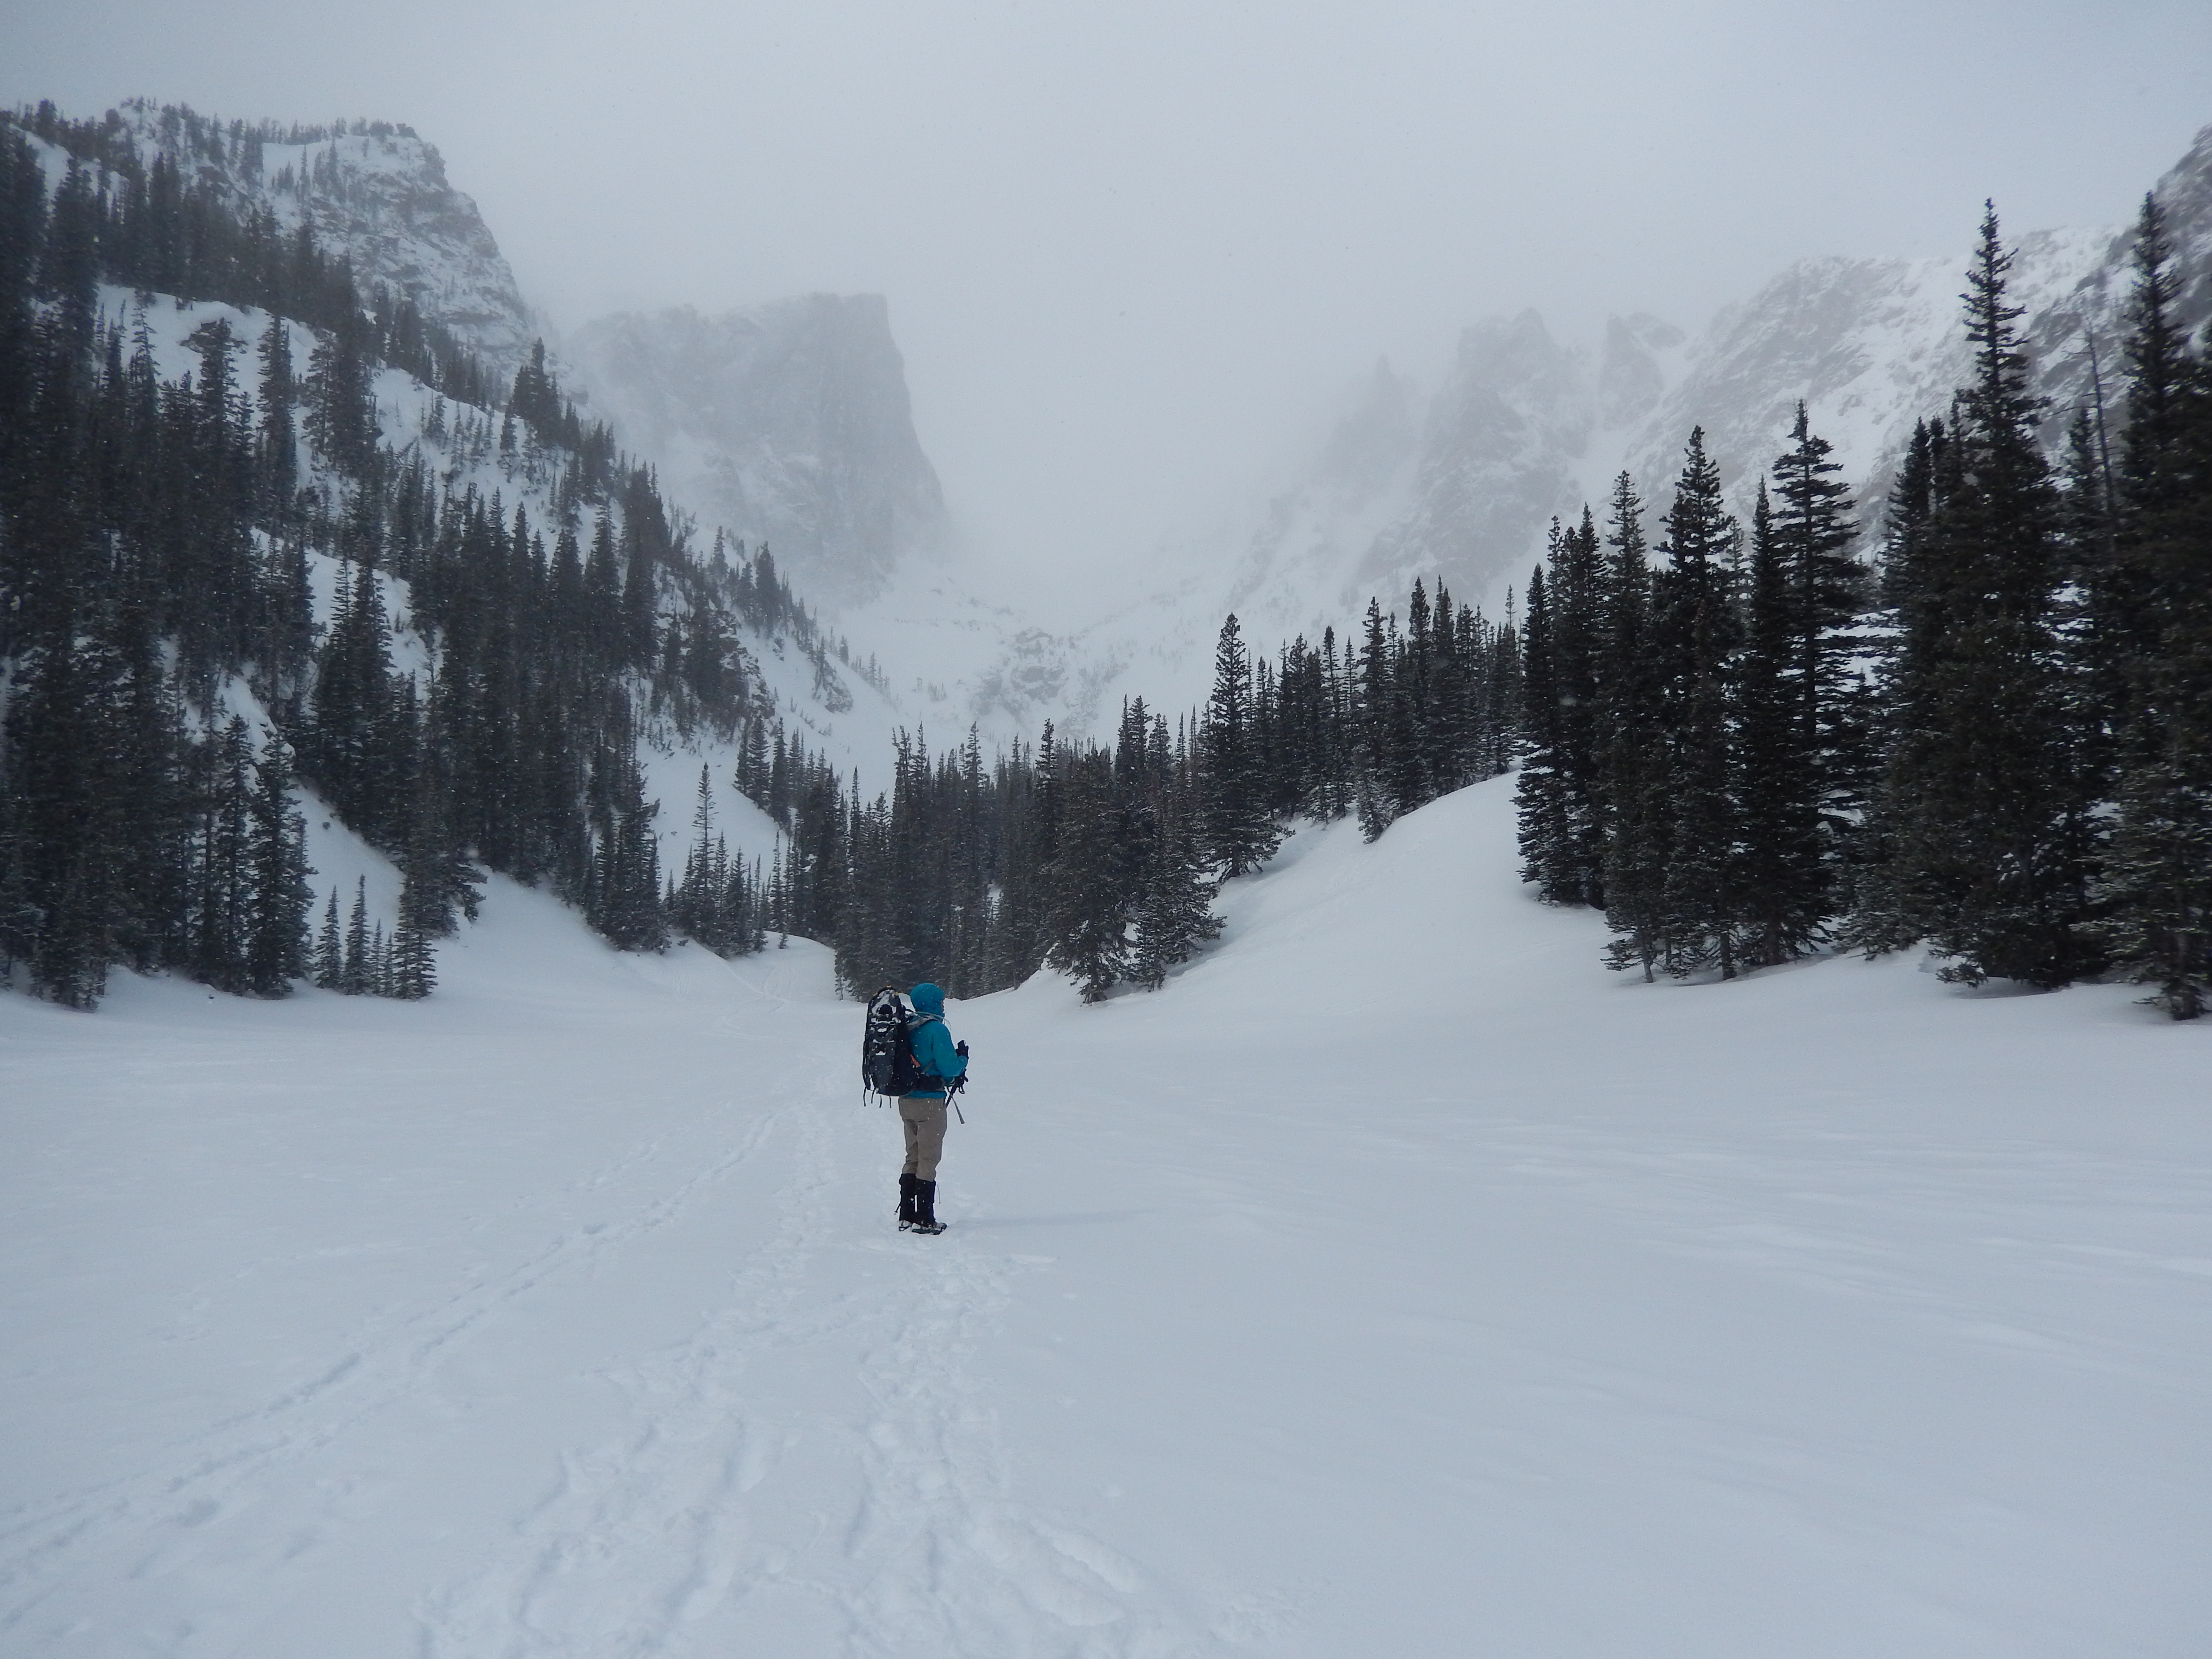
We pulled into a huge parking lot that was quickly filling up at Bear Lake. If this lot is full, they suggest parking at the Glacier Gorge parking lot and walk up from there. I was impressed with how many people were out there given it was St. Paddy’s day weekend and the weather forecast was questionable. The weather was supposed to be exactly like our first snowshoe at Mills Lake via Glacier Gorge, snowy with a lot of wind. I had already made peace with the fact that I would not get any views just some experience and work on my leg strength with those snowshoes on. Getting out the car I was not surprised by our view.
Parking lot view
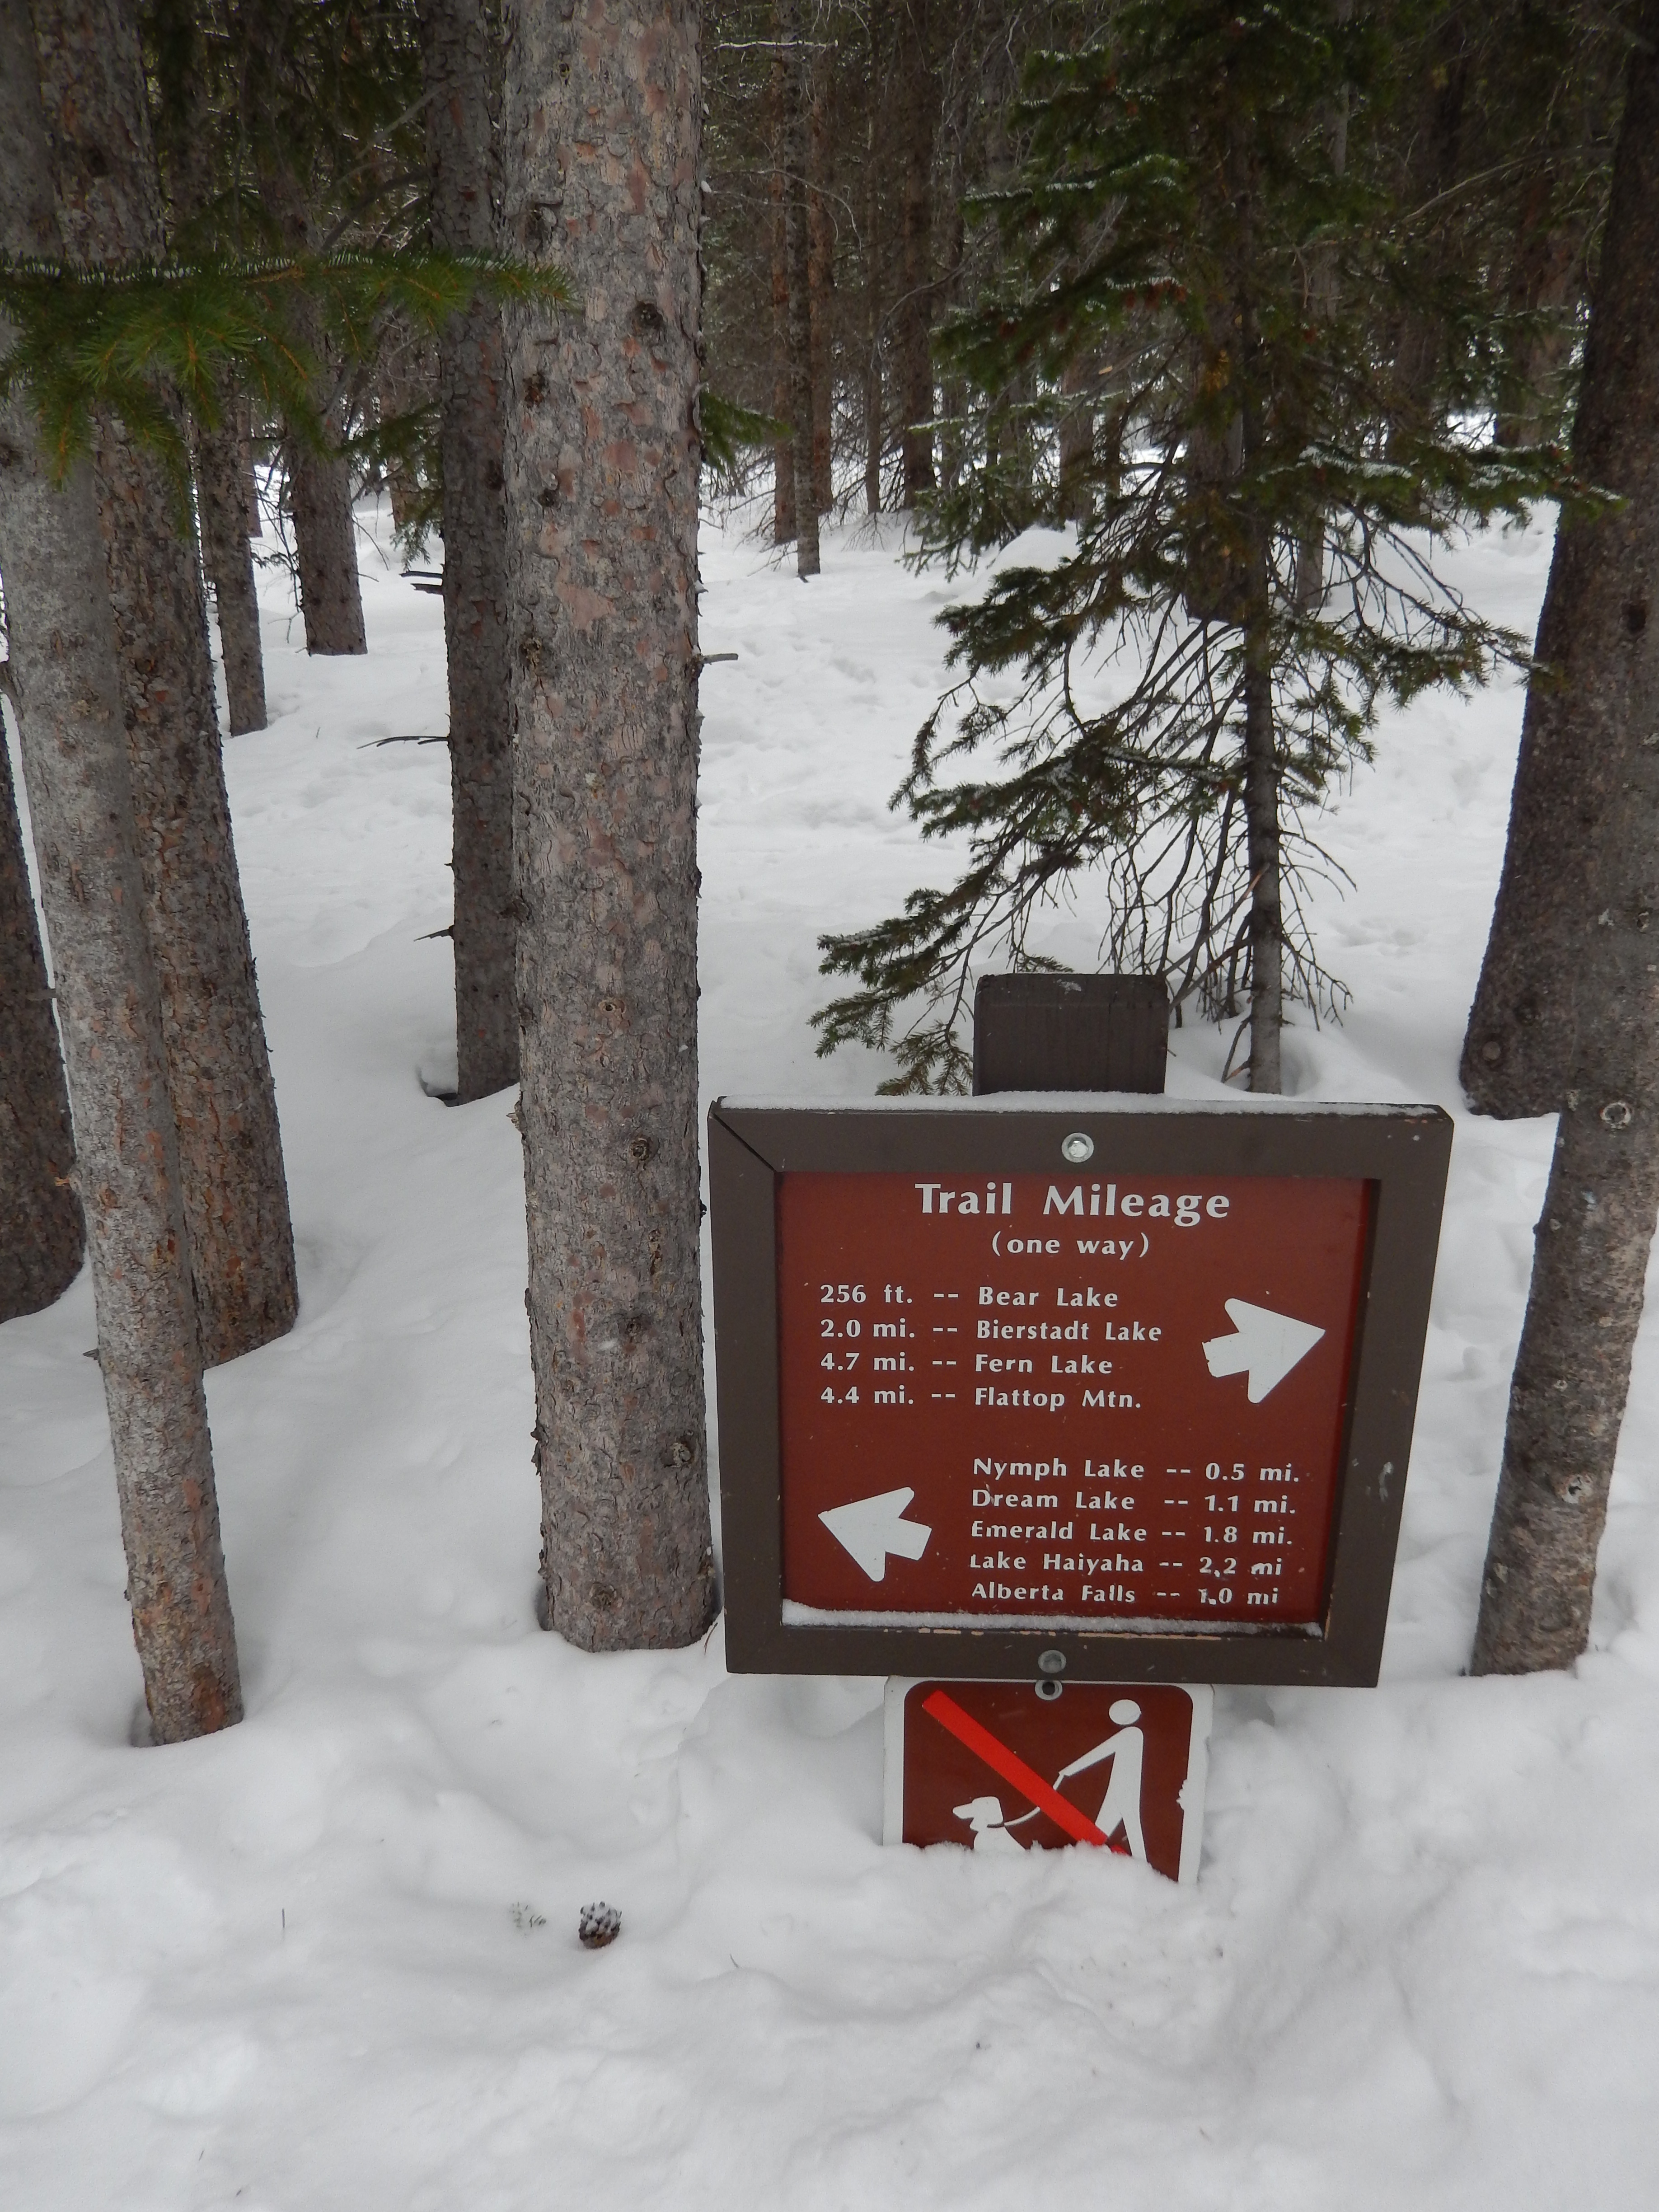
There are 2 options at this parking lot… well a lot more than 2 but for snowshoeing you had Bear lake, which is a 1 mile loop around Bear lake Or the 3 lakes we were going to that day; Nymph, Dream & Emerald. We took the path kinda up the middle and to the left of Bear Lake. It is not far to Nymph lake, in fact maybe a half a mile and the path was hard packed we didn’t have our snowshoes on but carried them instead. It was not super steep but we did climb up to the lake. It was snowing even harder upon our arrival then when we started.
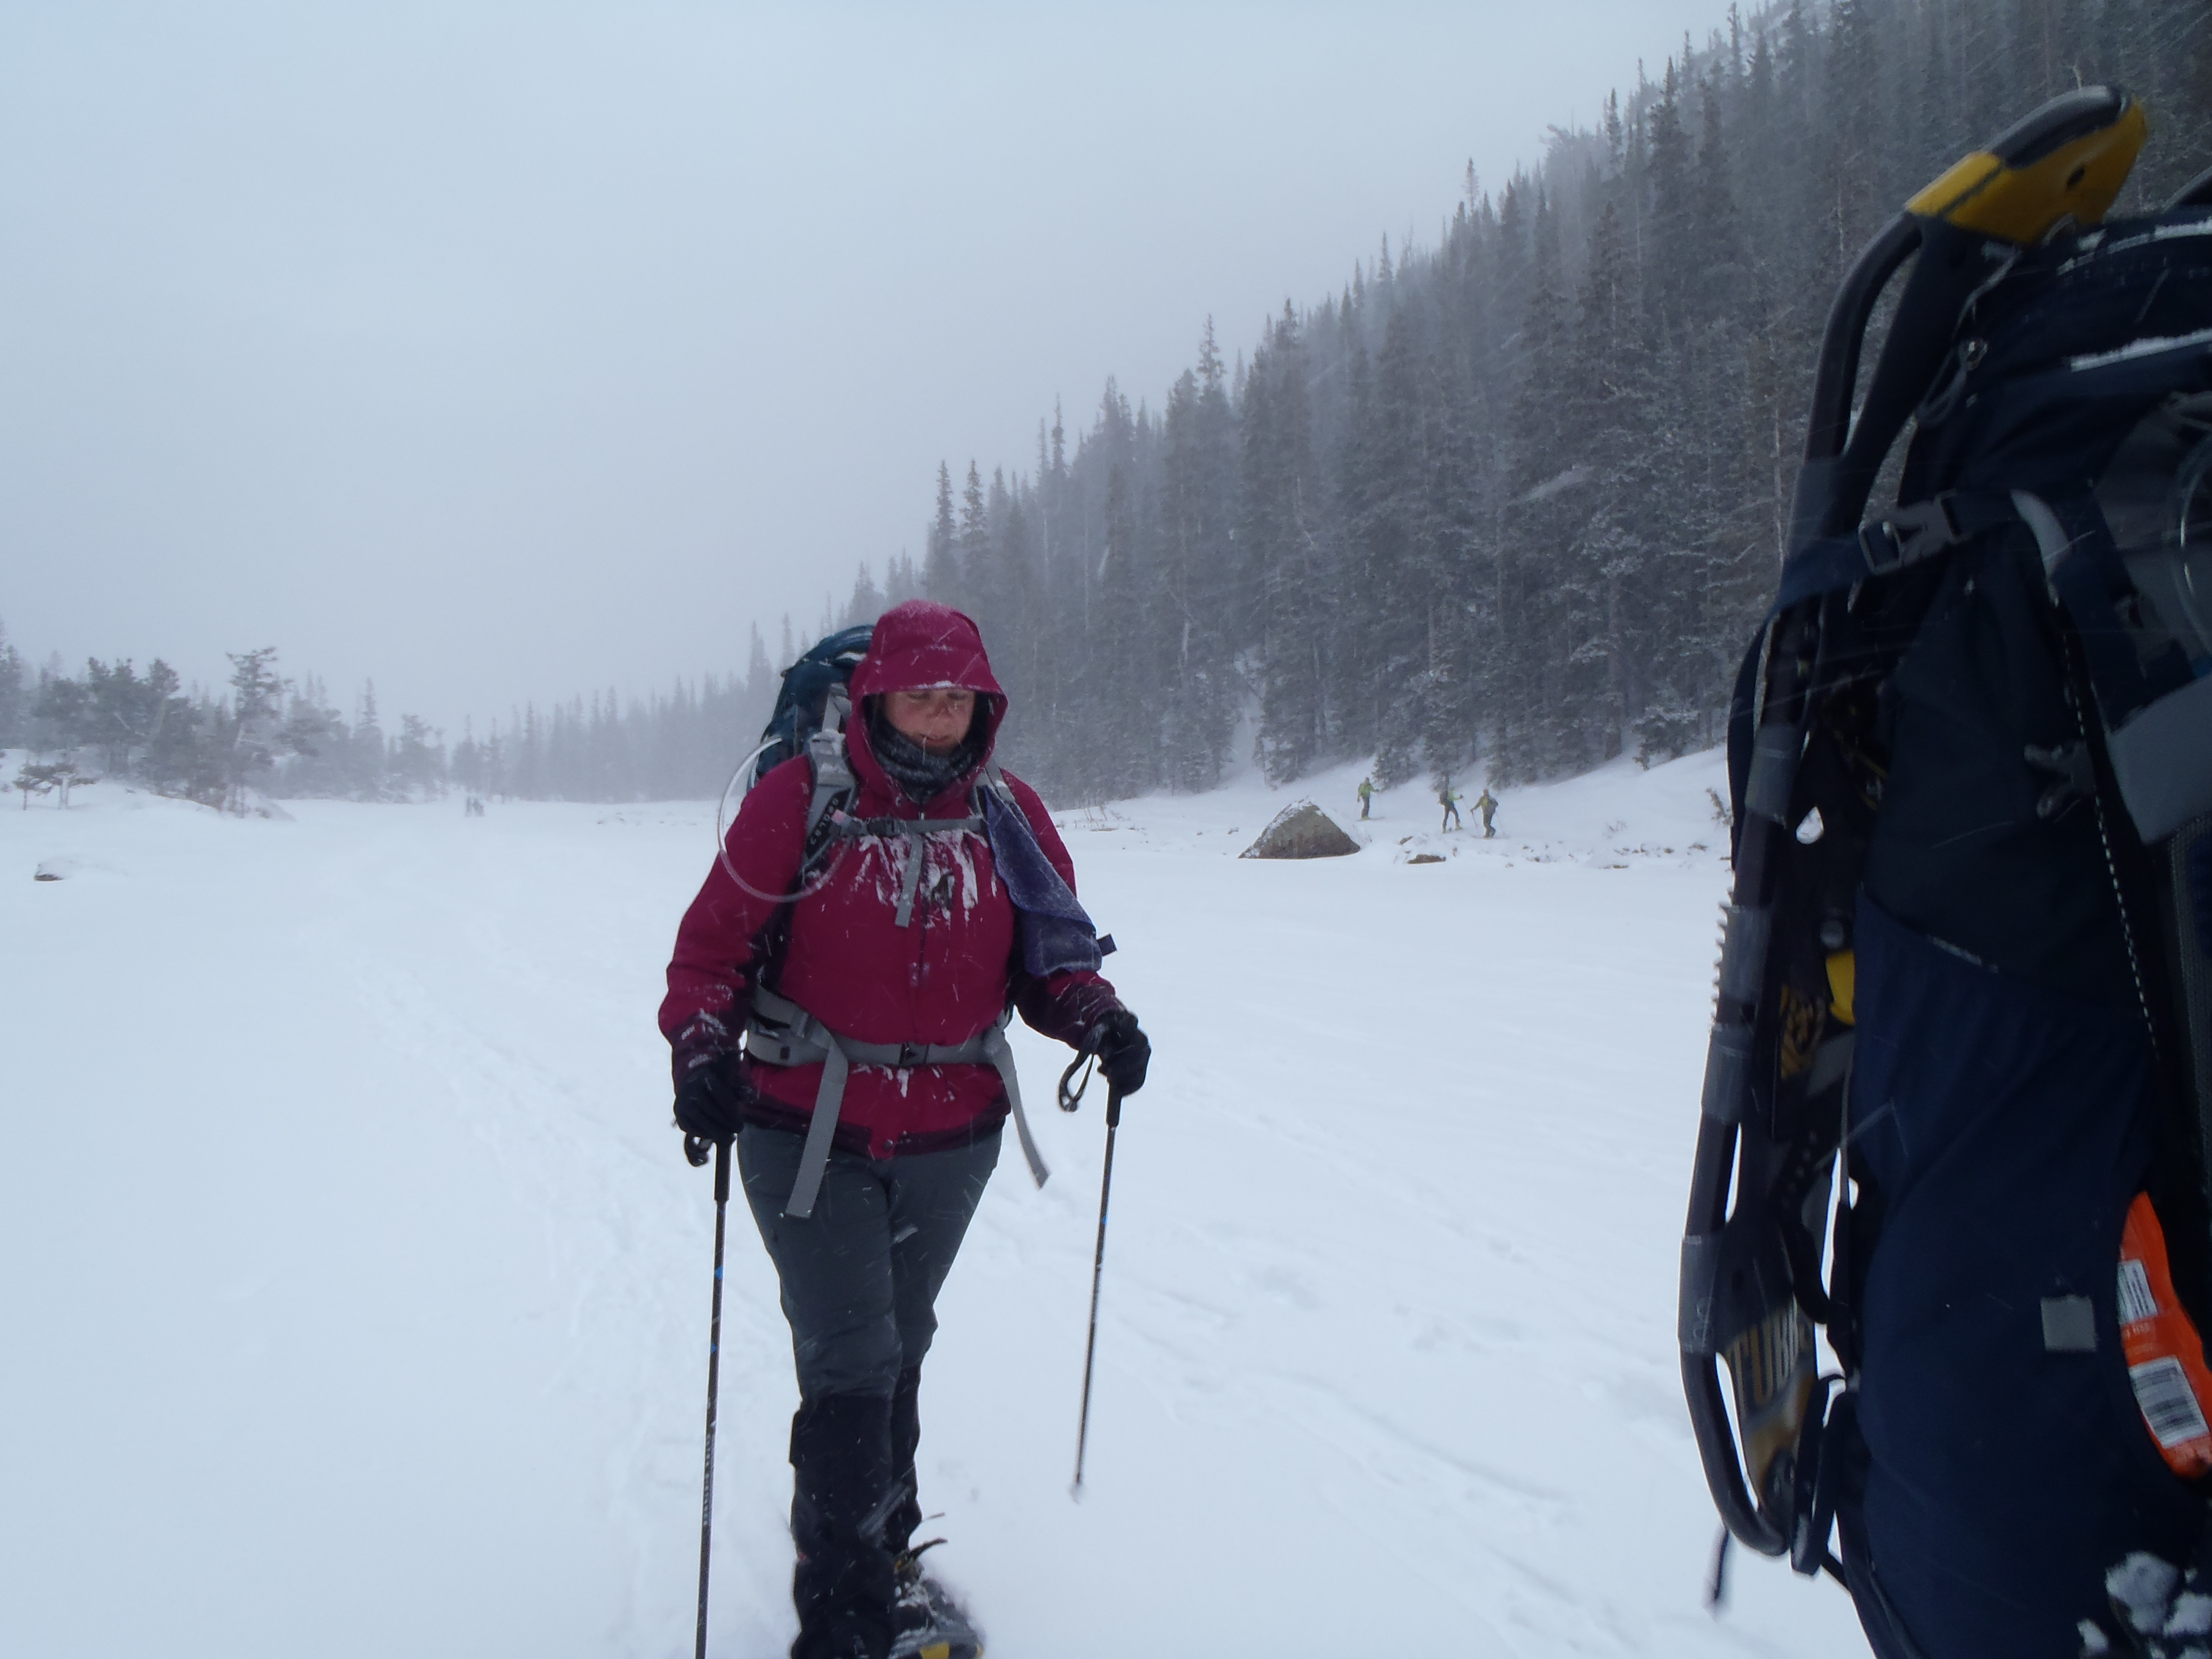
Trail Conditions to Nymph
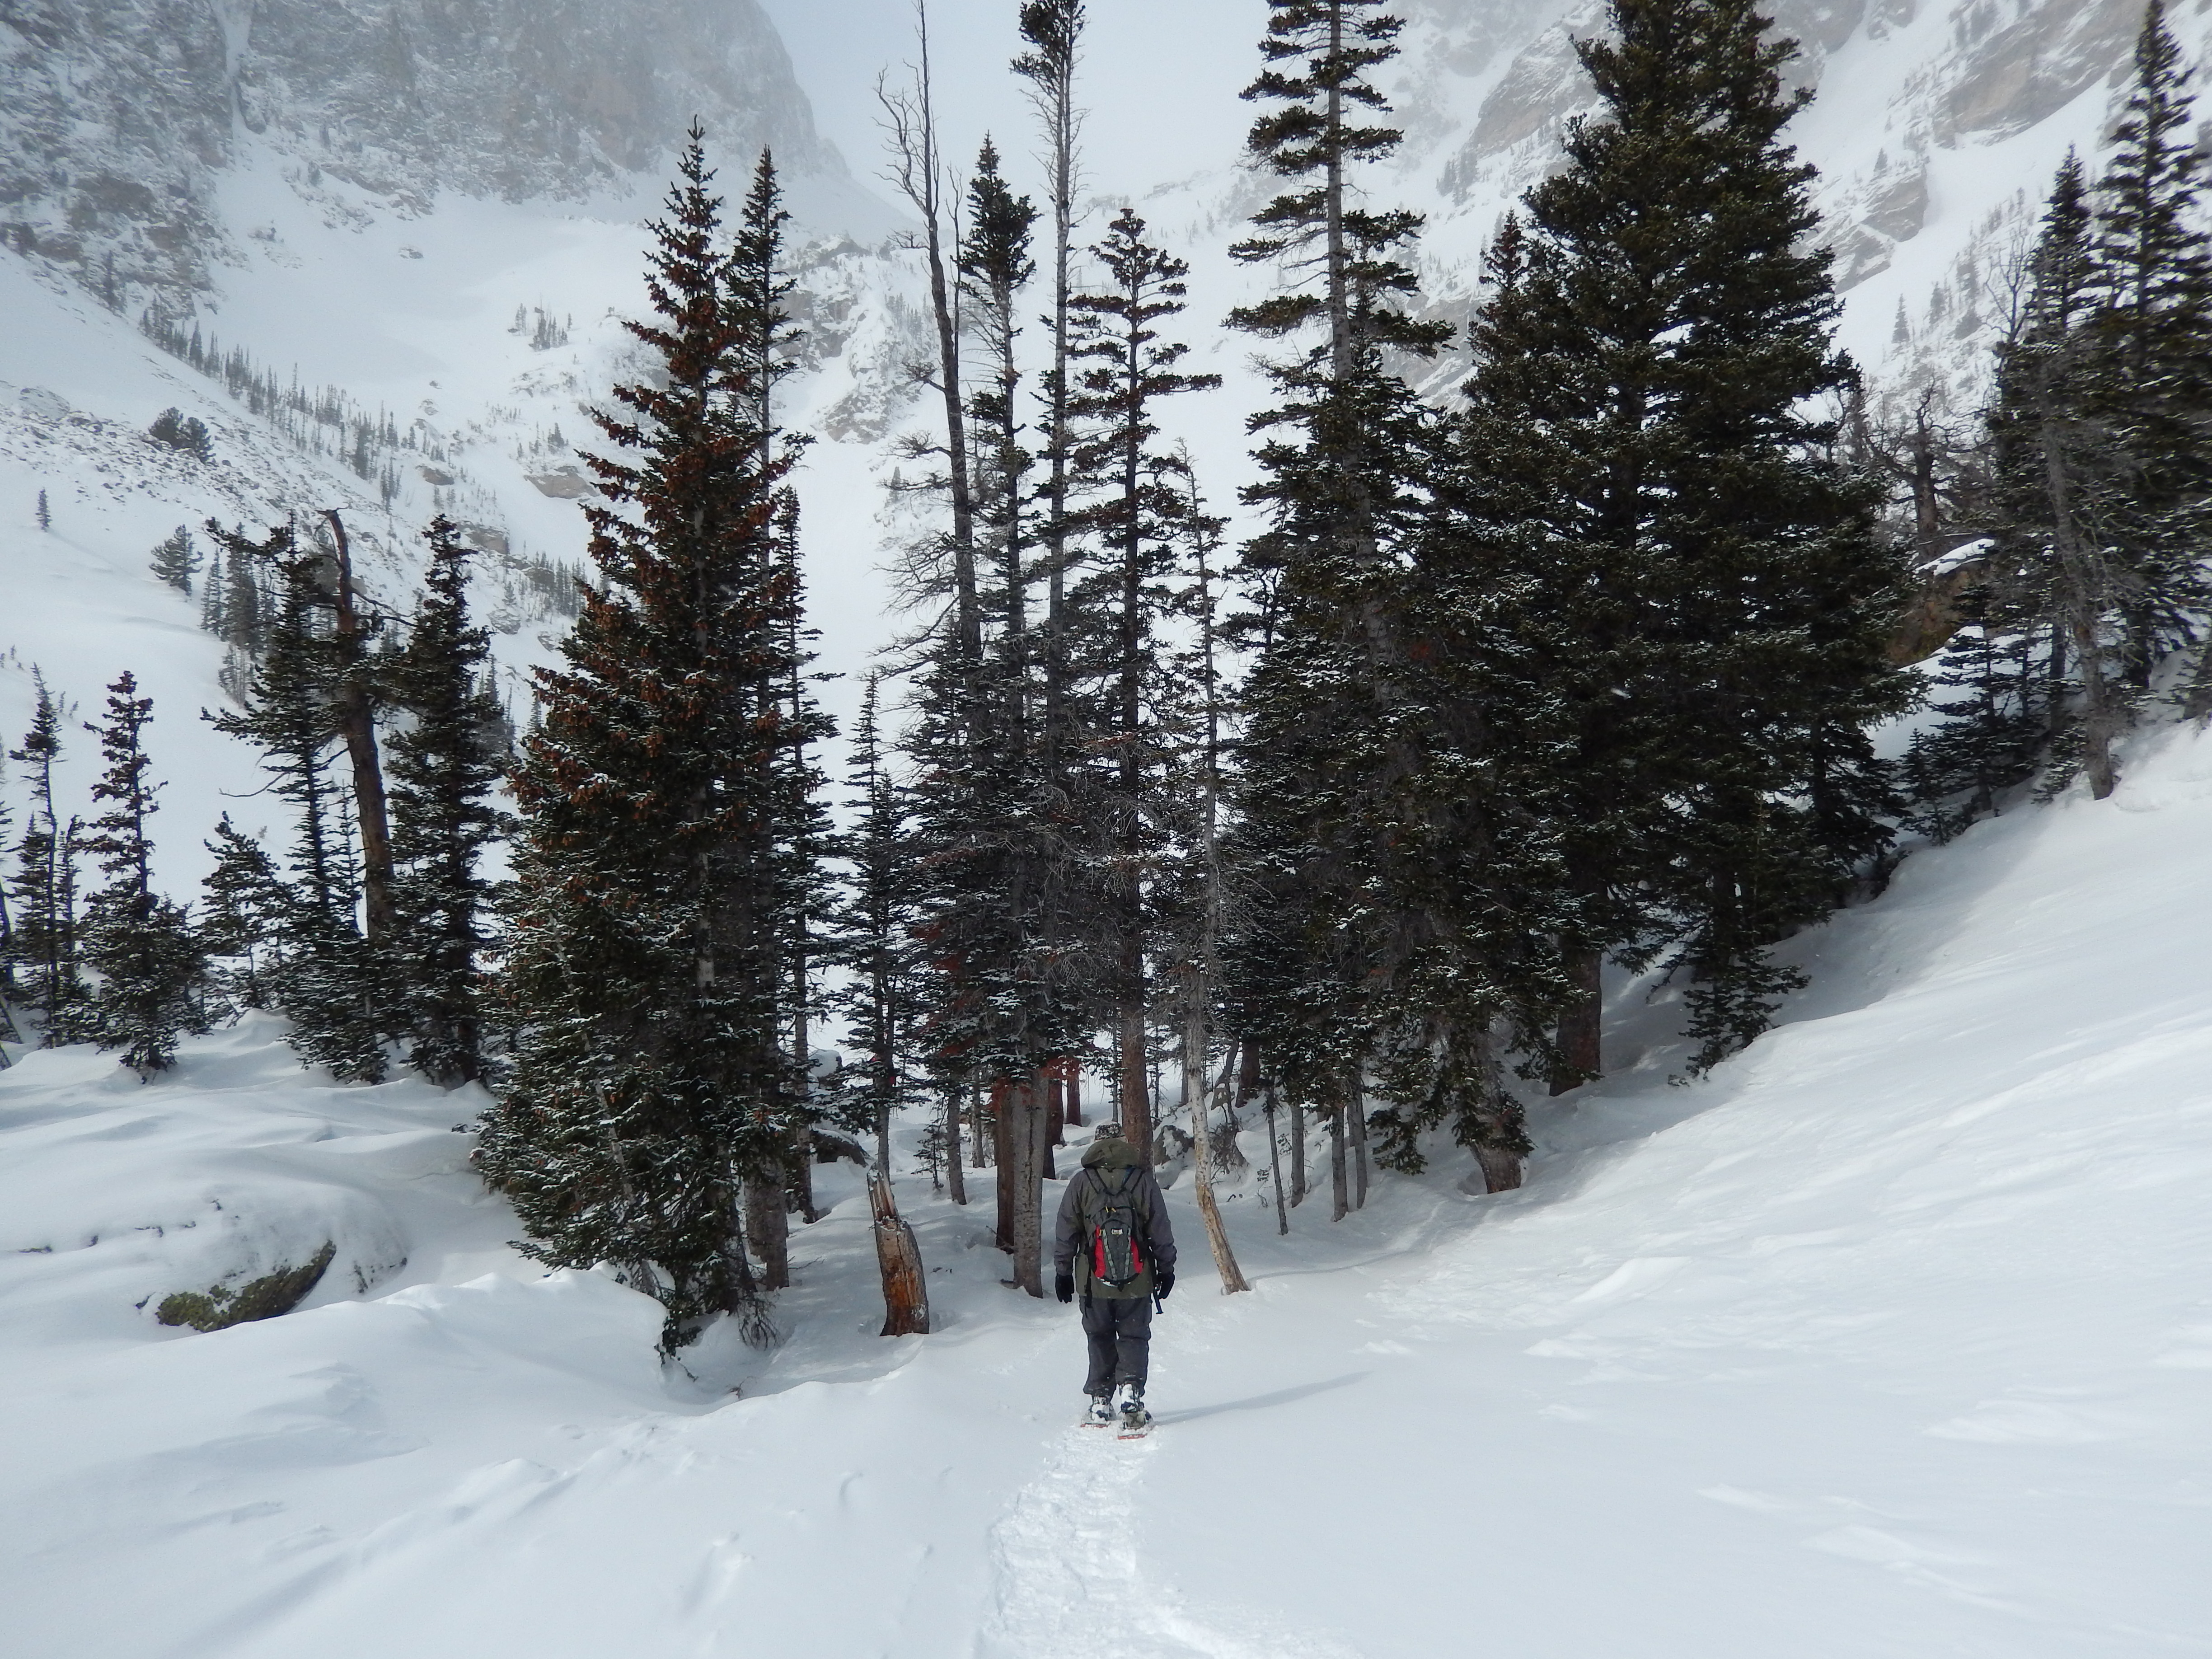
When we got there I realized I had left my directions in the car and so we started going the wrong way. I should have just looked for the hard packed trail but there was a large guided group there as well and it threw me off. We went right and the snow felt lass hard here so I put my snowshoes on. That’s when we saw everyone going left along the lake so we turned around and followed them up. For the record I didn’t need my snowshoes for this portion either and really I could have gone without them until Emerald lake where I was actually out on the lake adventuring around. It was kind of steep going up this section, I would say the most steep of the whole snowshoe and it was busy!
Nymph LakeViews on the way to Dream Lake
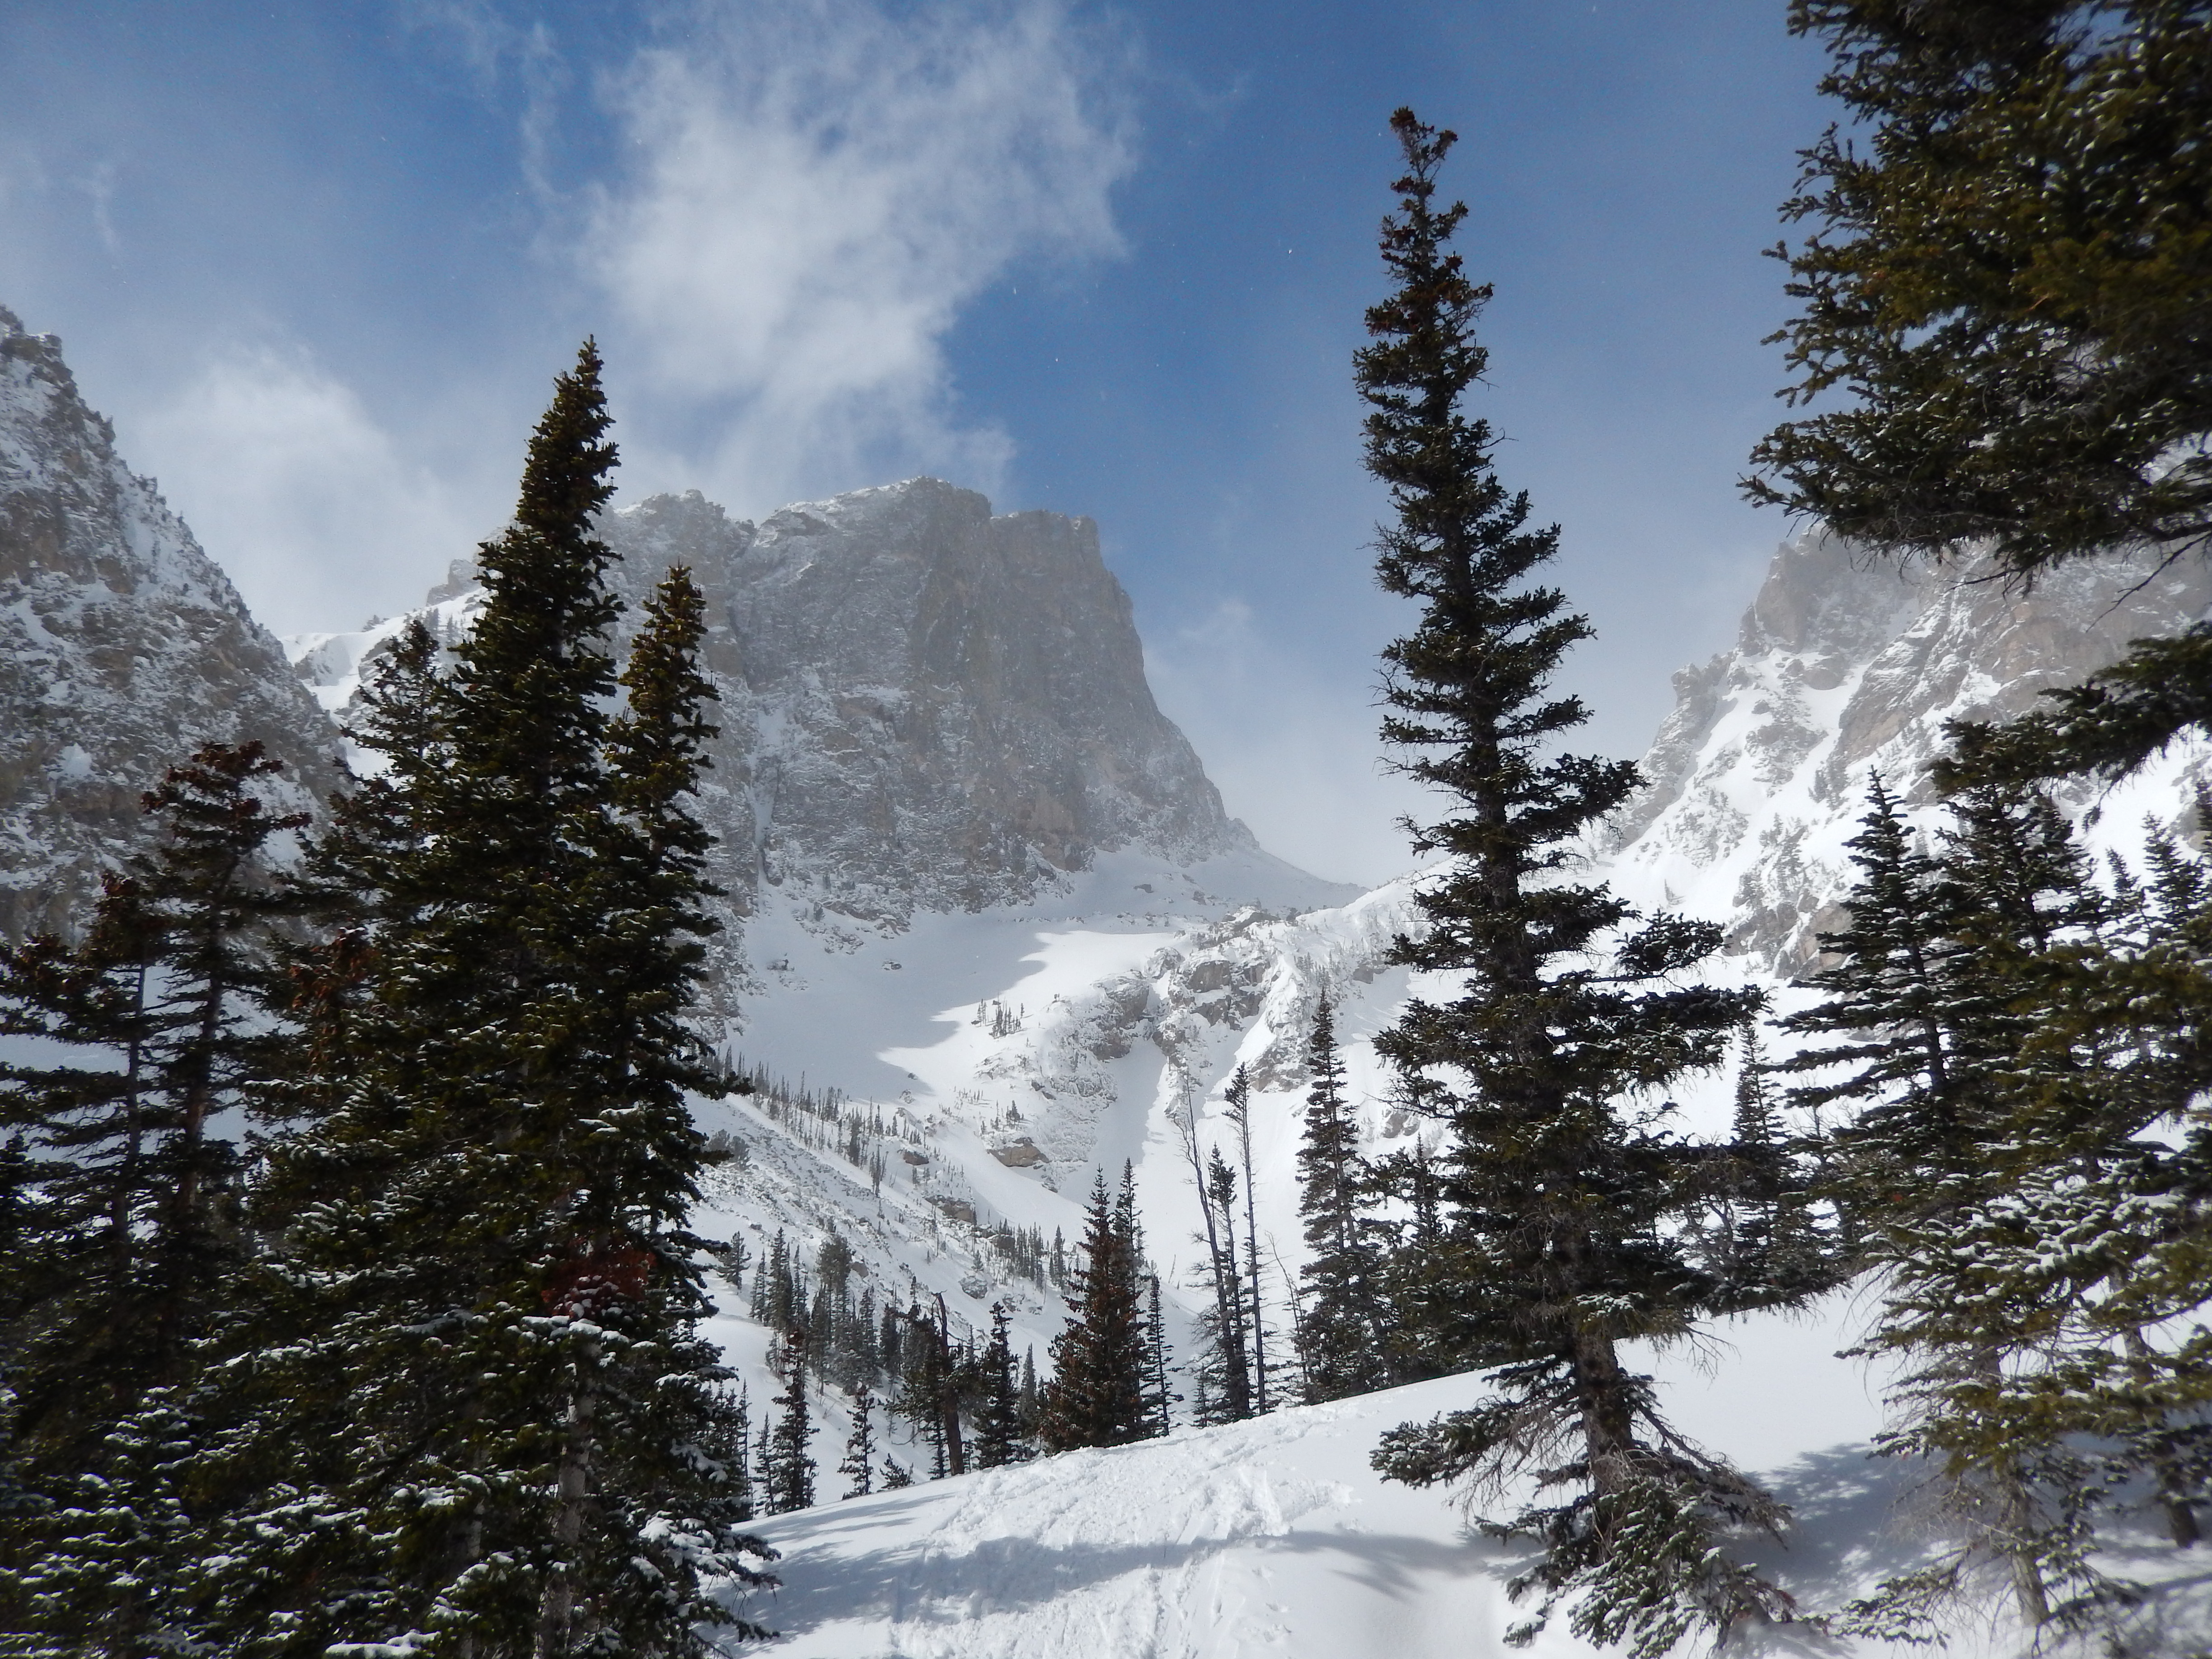
When we got to Dream Lake, I was once again confused by where to go. There is a clear path off to the left but it must go up to other options, we decided to stay straight and cross over dream lake hoping to get to Emerald lake. I was so consumed to see where everyone else was going that I failed to notice it was starting to clear up. We thankfully crossed the path of another snowshoer who said we were on the right track for Emerald Lake and so we continued on.
Dream Lake Looking towards Emerald LakeMe on Dream Lake
It was not far to this last lake with some more climbing, a little over half a mile. As we got a little higher, the sky lit up in the best blue while clouds moved around the peaks surrounding the lake. It was amazing! When we got to Emerald Lake Aaron put on his snowshoes while I ran out on to the lake to try to capture the views as best I could before we lost them again. Honestly I could have stayed there longer it was so beautiful. The best part is we had it mostly to ourselves.
Trail Conditions going towards Emerald LakeSkies opening upAlmost to Emerald Lake
We spent about 30 minutes ohhhing and ahhing before heading back. It was a slow start back because I kept turning around to enjoy the views before they were gone. By the time we got back to Dream lake the clouds had moved back in, while the crowds were on the move to Emerald lake. We passed so many people on the way down.
On Emerald Lake
Overall it was a great snowshoe! I would love to take visitors here so they could see the amazing beauty for themselves. I know I will be back in the summer, there is another lake to check out and so much to see, all off this parking lot. I couldn’t believe how lucky we were in terms of our timing, it made me want to get back there as soon as I could!
Since the snowshoe was on the easier side, we got out on Sunday and did 7 miles at Deer Creek Canyon which is a muddy, snowy, icy mess right now. It was a good workout. After the directions will be some of my favorite pictures from the day.
However your week is going, find some time and get out there and hike!
Directions: From Estes Park stay on 66/36 through town, at the 3rd light in town, turn left and follow the signs to the Beaver Meadows Entrance Station entrance into the park. There is a fee to enter the park through this entrance.
Shortly after passing through the Beaver Meadows fee station, turn left onto Bear Lake Road. Take Bear Lake Road until it dead-ends into the Bear Lake Trailhead area. If parking is unavailable at Bear Lake, it is possible to park at the Glacier Basin area and take a shuttle to Bear Lake.
When my nieces came to visit me last year, their one request was more hiking. I honestly had no idea they would like it as much as they did. I wanted to get them out as much as possible while still giving them a break from school. I had grand plans, hike 3/1, snowshoe 3/2, sunrise hike 3/3, break on 3/4, hike of their choice on 3/5 play 3/6 by ear…. our first hike fell apart quickly while the snowshoe on 3/2 was excellent as I mentioned here.
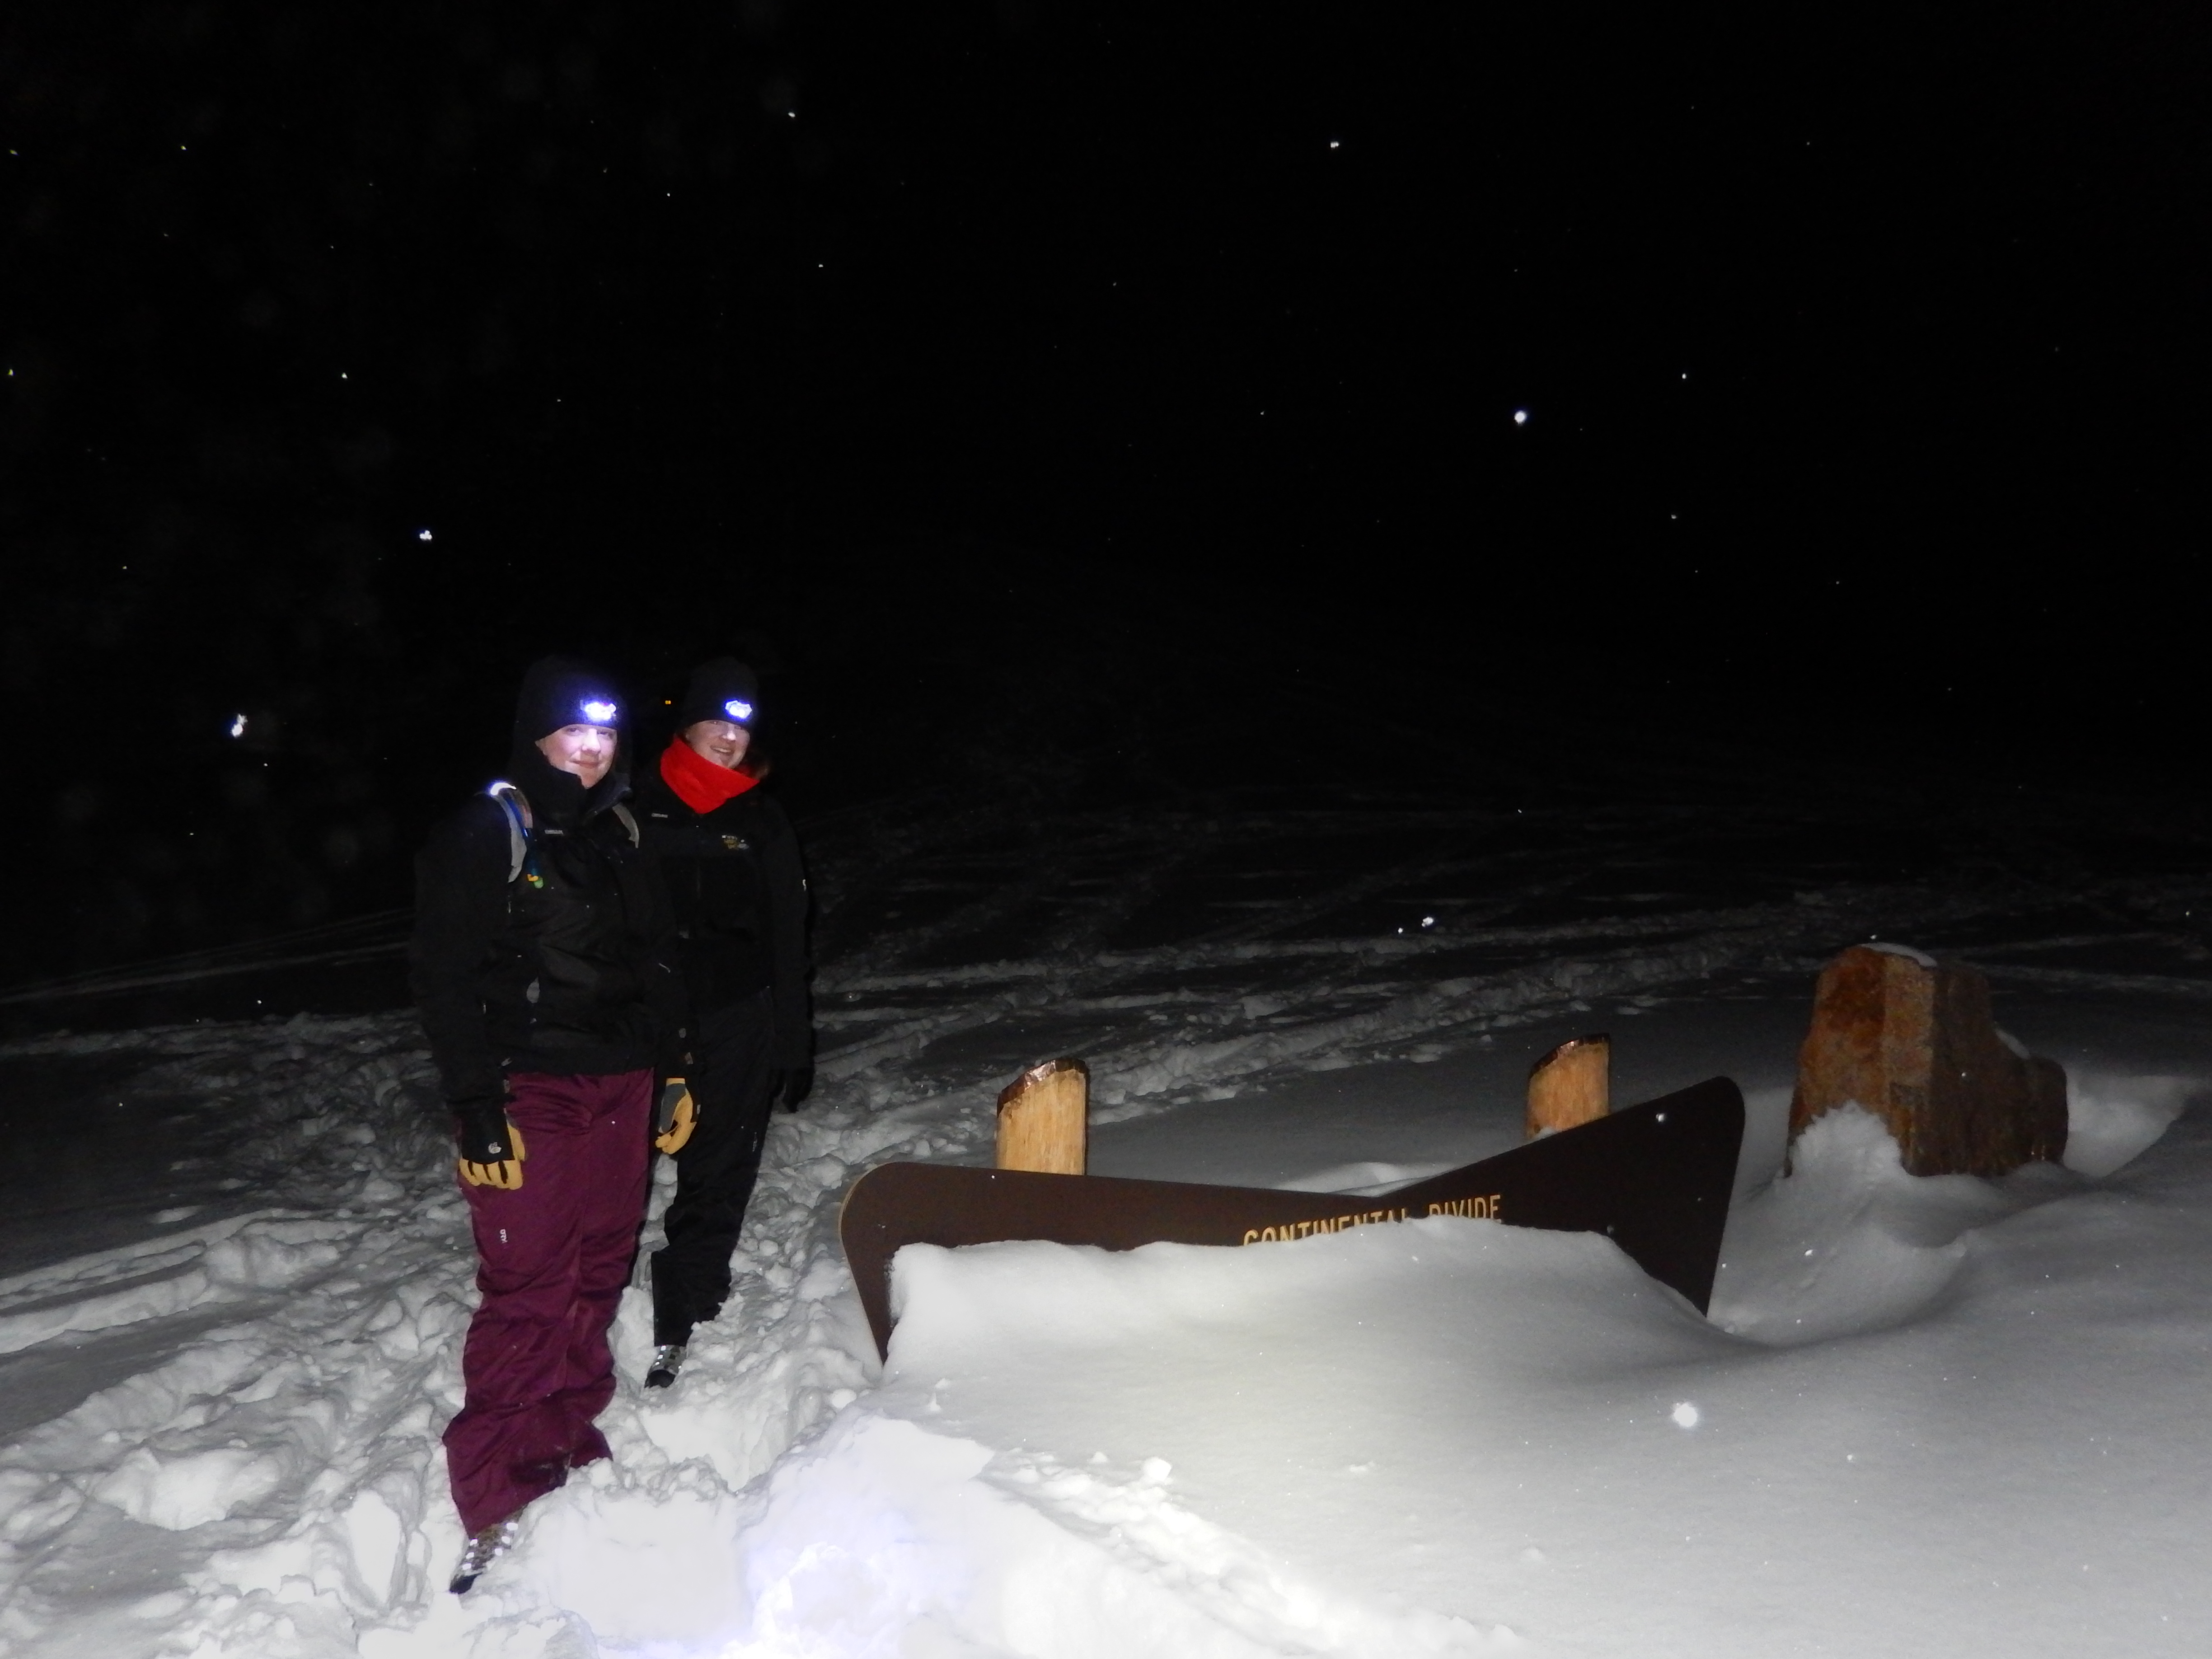
For our sunrise hike on 3/3 I was pretty uncertain we would ever be able to do it because the avalanche risk was so high all through the high country and I am not yet educated on avalanche safety and awareness. I picked a mountain that I knew was a low risk but tricky to get to, Colorado Mines Mountain. With the snow storm we had on 3/1 I wasn’t certain the road up would be open but it was so we got up at 2AM and headed out to attempt their first sunrise hike. When we arrived at the Berthoud Pass parking lot I was not expecting the 15 foot high wall of snow all around the parking lot nor Aaron getting bad coffee from 7-11. He hardly had the car in park before he was running to the warming hut vault toilets to be sick. Which I might add is one of the most awful places in the world to have that kind of situation in…. And my old negative Nellie said out loud “oh yeah we aren’t doing this”.
At the top of the continental divide sign
While Aaron was being sick I told them to get their snow pants on and wait in the car while I scouted out the trail to see what we had to work with. The snow was actually hard enough to walk on and the snowshoe trail was just like Butler’s Gulch the week before in that we didn’t need snowshoes where all the other snowshoers had gone before us. I walked a good quarter-mile up without anything but my hiking boots. That walk felt good so I went back, checked on Aaron and the 3 of us adventured up the trail a bit to get a feel. I should have had them put on their snowshoes and just gone for it but I didn’t, and my lack of confidence probably contributed to their unease. We went up about half a mile, shut off our headlamps and then turned around. We decided we would wait for sunrise in the parking lot and then head back for naps as soon as Aaron could safely leave the bathroom. We goofed around where we could and then as the sun started to rise the snow picked up along with the wind… it was almost a white out. I took a look down Berthoud pass and we weren’t going to catch any of the sunrise from there the snow was so thick in crazy blowing winds. I am still kicking myself for not just taking them up alone, I am perfectly capable but I let doubt rule me! Regardless it would have been miserable at the top with absolutely no views. I promised them that if they came in the summer we would do this again on a better mountain.
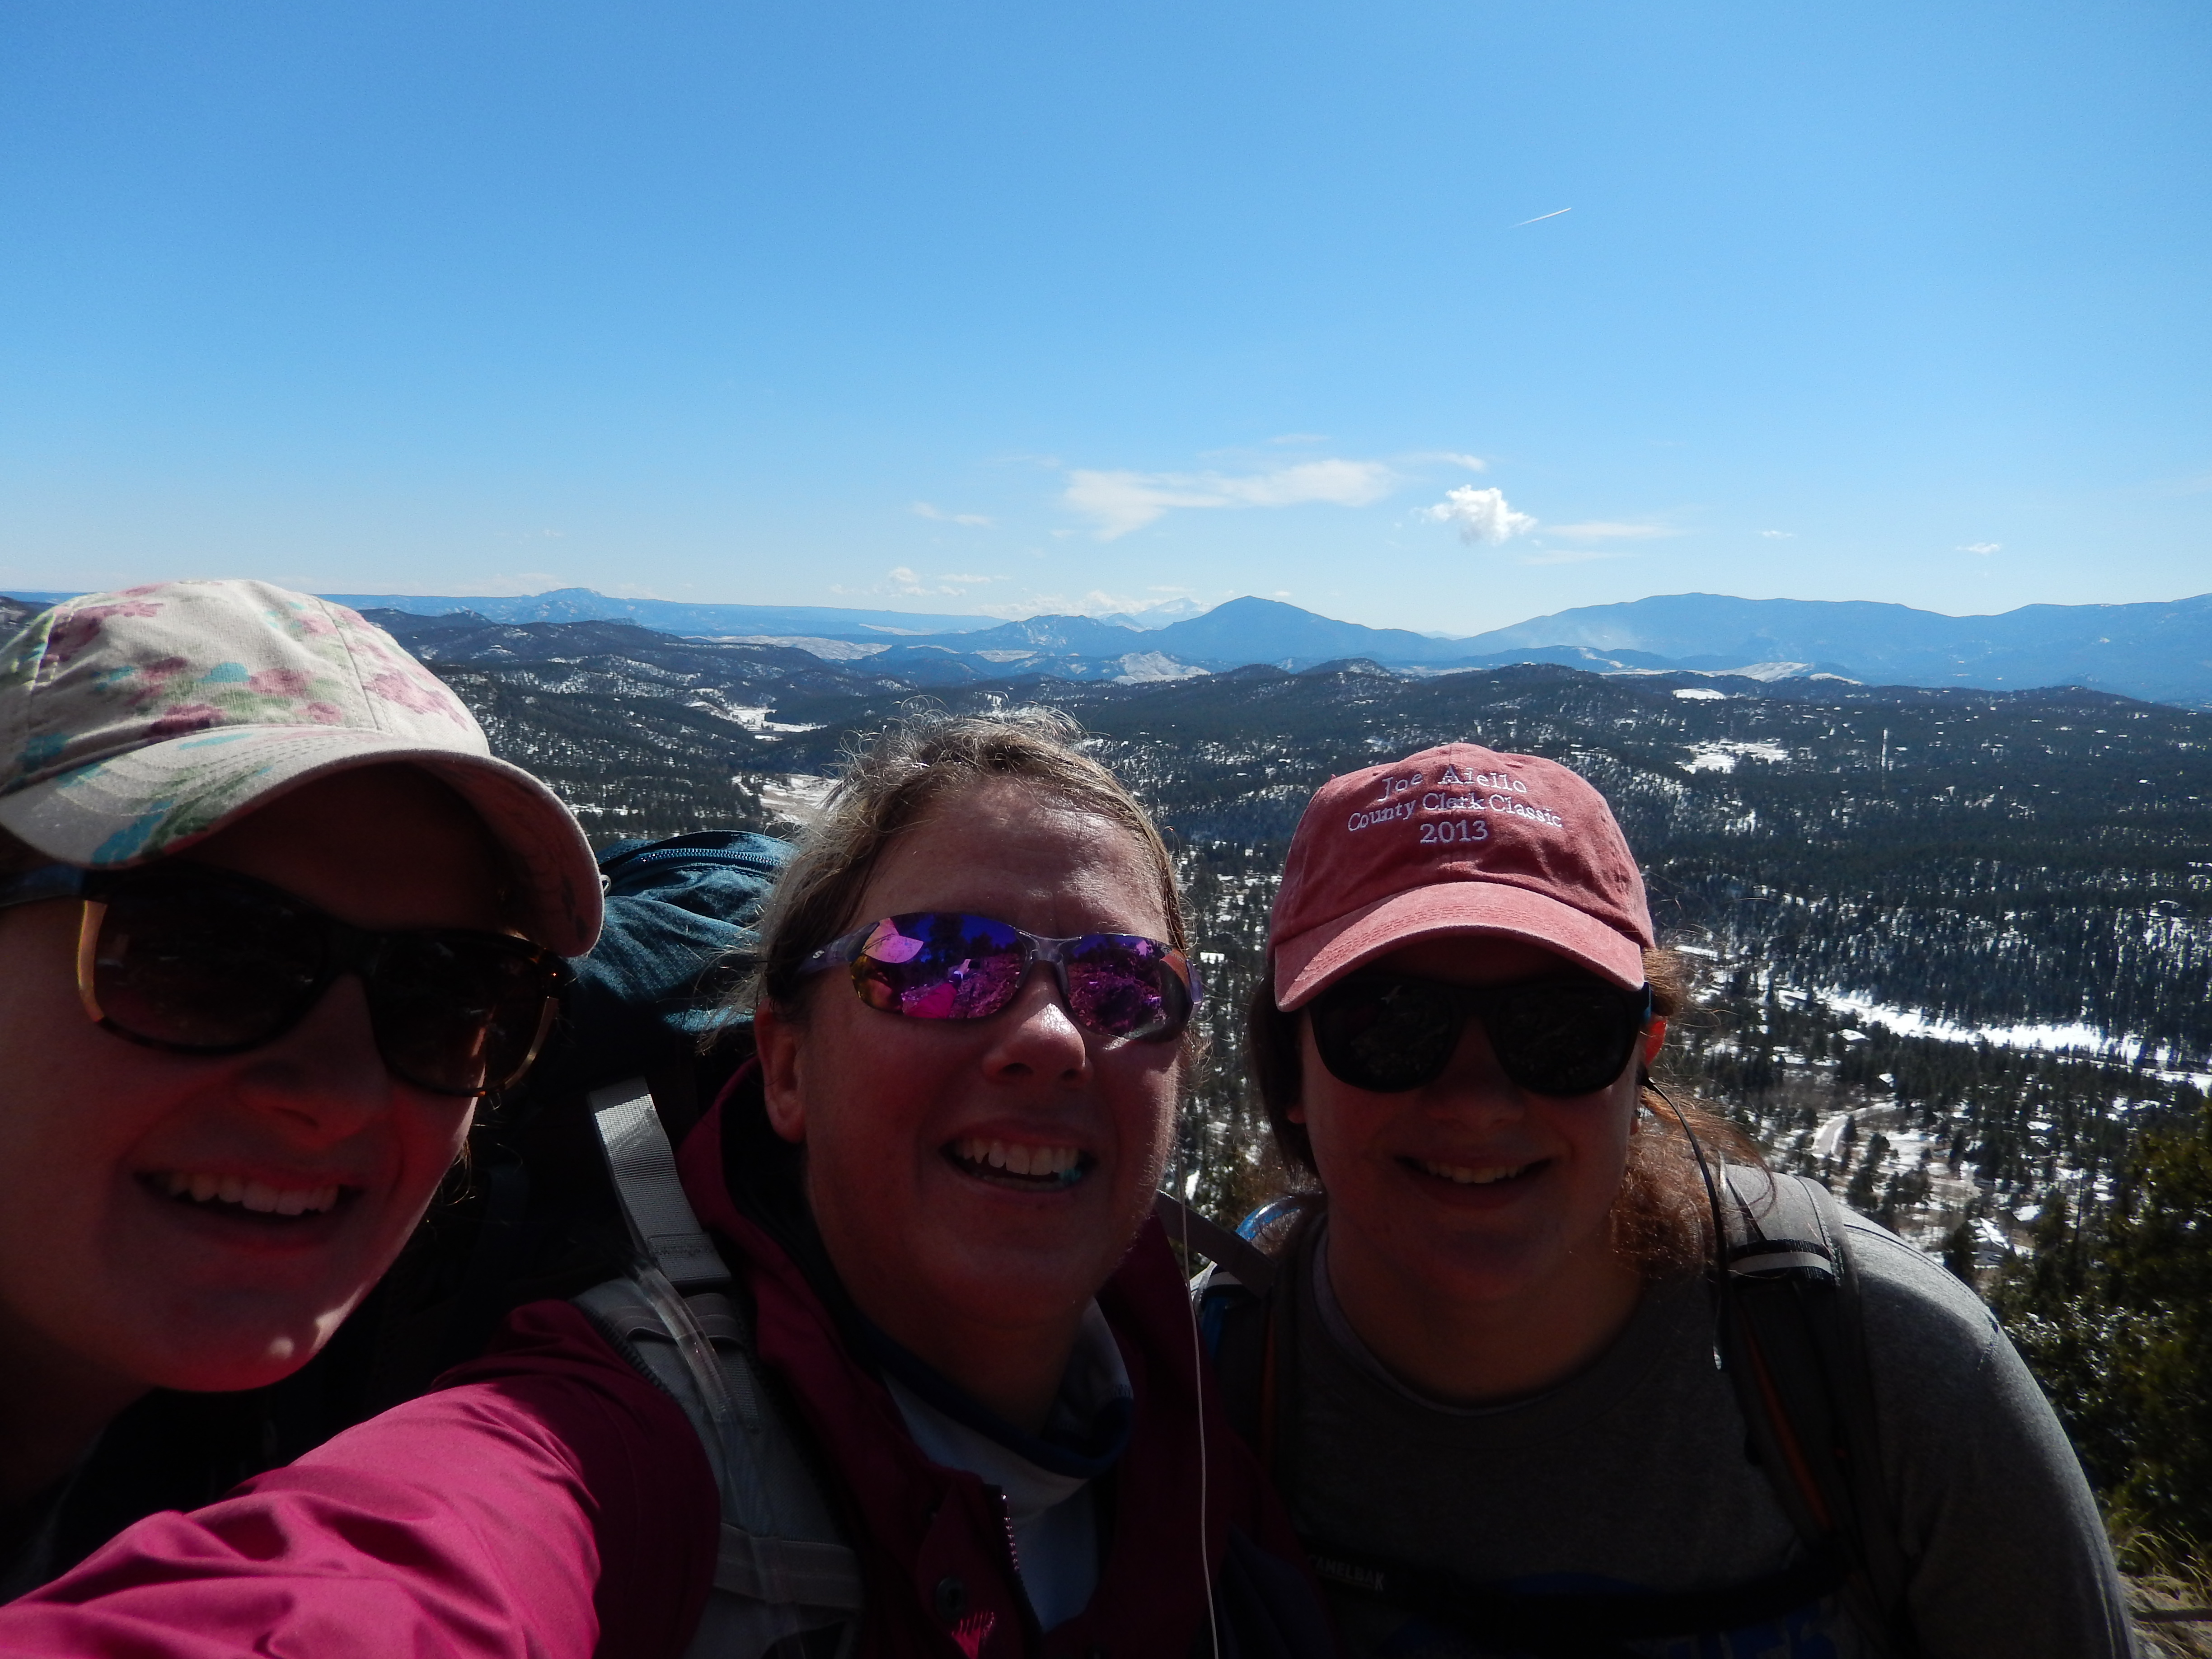
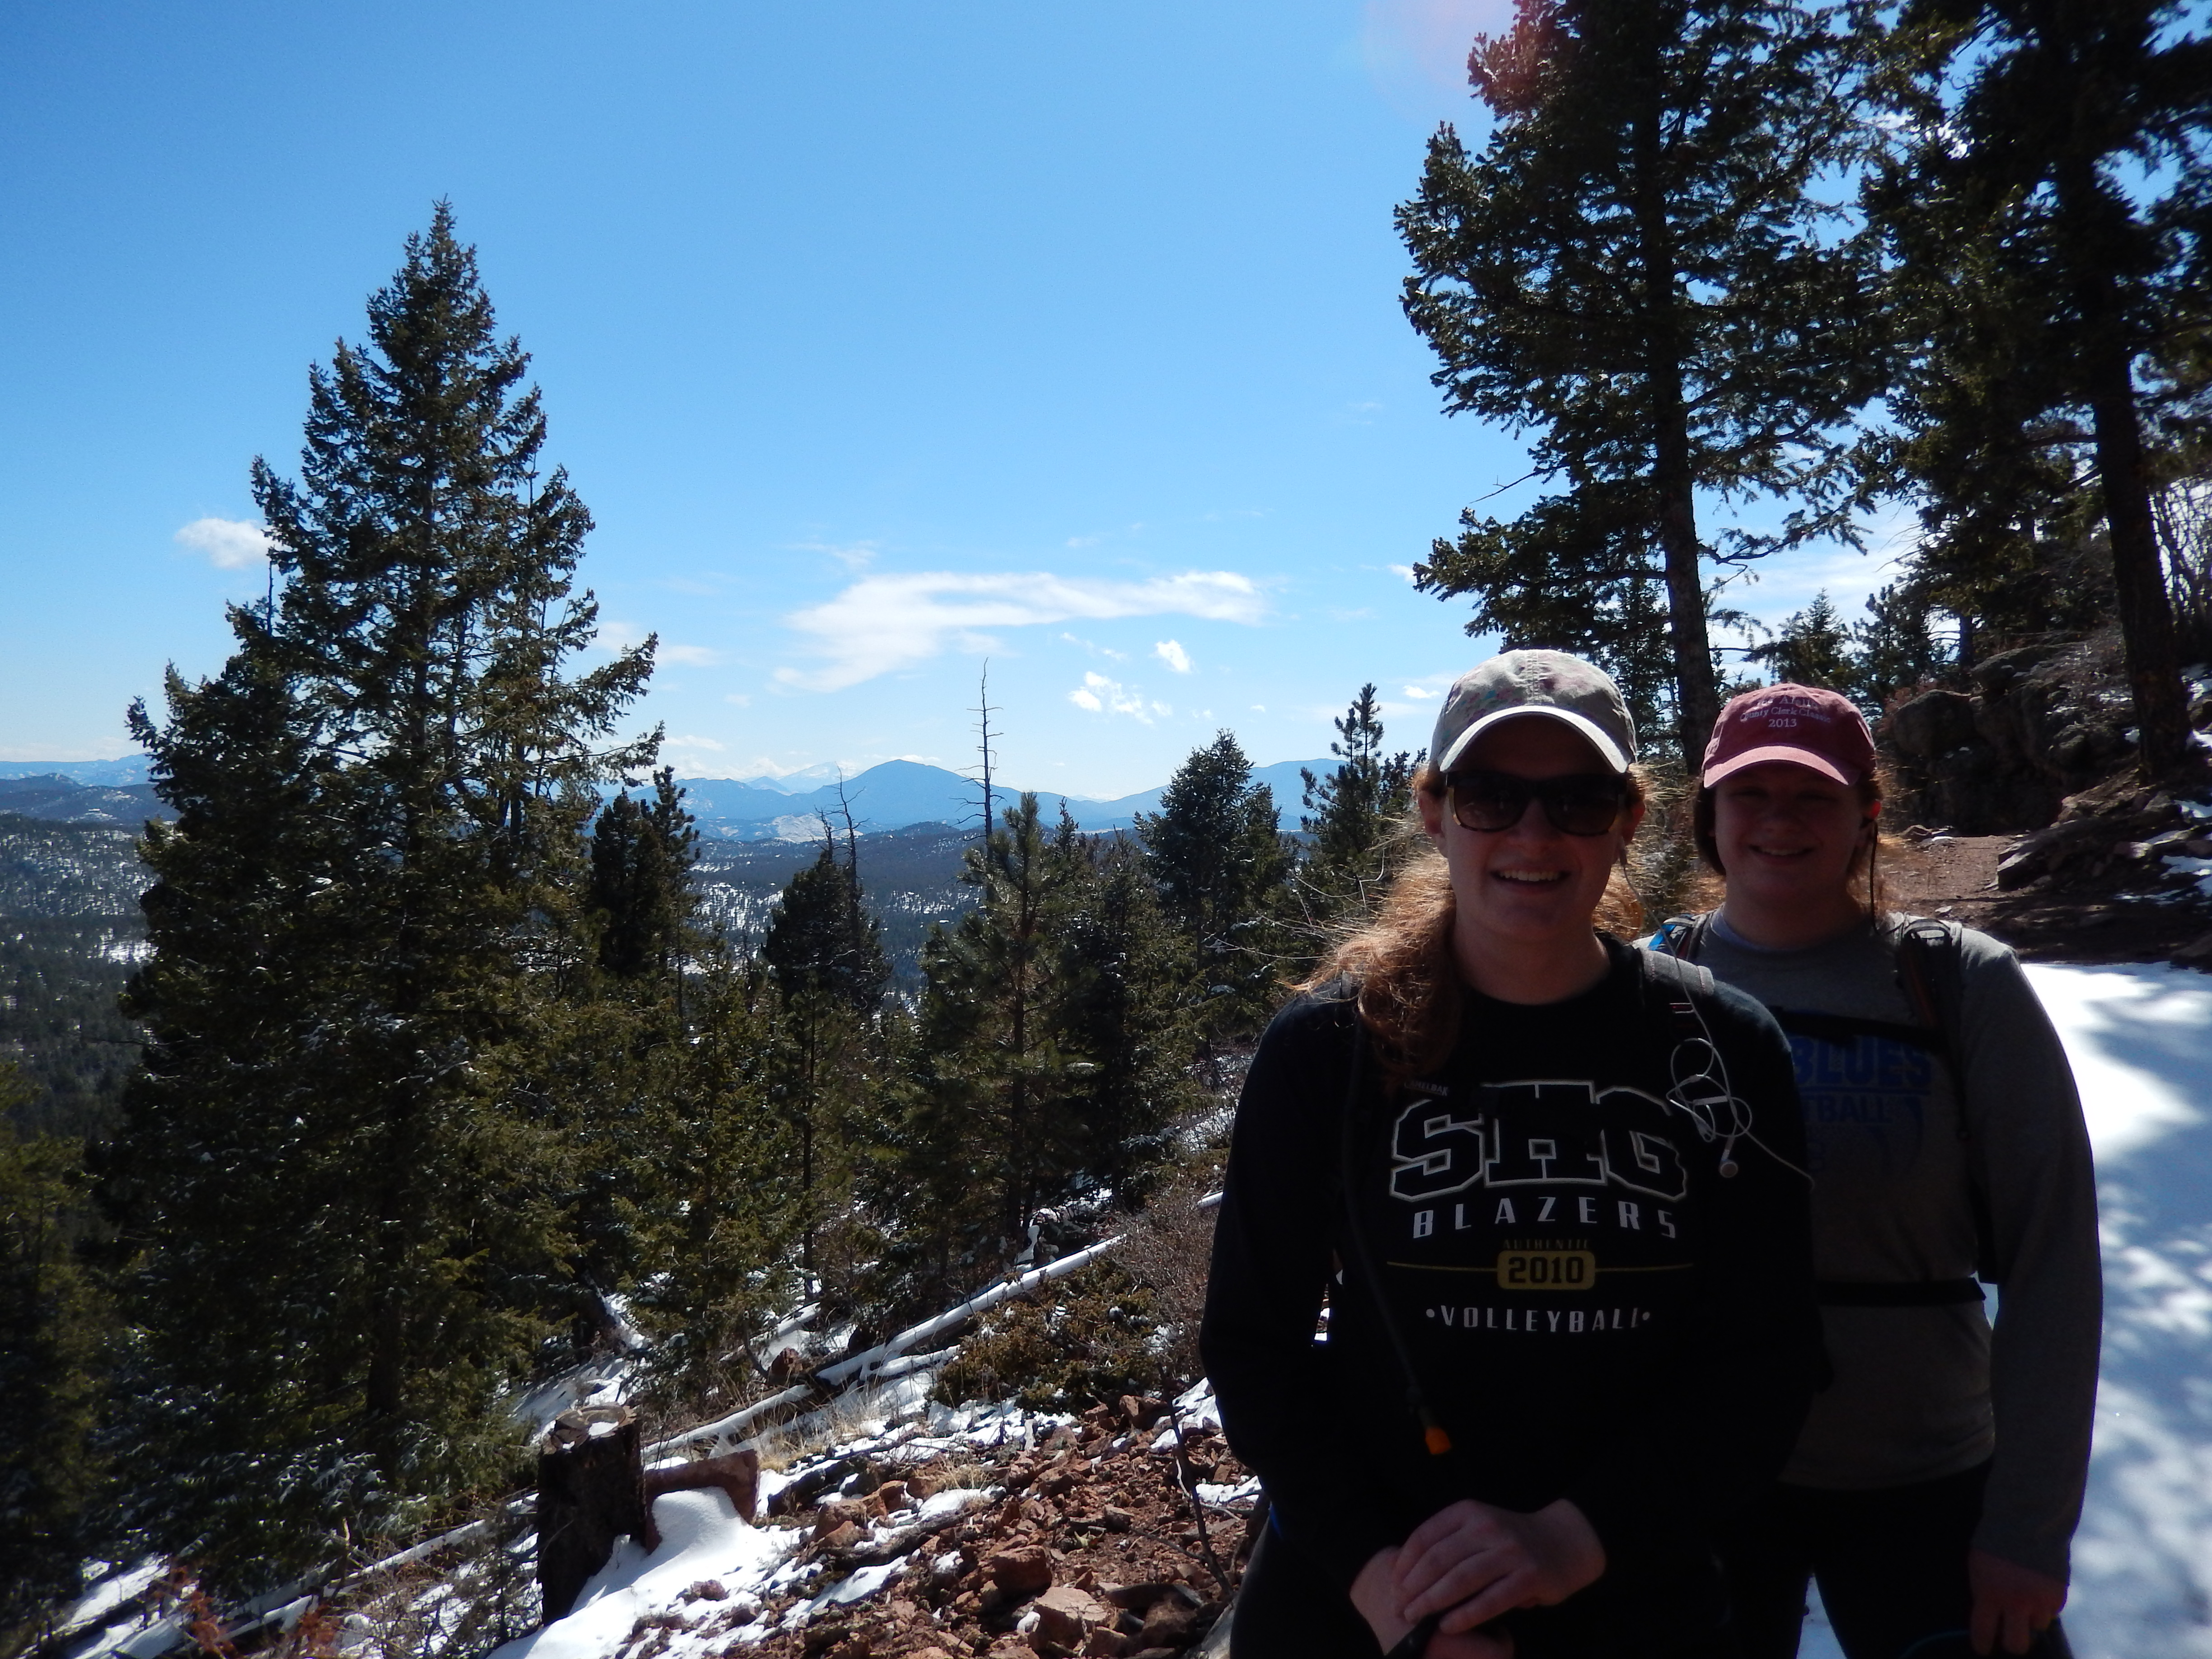
On Wednesday, we hit Staunton State Park and the weather was absolutely perfect, the views were amazing and my nieces were the perfect company. We hiked about 8 of the miles Aaron and I hiked last fall. We did the Staunton Ranch trail to Scout Line, took Marmot down and then Staunton Ranch back out. The hardest part was the little bit of snow we had to contend with, it was just enough to have slipping and sliding more than we wanted too.
The best view on Scout line – see pikes peak?
What I loved was just talking with my nieces about whatever, they are adults now and so incredibly smart it was a revelation. I found myself wanting to study again so I could keep up!
We did the length of Scout Line trail and then headed down Marmot passage to get a little loop back to Staunton Ranch trial. Overall it gave us 8-9 miles of hiking with perfect weather and amazing company.
Taking marmot passageView on the way down Marmot Passagetoo good to miss
After making them hike a lot on Wednesday, my nieces were still up for another hike on Thursday so we decided that the first hike we wanted to take them on- Evergreen Mountain– would be the one to do. It was like night and day from just 5 days before. The only downside was the snow on the path with the ice underneath that snow. Once again Lauren and Anne proved how awesome they are! It was supposed to a warm beautiful day, and while it was warm the sun stayed hidden which meant it wasn’t as warm as we had hoped it would be.
I love showing new people to this trail, when I do I usually take them to it before we hike much else only because the route up can be kind of boring after other hikes. I felt that boring aspect the most this last time with no sun and the pesky snow making us slip and slide all over the place even more than the day before. But the summit views were lovely to behold as always. I think that was the redeeming part of the hike for us all after a struggle to get up through the melting, sloppy snow… that and the drinks afterwards.
This visit overall was so nice, having my nieces here made me both miss my family terribly and want to redouble my efforts to get them all to move here to Colorado…. now I am patiently waiting until my next family visit. It needs to come faster!
I hope you are experiencing some form of spring awesomeness and if you are, get out there and hike, life is too short!!!!
Highest Elevation: Around 10,800 Ft ( total guess based on my fitbit number of stairs)
Trail Uses: Snowshoe only – Designated Terrain Park
Trail Length: 6-ish miles round trip
Degree of Difficulty: Easy(Willow) to Moderate(Engleman)
Bathrooms: Yes – At the Nordic Center and at the Grand Lodge on Peak 7
Pets: No but it seemed like season ticket holders or locals were using the trails too and had dogs
Fees: Yes $20 for a day pass for the terrain park and $18 a day for snow shoe rental
View as we crossed over by Grand Lodge at Peak 7
Our first hike with our nieces was a disappointing cancel for 2 reasons, first when we pulled into the trailhead parking lot we literally couldn’t see more than 2 feet in front of us the snow was so heavy. I have to admit I didn’t want to try the hike with the weather the way it was but my nieces were still game… they ROCK! Then when we were getting our shoes on I realized I had left mine at home in the garage, yep I forgot them sitting all nice and warm on the tool table. Needless to say we decided the weather was too bad to hike and just drove straight on to Breckenridge. It turned out to be divine intervention because as we pulled back onto I70 the weather cleared just long enough to get to Breckenridge, where I could pick up new hiking boots, before the next wave hit.
On Sunday we got up early and headed right to the terrain park so that Anne & Lauren could try out snowshoeing, this way we could see how they liked it before we attempted a sunrise hike the next morning. I had read up on the 3 Nordic Centers in and around Breckenridge and decided this one the best one to hit mostly because of all the trail options. I have read that a lot of people didn’t like that it winds around all the mansions on Shock hill but we didn’t see that much of the houses on our trip and what we did see, didn’t bother us.
Anne & Lauren all ready to go.
The people running the Nordic center might be the nicest people I have ever met, seriously they went through the trail map with me and circled all the places we might see Moose and suggested options for trail changes. Then when I explained I needed to keep the snowshoes over night to do a sunrise hike/snowshoe but would be returning them early the next day, they only charged me the overnight fee of $5 instead of an additional full day rental. They also gave us tips on dealing with the Moose… did you know that if a moose is standing and looks like it might charge you can just jump behind a tree and it loses you? And as long as there are trees between you and the moose or they are laying down you should be fine!???! This is by no means scientific so always use caution around wild animals because they are WILD, but we found it interesting.
We started out on the Willow path, which was pretty nice and easy to let you get used to the snowshoes . It winds through Shock Hill and the Alpine wet lands behind the Nordic Center. We went under the Gondola going to Peak 8 and then popped out of the trees just north of the Grand Lodge on peak 7. I stay at the Grand Lodge as much as I can so I knew right where the public restrooms were, we took off our snowshoes and took advantage of those restrooms. Up to this point the trail was pretty easy and VERY well-marked, the terrain park did a great job in putting trail markers every where to ensure their guests could find their way around.
Crossing over the first cross-country skiing path.
Turning onto Engleman from willow Red markers to Yellow Markershow Engleman was feeling in the beginning
Once we crossed over by the Grand Lodge, the trail got a little harder but it was also almost completely empty. The best part was when the sun came out bright and strong making the day perfect!
By the Grand Lodge on Peak 7Very well-markedTrail Conditions on EnglemanThe trail marker for the last mile to the Hallelujah hut
We climbed the most at this point, through the pines and up along peaks 7 & 6 but outside of the skiing area. As we came to a nice large open area the views were amazing and across the area we could see our turnaround point, Hallelujah Hut. It was a welcome sight as we were all getting a little tired. I am starting to learn that snowshoeing requires a little more stamina than hiking does, so each time I am surprised that I am so wiped after what I consider short distances. We had a snack at the Hut and then made a quick return trip to the Nordic center.
Start of the last stretchHallelujah Hut
While on the return, I overshot the trail turn back but we were thrilled with my mistake because it led us right to the some Moose just chillin on one of the cross-country ski routes. They had told us the Moose were all over the park that day but we had given up hope we might actually see some. It was the perfect way to end the snowshoe!
MooseUs and Moose
I loved the Terrain Park at the Nordic Center, in fact I plan on going there again as soon as we can. It is a really good way to get used to snowshoes, the trails are well marked and goes through amazing scenery. We had a lot of fun on our snowshoe, I think maybe we took on a little more than we should have as we were all wiped at the end of almost 5 hours of snowshoeing. But we laughed a lot and got to see moose! After the directions will be some of our favorite pictures.
Directions: From Breckenridge Main Street take Ski Hill/Lincoln West up Ski Hill for almost a mile, the NOrdic Center will be on you Left at 1200 Ski Hill Road. Go Past the first Nordic Center sign for the actual parking lot. entrance.
More ViewsAaron said get crazy I heard Get Cozy…. much laughter and confusion followedAction shot
On Tuesday when I came home to the huge box with our snowshoes, I kinda wanted to go out right then and to try them out. Unfortunately there is no real snow here on the Front Range so I had to wait until the weekend to get my fix in.
The view South at the top
I had hiked Butler Gulch( Hike Details here) in September of 2012 and had read that it was actually a more popular snowshoe than hiking trail. This is the trail I knew I wanted to do as our first solo snowshoe. It was one we had done before, the nature of the bowl we were hiking into made it safer from avalanche danger than most and it meant we could hit Tommyknockers on the way home.
When we pulled up to the parking lot, we were impressed with how many cars were already there and more were pulling in constantly. Fortunately it was not all for Butler Gulch, but also for Jones Pass which is open to motorized vehicles(Butler Gulch is not), lots of snow mobiles were over that way.
Parking Lot
We put on our snowshoes at the car and started up the road to the trail head, I don’t think we needed to do this as the trail was pretty stable and our boots would have been fine. It was so cool walking over the gate to the trail, knowing it meant we were on 4 feet of snow, but again, I think we could have walked this all in our boots it was packed so hard.
Standing on the gateThe Gate in Summer….
We moved out at a nice pace and then as we climbed in elevation we definitely slowed down, I guess it had been longer than I thought since we were last at 10,000+feet. Despite the struggle with the altitude I was so happy to be out there. The weather was pretty good, just a little snow falling and occasionally we would hear big wind up above.
It took us longer than we expected to go just 2 ish miles, around 2 – 2.5 hours, and I think it took this long for 2 reasons. First, the altitude kicked my butt the whole way up while I practically flew down the gulch in the return trip. Second, it was just interesting to get used to the snow shoes, we got mountaineering ones and went with men 30’s . They are bigger and heavier than what we used 2 weeks before, but it was right for our weight combined with our backpacks. It was like walking with those ankle weights on but we did float better.
The path itself wasn’t too steep until it was crazy steep, the last climb up was very challenging so when I fell heading up, I wasn’t sure how I was going to get up and it took me a couple of minutes to sort of wiggling around to get to a standing position. Conversely when I fell coming down at the same point… I couldn’t get up so I just scooted on my butt down to the tree line.
Getting SteepJust a peek as we catch our breath
It flattened out above that steep section and we could see the whole bowl in front of us with all the mountains north of us, it was beautiful! I am so glad we stopped here to capture it because not 5 minutes after we snapped a few pictures the wind picked up in a wicked way and didn’t stop. This is the challenge of being at 11,000ft, when the weather changes it is dramatic. I got a few pictures of the snow blowing like crazy and then we hightailed it out of there. The wind was coming hard enough that our path up was already being covered.
the way we planned on continuingView Before it changedChangingChangingChanged
The trip down took maybe an hour and let me tell you the traffic going up was heavy, I think we easily passed a 100 people or more heading up. Most were going up to do some back country skiing, with a couple of groups of snowshoers as well. We passed one couple that had done almost the whole thing in just their micro spikes, they were so friendly, they had snowshoes attached to their packs and were holding out til the last-minute to put them on. It was interesting to see that we could have done the same trail in our micro spikes without postholing… next time. I think the only hard part is knowing when to switch it up. I am not sure where the right spot to put on the snowshoes is at. I think I did know where it wasn’t …. I am sure once I get more comfortable I will be able to figure out when I need to switch.
Moving down fast
The day itself was pretty amazing, I never imagined I would be able to climb up to 11,000+ft this time of year and the snowshoes made it so easy! I was surprised by the level of traffic on the trail but it is pretty close to Winter Park and likely a good break for skiers on a crowded Saturday.
I hope if you find yourself out this way, that you get a chance to check this one out!
Just as an FYI… I will not be posting for a bit, my nieces are coming out for spring break at the end of the week and we have a crazy schedule set up. We are hiking, snowshoeing, seeing the ice castle in Breckenridge, doing a sunrise hike( their request) and lots of shopping and laughing. I think my evil plan to make them love Colorado enough to want to live here is working! I will catch up as soon as I can!